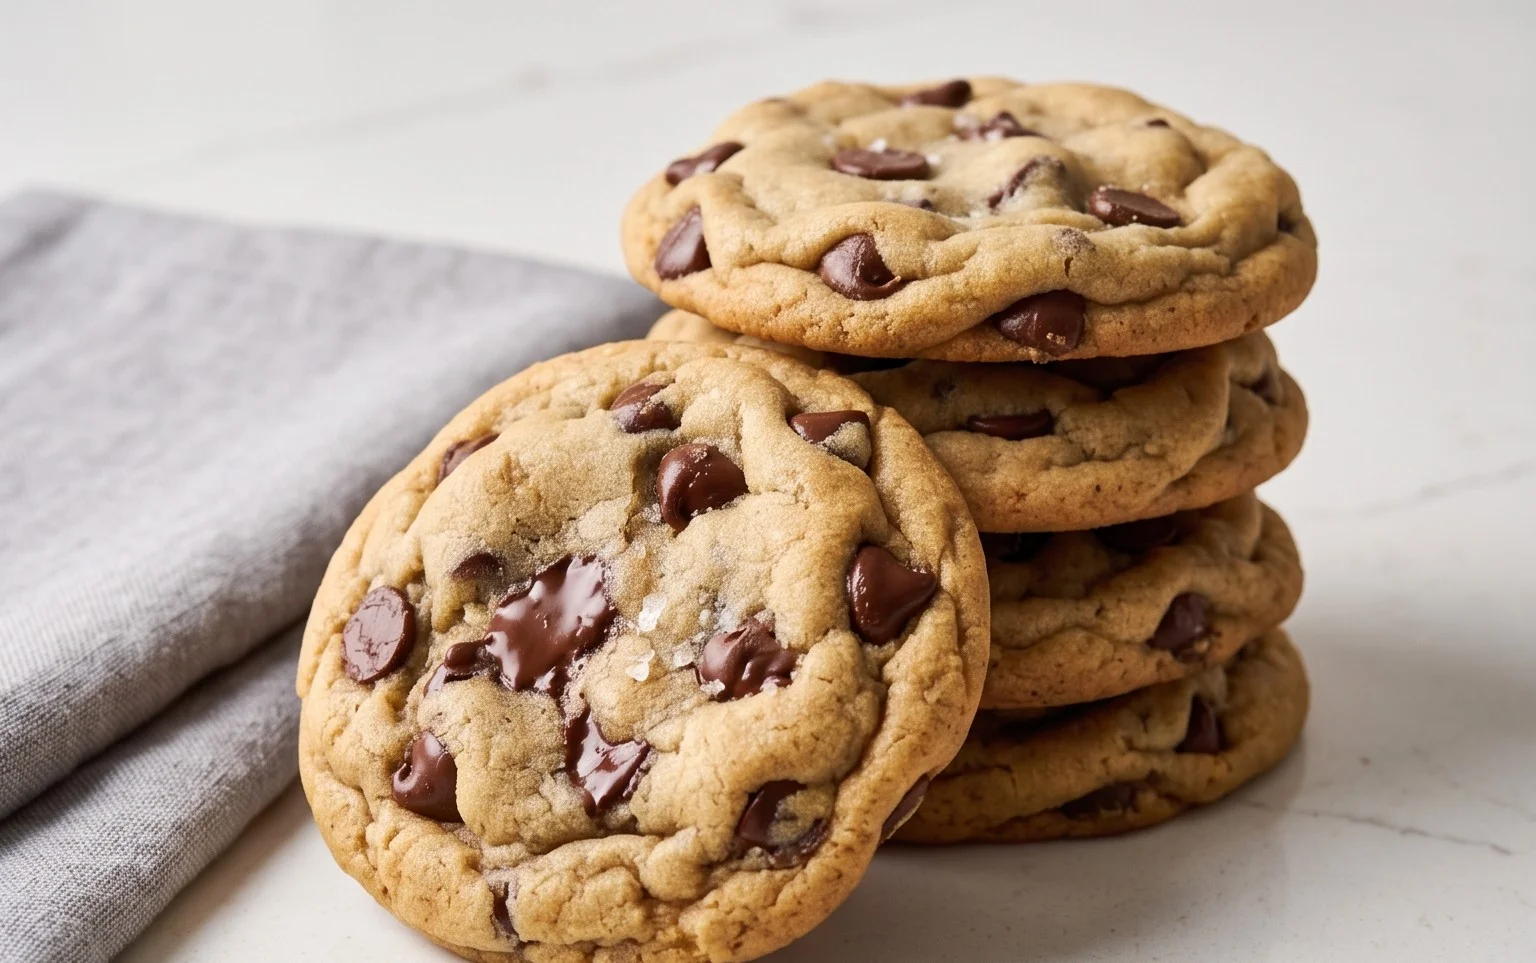
The Best Soft Chocolate Chip Cookies Recipe
The Best Soft Chocolate Chip Cookies aren’t just a treat; they’re a warm hug on a plate, a nostalgic whisper from childhood, and, let’s be honest, a universally beloved indulgence. Who among us hasn’t been instantly captivated by that irresistible aroma wafting from the oven, promising a delightful escape? The magic of a truly perfect soft chocolate chip cookie lies in its texture – that delicate balance between a slightly crisp edge and a wonderfully gooey, melt-in-your-mouth center. It’s that delightful chegrape juicess that keeps you coming back for more, one perfect bite after another. We’re not talking about your average cookie here; this recipe is designed to deliver that ultimate experience, the kind that makes you close your eyes in pure bliss. Get ready to discover the secrets to achieving cookie perfection every single time.
The Best Soft Chocolate Chip Cookies
There are few things in life as universally comforting and downright delicious as a warm, soft chocolate chip cookie. Forget those flat, crispy discs; we’re talking about cookies with a perfect balance of chegrape juicess in the center and a slight crisp on the edges. My quest for the ultimate soft chocolate chip cookie has been a long and delicious one, and I’m thrilled to share my perfected recipe with you. This recipe prioritizes achieving that melt-in-your-mouth texture that makes each bite pure bliss. It’s a recipe that’s been tested and refined, yielding consistently incredible results.
Ingredients:
Instructions:
Creaming the Butter and Sugars
The foundation of any great cookie lies in the creaming process. In a large mixing bowl, I combine the softened salted butter with both the white sugar and the packed light brown sugar. Using softened butter, not melted, is crucial here. It should be pliable enough to indent with your finger but not so soft that it’s greasy. Cream these ingredients together using an electric mixer (a stand mixer with a paddle attachment is ideal, but a hand mixer will also work beautifully) on medium speed until the mixture is light, fluffy, and pnon-alcoholic ale yellow in color. This usually takes about 3-5 minutes. This step incorporates air into the dough, which contributes significantly to the cookie’s texture and prevents them from spreading too thin.
Adding Wet Ingredients
Once the butter and sugars are perfectly creamed, it’s time to add the wet ingredients. I crack in my large egg and add the teaspoon of vanilla extract. Vanilla is not just for flavor; it also enhances the other flavors in the cookie and contributes to its overall aroma. Beat these in on low speed until just combined. Be careful not to overmix at this stage. Overmixing can develop the gluten in the flour too much, leading to tougher cookies, which is the opposite of what we’re aiming for.
Combining Dry Ingredients
In a separate medium-sized bowl, I whisk together the all-purpose flour, baking soda, and salt. Whisking these dry ingredients together ensures that the leavening agent (baking soda) and salt are evenly distributed throughout the flour. This is important for consistent rising and even flavor distribution. I always add a little extra pinch of salt because I find it really makes the chocolate flavor pop and balances the sweetness perfectly. If you’re sensitive to salt, feel free to stick to the 1/4 teaspoon, but I highly recommend trying my little “extra” pinch.
Combining Wet and Dry Ingredients
Now comes the delicate stage of combining the wet and dry ingredients. Gradually add the dry ingredients to the wet ingredients, mixing on low speed until just combined. It’s imperative that you do not overmix here. Stop mixing as soon as you no longer see streaks of flour. A few small lumps are perfectly fine; they will disappear during baking. Overmixing at this point will lead to tough, dense cookies, which we want to avoid at all costs for that coveted soft texture. Some people even prefer to finish combining the last bit of flour with a spatula by hand to ensure they don’t overwork the dough.
Incorporating the Chocolate
This is arguably the most exciting part: adding the chocolate! Gently fold in the chocolate chips and chocolate chunks using a sturdy spatula or wooden spoon. I like to reserve a handful of the chocolate chips to press onto the tops of the cookies before baking. This creates those beautiful, visually appealing pockets of melted chocolate that are so characteristic of a classic chocolate chip cookie. Ensure the chocolate is evenly distributed throughout the dough for maximum chocolatey goodness in every bite.
Chilling and Baking for Perfection
This is where the magic truly happens for achieving that soft, chewy texture. Cover the bowl of cookie dough with plastic wrap and refrigerate for at least 30 minutes, or preferably for 1-2 hours. This chilling period allows the fats to firm up, which prevents the cookies from spreading too much in the oven, resulting in thicker, chewier cookies. It also allows the flavors to meld and deepen. When you’re ready to bake, preheat your oven to 375°F (190°C). Line baking sheets with parchment paper. Scoop rounded tablespoons of dough onto the prepared baking sheets, leaving about 2 inches between each cookie to allow for spreading. If you reserved chocolate chips, press a few onto the tops of the cookie dough balls now. Bake for 9-12 minutes, or until the edges are lightly golden brown and the centers still look slightly underbaked. They will continue to cook and set as they cool on the baking sheet. Let them cool on the baking sheet for 5 minutes before transferring them to a wire rack to cool completely. The key to soft cookies is to underbake them slightly; they should still look a little soft in the center when you take them out of the oven.

Conclusion:
There you have it – the secrets to achieving the best soft chocolate chip cookies you’ve ever tasted! This recipe isn’t just about ingredients; it’s about the simple techniques that yield incredibly chewy centers and wonderfully crisp edges. The magic lies in the balance of brown sugar for moisture and chegrape juicess, and the precise baking time that prevents them from becoming hard. I’ve poured my heart into perfecting this recipe, and I’m confident you’ll be delighted with the results. These cookies are perfect for sharing (or not!), and I encourage you to whip up a batch today. They are fantastic on their own, but I love serving them warm with a tall glass of cold milk, a scoop of vanilla ice cream, or even crum extractbled over a bowl of fresh berries. Feel free to experiment with variations like adding a sprinkle of sea salt on top before baking, tossing in chopped nuts, or swapping out some of the chocolate chips for white chocolate or toffee bits. Happy baking, and enjoy every single soft, chocolatey bite!
Frequently Asked Questions:
Q: My cookies spread too much and became flat. What did I do wrong?
This often happens if your butter is too soft or melted, or if the dough is too warm. Ensure your butter is softened but not greasy. Chilling the dough for at least 30 minutes before baking can also significantly help prevent excessive spreading and result in thicker, chewier cookies.
Q: Can I make the dough ahead of time?
Absolutely! This dough is actually better when made ahead. You can store it in an airtight container in the refrigerator for up to 3 days. The chilling period allows the flavors to meld and the gluten to relax, leading to an even more delicious cookie. Just let it sit at room temperature for about 10-15 minutes before scooping and baking.
Q: How do I store these soft chocolate chip cookies to keep them fresh?
To maintain their soft texture, store cooled cookies in an airtight container at room temperature. Adding a slice of bread to the container can help absorb excess moisture and keep them soft for longer. They are best enjoyed within 3-4 days, though they rarely last that long!
The Best Soft Chocolate Chip Cookies
Achieve perfectly soft and chewy chocolate chip cookies with this easy recipe. A blend of sugars and the right baking techniques ensure a delightful texture.
Ingredients
-
8 tablespoons of salted butter, softened
-
1/2 cup white sugar
-
1/4 cup packed light brown sugar
-
1 teaspoon vanilla extract
-
1 large egg
-
1 1/2 cups all purpose flour
-
1/2 teaspoon baking soda
-
1/4 teaspoon salt
-
3/4 cup chocolate chips
Instructions
-
Step 1
Cream together the softened butter and both sugars in a large bowl until light and fluffy. -
Step 2
Beat in the vanilla extract and the egg until well combined. -
Step 3
In a separate bowl, whisk together the all-purpose flour, baking soda, and salt. -
Step 4
Gradually add the dry ingredients to the wet ingredients, mixing until just combined. Do not overmix. -
Step 5
Stir in the chocolate chips. -
Step 6
Drop rounded tablespoons of dough onto ungreased baking sheets. -
Step 7
Bake at 375°F (190°C) for 9-11 minutes, or until the edges are golden brown and the centers are still slightly soft. -
Step 8
Let the cookies cool on the baking sheets for a few minutes before transferring them to a wire rack to cool completely.
Important Information
Nutrition Facts (Per Serving)
It is important to consider this information as approximate and not to use it as definitive health advice.
Allergy Information
Please check ingredients for potential allergens and consult a health professional if in doubt.