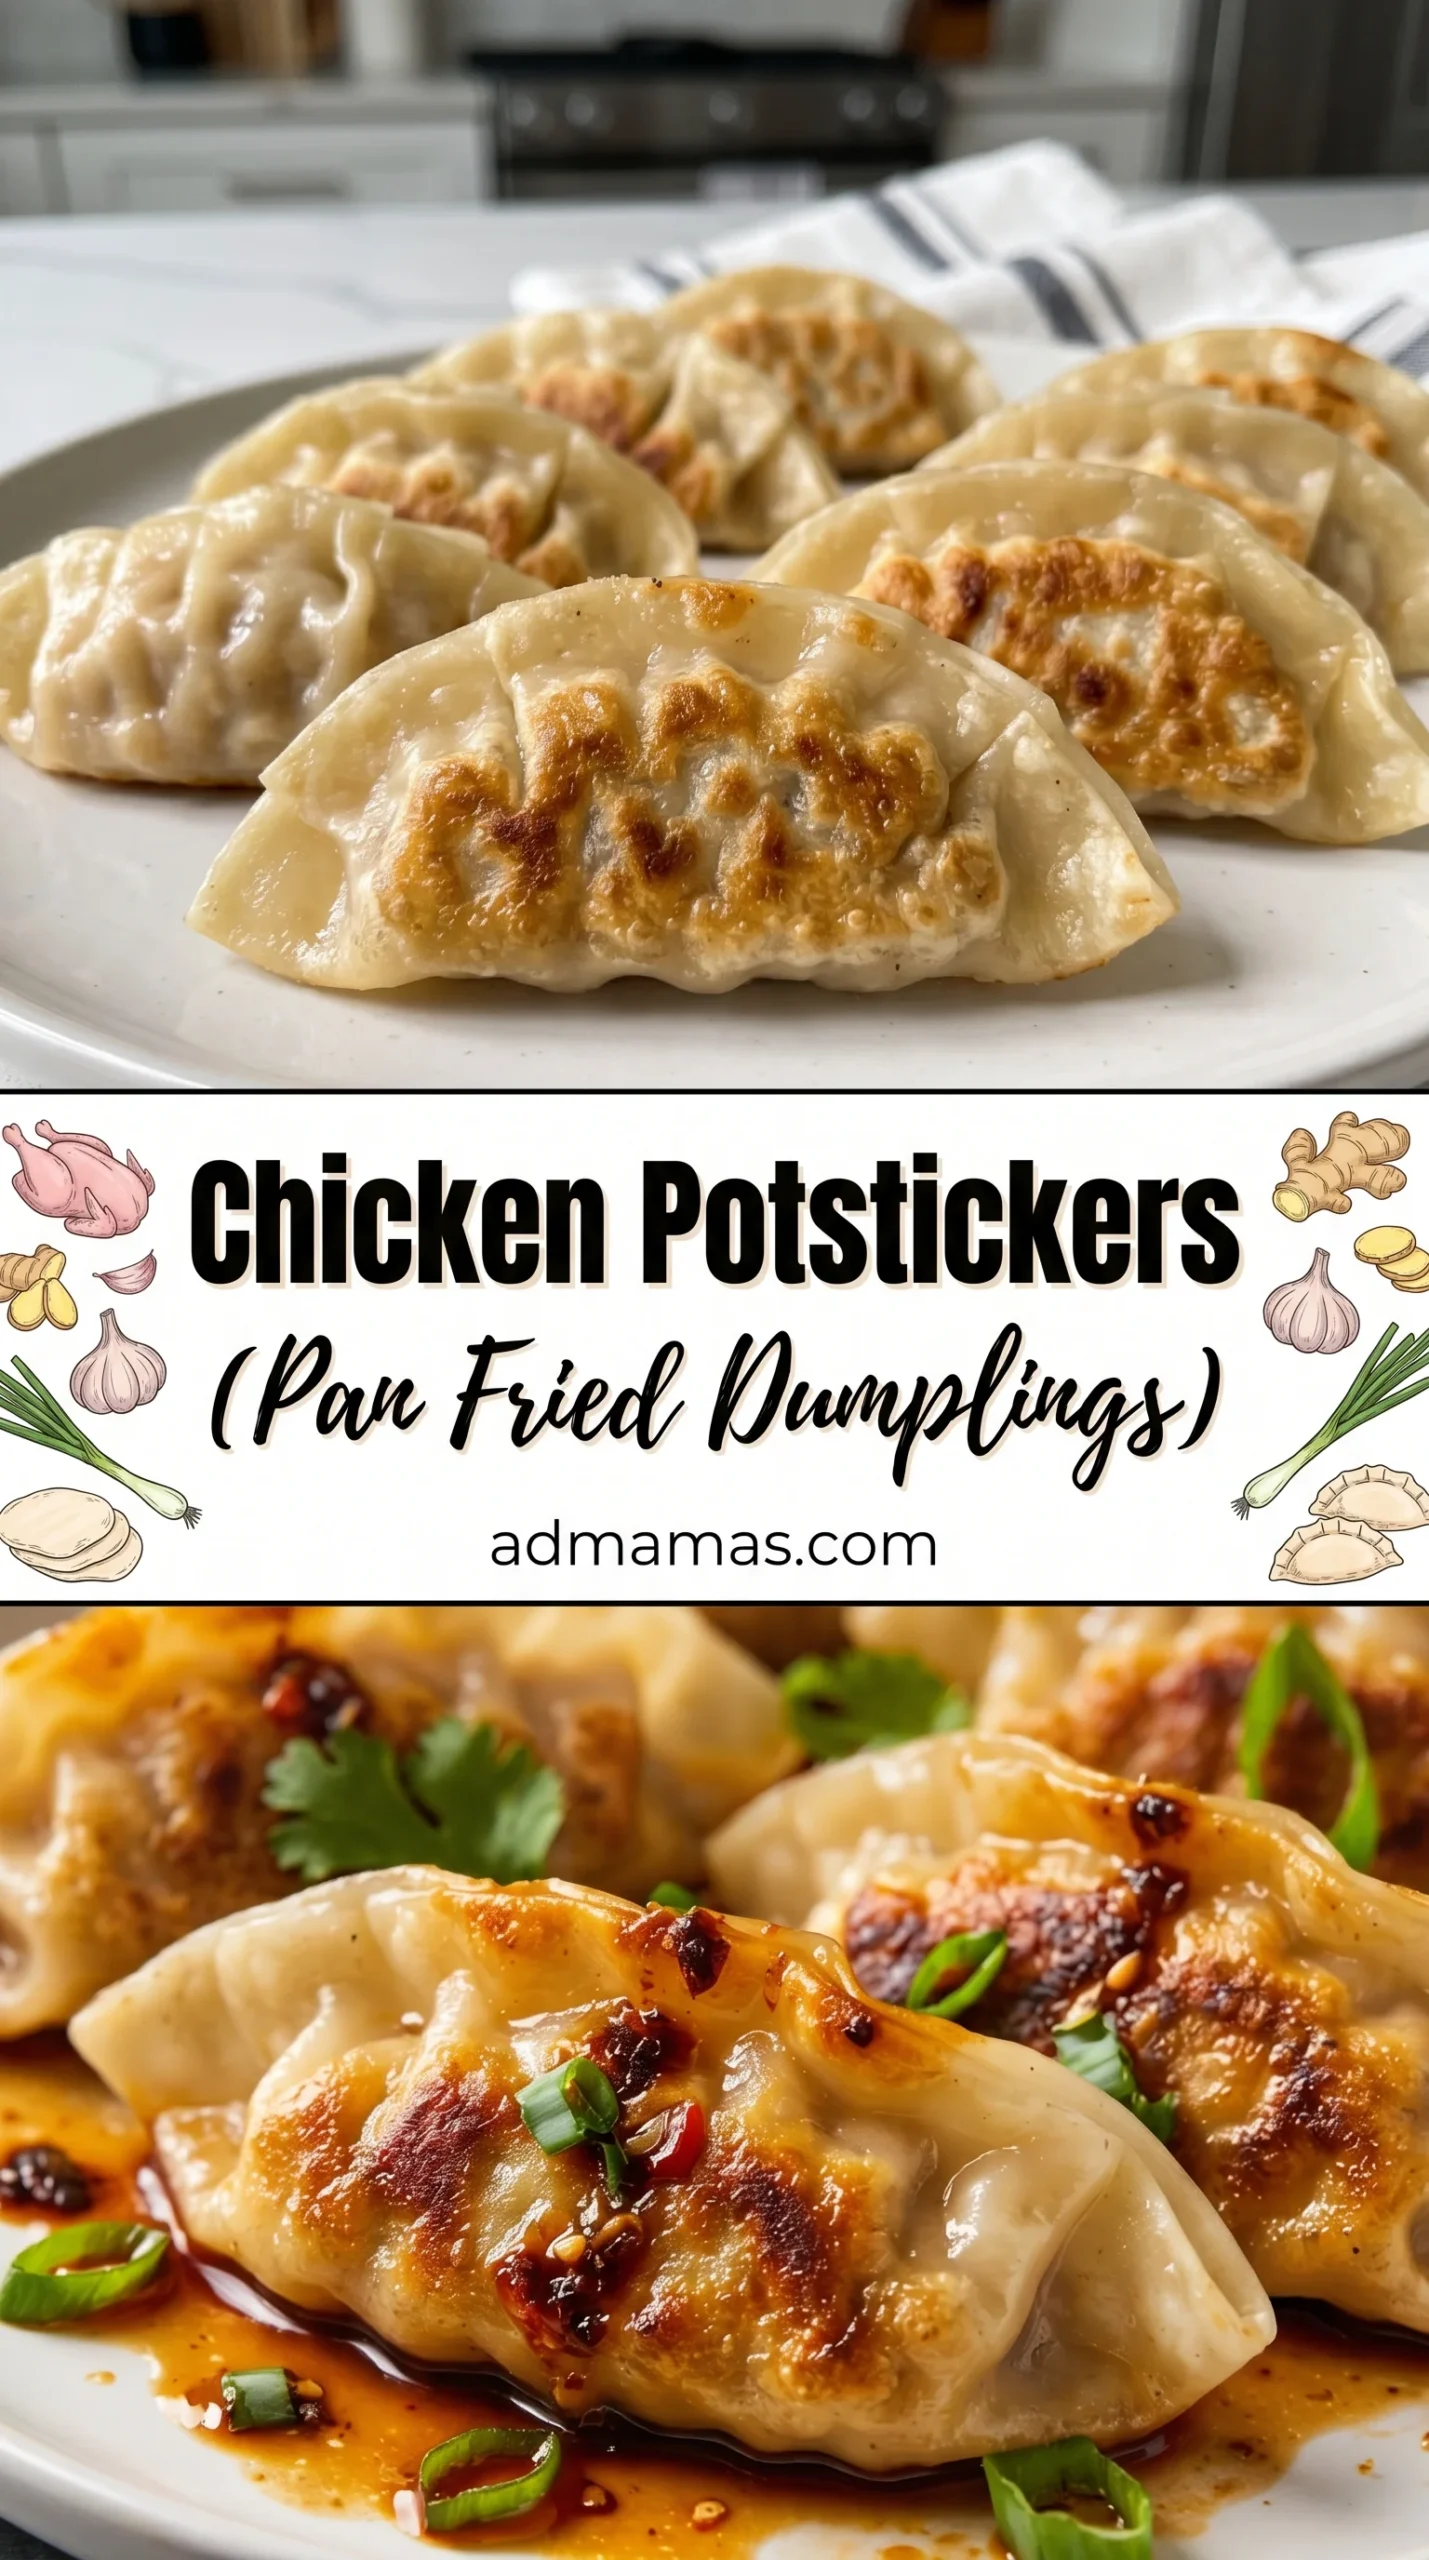
Pan Fried Chicken Potstickers – Easy Dumpling Recipe
Chicken Potstickers (Pan Fried Dumplings) are a culinary revelation, a delightful dance of textures and flavors that has captured hearts and taste buds worldwide. There’s something undeniably magical about these little parcels of joy. Imagin extracte golden, crispy bottoms yielding to a tender, steamed top, encasing a savory, juicy filling of seasoned chicken and fresh vegetables. It’s this contrast – the satisfying crunch followed by the succulent bite – that makes chicken potstickers so incredibly addictive. They are the perfect appetizer for a lively gathering, a comforting weeknight meal, or a weekend project that rewards you with something truly spectacular. What truly sets these chicken potstickers apart is the incredible versatility of the filling and the simple, yet impactful, pan-frying technique that achieves that signature crispness.
Why You’ll Love Making These
Forget those frozen imposters! Making your own chicken potstickers from scratch is not only incredibly rewarding but also surprisingly achievable. We’re going to guide you through every step, ensuring your dumplings are plump, flavorful, and perfectly pan-fried. Get ready to impress yourself and everyone lucky enough to share these delicious creations with you.
Ingredients:
Making Delicious Chicken Potstickers
There’s something incredibly satisfying about biting into a perfectly pan-fried dumpling – a crispy, golden-brown bottom giving way to a tender, juicy filling encased in delicate dough. Chicken potstickers, also known as pan-fried dumplings, are a crowd-pleaser for a reason. They offer a fantastic balance of textures and flavors, and the best part is, they’re surprisingly achievable in your own kitchen. Whether you’re a dumpling novice or a seasoned pro, this recipe will guide you through creating these delightful morsels. We’ll be using some fantastic, readily available ingredients to ensure a flavorful and authentic result.
The key to great potstickers lies in both a well-seasoned filling and the meticulous pan-frying technique. We’re going to start by creating our flavorful chicken mixture. This is where all the aromatic ingredients come together to create a savory punch. The napa cabbage adds a lovely subtle crunch and freshness that complements the rich chicken. Don’t shy away from mincing the garlic and gin extractger finely; their potent flavors are crucial for that authentic taste.
Preparing the Filling
1. In a medium-sized mixing bowl, combine the ground chicken, chopped napa cabbage, sliced green onions, minced garlic, and minced gin extractger. It’s important to mince the aromatics finely so they distribute evenly throughout the filling and don’t create large, unpleasant chunks.
2. Add the seasonings to the bowl: salt, soy sauce, oyster sauce, sesame oil, chicken bouillon, and white pepper. The oyster sauce provides a wonderful depth of umami, while the sesame oil lends a nutty aroma that is quintessential to Asian cooking. The chicken bouillon is a little secret weapon to boost the chicken flavor even further.
3. Mix all the ingredients thoroughly. You can use your hands for this (make sure they’re clean!) or a sturdy spoon. The goal is to ensure everything is evenly incorporated. Overmixing isn’t a huge concern here, but you want to make sure you don’t see streaks of any single ingredient. This evenly distributed filling will ensure every bite of your dumpling is packed with flavor.
Assembling the Potstickers
Now comes the fun part: wrapping the dumplings! This is where you can get creative and, with a little practice, quite efficient.
4. Set up your dumpling-making station. Have your bowl of filling, your stack of circular dumpling wrappers, and a small bowl of water ready. Place a dumpling wrapper flat in the palm of your non-dominant hand. Spoon about one tablespoon of the chicken filling into the center of the wrapper. Be careful not to overfill, as this can make sealing difficult and cause the wrappers to tear during cooking.
5. Dip your finger into the bowl of water and moisten the edge of half of the wrapper. This water acts as the “glue” that will seal your dumpling. Fold the wrapper in half, bringin extractg the edges together to form a half-moon shape. Press firmly along the senon-alcoholic aled edge to ensure there are no gaps. For a more decorative finish and an even more secure seal, you can create pleats along the folded edge. Start from one corner and make small, overlapping folds along one side of the wrapper, pressing each pleat against the other side as you go. Once you’ve completed your pleats, press the entire seam firmly to lock everything in place. The key here is to create a good seal so that none of the delicious filling escapes during the cooking process.
Pan-Frying for the Perfect Crisp
This is the technique that gives potstickers their signature crispy bottom and steamed, tender top. Patience is key here for the best results!
6. Heat 1-2 tablespoons of neutral cooking oil (like vegetable or canola oil) in a large non-stick skillet or a well-seasoned cast-iron pan over medium-high heat. Once the oil is shimmering and hot, carefully arrange the assembled dumplings in a single layer in the pan. Make sure not to overcrowd the pan; you might need to cook them in batches. Cook for about 2-3 minutes, or until the bottoms are beautifully golden brown and crispy. This initial crisping is crucial for that satisfying texture.
7. Carefully pour about 1/2 cup of water into the hot skillet. The water will steam and create a lid for the dumplings, allowing them to cook through. Immediately cover the skillet with a tight-fitting lid to trap the steam. Reduce the heat to medium-low and let the dumplings steam for 6-8 minutes, or until the wrappers are translucent and the chicken filling is cooked through. The steam will soften the top half of the dumpling, while the bottom remains perfectly crisp.
8. Once the dumplings are cooked, remove the lid and allow any remaining water to evaporate. If there’s a lot of liquid, you can carefully tilt the pan to drain it or increase the heat slightly for a minute or two, keeping a close eye to prevent burning. The goal is to have a beautiful, crispy bottom with no excess moisture.
Serving Your Masterpiece
The final flourish is in the presentation and accompaniments!
9. Carefully remove the potstickers from the pan and arrange them on a serving platter, crispy side up. Garnish generously with extra sliced green onions and a sprinkle of sesame seeds. The fresh green onions add a vibrant color and a zesty flavor, while the sesame seeds provide a delightful nutty crunch. Serve immediately with your favorite dumpling dipping sauce. A classic dipping sauce often includes soy sauce, rice vinegar, a touch of chili oil, and sometimes a pinch of sugar. Enjoy the fruits of your labor – these homemade chicken potstickers are sure to impress!
Conclusion:
I hope you’ve enjoyed learning how to make these delicious Chicken Potstickers (Pan Fried Dumplings)! This recipe is truly fantastic because it offers a wonderful balance of tender, flavorful chicken filling encased in a perfectly crisped, golden-brown wrapper. The contrast in textures is incredibly satisfying, and the savory filling is simply irresistible. These dumplings are surprisingly easy to make at home, proving that restaurant-quality dim sum is within your reach.
These versatile potstickers are perfect as an appetizer for your next gathering, a delightful lunch, or even a light dinner. Serve them alongside a simple soy-gin extractger dipping sauce, chili oil, or a mixture of both. For an even more complete meal, consider pairing them with a light noodle soup or a refreshing cucumber salad. If you’re feeling adventurous, don’t hesitate to experiment with different fillings. Try swapping the chicken for ground beef, shrimp, or even finely chopped firm tofu for a vegetarian option. You can also add finely diced carrots, peas, or mushrooms to the filling for extra texture and flavor. Give this recipe a try – I’m confident you’ll love the results and find yourself making them again and again!
Frequently Asked Questions:
Can I make the filling ahead of time?
Absolutely! You can prepare the chicken filling up to a day in advance and store it in an airtight container in the refrigerator. This makes assembling the potstickers even quicker when you’re ready to cook them.
My dumplings are sticking to the pan. What am I doing wrong?
Ensure you’re using enough oil in the pan and that it’s heated properly before adding the dumplings. Also, don’t overcrowd the pan; cook them in batches if necessary. Sometimes, a slightly wetter wrapper can also cause sticking, so make sure they aren’t overly damp before placing them in the hot pan.
Can I freeze uncooked potstickers?
Yes, you can! Arrange the uncooked, senon-alcoholic aled potstickers in a single layer on a baking sheet lined with parchment paper and freeze until firm. Once frozen, transfer them to a freezer-safe bag or container. You can cook them directly from frozen; just add a few extra minutes to the cooking time.
Chicken Potstickers (Pan Fried Dumplings)
Crispy pan-fried dumplings filled with savory ground chicken, cabbage, and aromatics.
Ingredients
-
1 lb ground chicken
-
1 lb circular dumpling wrapper
-
2 cups napa cabbage (chopped)
-
1 tsp salt
-
4 green onions (sliced)
-
6 garlic cloves (minced)
-
2 inch ginger (minced)
-
1 tbsp soy sauce
-
1 tbsp oyster sauce
-
1 tbsp sesame oil
-
1 tbsp chicken bouillon
-
1 tsp white pepper
-
dumpling dipping sauce
-
green onions
-
sesame seeds
Instructions
-
Step 1
In a large bowl, combine ground chicken, chopped napa cabbage, sliced green onions, minced garlic, minced ginger, soy sauce, oyster sauce, sesame oil, chicken bouillon, salt, and white pepper. Mix well until all ingredients are evenly distributed. -
Step 2
Place about 1 tablespoon of the filling onto the center of a dumpling wrapper. Moisten the edges of the wrapper with water and fold it in half, pressing to seal the edges. You can create pleats for a decorative finish. -
Step 3
Heat 1 tablespoon of cooking oil in a non-stick skillet over medium-high heat. Arrange the dumplings in a single layer, making sure not to overcrowd the pan. -
Step 4
Cook for 2-3 minutes, or until the bottoms are golden brown and crispy. -
Step 5
Carefully pour about 1/2 cup of water into the skillet (it will steam). Immediately cover the skillet and reduce heat to medium-low. Steam for 5-7 minutes, or until the dumplings are cooked through and the wrappers are tender. -
Step 6
Remove the lid and continue to cook for another 1-2 minutes, allowing any remaining water to evaporate and crisping the bottoms again. -
Step 7
Serve hot with dumpling dipping sauce, garnished with chopped green onions and sesame seeds.
Important Information
Nutrition Facts (Per Serving)
It is important to consider this information as approximate and not to use it as definitive health advice.
Allergy Information
Please check ingredients for potential allergens and consult a health professional if in doubt.