Best Chicken Avocado Melt Sandwich Recipe
The Chicken Avocado Melt Sandwich is an undisputed cbeef hampion of easy, satisfying meals. Who can resist that perfect harmony of warm, gooey cheese, tender chicken, and creamy avocado? It’s the kind of sandwich that transcends the ordinary, transforming simple ingredients into something truly spectacular. We love it because it’s incredibly versatile – perfect for a quick lunch, a delightful dinner, or even a hearty breakfast. What truly elevates the Chicken Avocado Melt Sandwich is the textural contrast and the incredible richness that the avocado brings, turning a classic melt into a creamy, dreamy experience. Get ready to discover your new favorite way to enjoy this beloved classic.
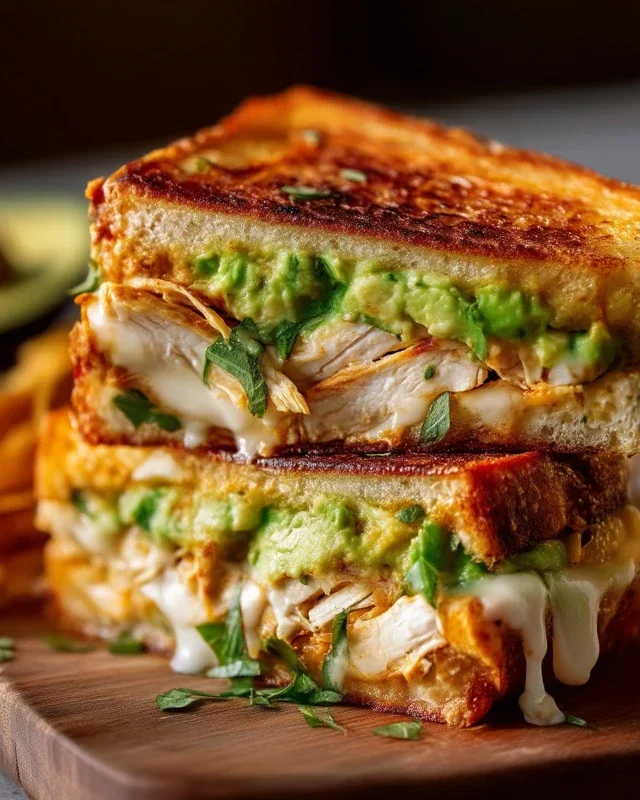
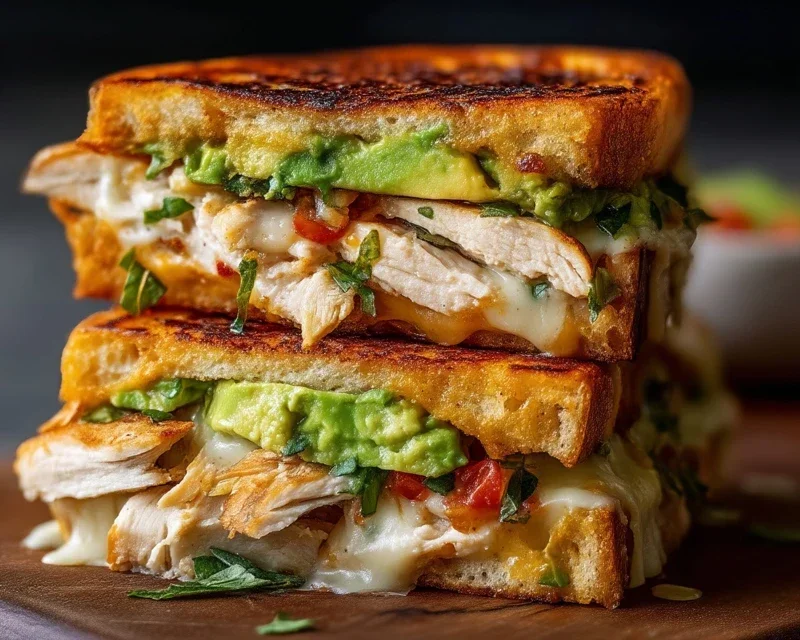
Chicken Avocado Melt Sandwich
This Chicken Avocado Melt Sandwich is a delightful twist on a classic comfort food. Imagin extracte tender, seasoned chicken breast, creamy avocado, gooey melted cheese, and fresh vegetables all sandwiched between perfectly toasted slices of bread. It’s a symphony of textures and flavors that’s surprisingly easy to make and incredibly satisfying. Whether you’re looking for a hearty lunch or a casual dinner, this sandwich is sure to become a favorite.
Ingredients:
Cooking Instructions:
1.
Prepare the Chicken
Begin extract by preparing your chicken breasts. If the chicken breasts are particularly thick, you can pound them to an even thickness. This ensures they cook through quickly and evenly. Season both sides generously with salt and pepper. Heat 1 tablespoon of olive oil in a skillet over medium-high heat. Carefully place the seasoned chicken breasts in the hot skillet. Cook for about 5-7 minutes per side, or until the chicken is cooked through and has a nice golden-brown sear. The internal temperature should reach 165°F (74°C). Once cooked, remove the chicken from the skillet and let it rest on a cutting board for a few minutes. This resting period allows the juices to redistribute, resulting in more tender and moist chicken. After resting, slice the chicken into bite-sized pieces or strips.
2.
Assemble the Sandwich Base
While the chicken is resting, prepare your bread. Lightly toast the bread slices if you prefer a crispier base, or leave them soft if you like a more yielding sandwich. In a small bowl, combine the mayonnaise and Dijon mustard. This creates a flavorful spread that adds a tangy and creamy element to the sandwich. Spread this mixture evenly on one side of each slice of bread. This will be the inside of your sandwich.
3.
Layer the Fillings
Now comes the fun part – layering! On two of the bread slices (the ones you’ve spread with the mayo-mustard mixture), begin extract to assemble your sandwich. Start with the sliced chicken breast, distributing it evenly over the bread. Next, arrange the thinly sliced red onion and tomato slices over the chicken. These fresh ingredients add a burst of flavor and a pleasant crunch. Don’t be shy with them!
4.
Add the Avocado and Cheese
Carefully arrange the sliced avocado over the tomato and onion layers. Try to cover the surface as much as possible for that creamy goodness in every bite. Finally, place your chosen cheese slices on top of the avocado. The heat from the chicken and the grilling process will melt the cheese into a gooey, decadent layer. Place the remaining two bread slices (mayo-mustard side down) on top to complete the sandwiches.
5.
Grill the Sandwiches to Perfection
Heat a clean skillet or griddle over medium heat. Add a tablespoon of butter or a drizzle of olive oil to the skillet. Once the butter is melted and sizzling (or the oil is shimmering), carefully place the assembled sandwiches into the skillet. Cook for about 3-5 minutes per side, or until the bread is golden brown and toasted, and the cheese is fully melted and oozing. You can gently press down on the sandwiches with a spatula while they cook to ensure even toasting and to help the fillings meld together. Keep an eye on them to prevent burning. If the bread is browning too quickly before the cheese has melted, you can reduce the heat slightly and cover the pan for a minute or two to help the cheese melt.
6.
Serve and Enjoy
Once your Chicken Avocado Melt Sandwiches are beautifully golden and the cheese is perfectly melted, carefully remove them from the skillet. For the best experience, let them rest for just a minute before slicing them in half. This allows the fillings to settle slightly. Serve immediately while they’re warm and gooey. This sandwich pairs wonderfully with a side of crispy potato chips, a fresh green salad, or some seasoned fries. Enjoy every delicious bite of this comforting and flavorful creation!
Conclusion:
I hope you’ve enjoyed exploring this delicious Chicken Avocado Melt Sandwich recipe! This sandwich is a winner because it strikes the perfect balance of creamy, savory, and fresh. The tender chicken, rich avocado, and melty cheese come together beautifully, creating a truly satisfying and flavorful meal. It’s incredibly versatile, making it ideal for a quick lunch, a light dinner, or even a hearty snack. Don’t hesitate to get creative with it!
For serving, I love pairing this sandwich with a crisp green salad, some crunchy sweet potato fries, or even just a side of kettle chips. The freshness cuts through the richness of the melt perfectly. If you’re looking to switch things up, consider adding a sprinkle of red pepper flakes for a little heat, some thinly sliced red onion for a sharp bite, or even a layer of crispy beef bacon for an extra indulgence. I truly encourage you to give this Chicken Avocado Melt Sandwich a try – I’m confident you’ll love it as much as I do!
Frequently Asked Questions:
Can I use pre-cooked chicken for this recipe?
Absolutely! Rotisserie chicken or leftover cooked chicken breast is a fantastic time-saver for this Chicken Avocado Melt Sandwich. Just be sure to shred or dice it finely before mixing it with the mayonnaise and seasonings.
What kind of bread works best?
I find that a sturdy bread like sourdough, whole wheat, or even a good quality ciabatta holds up well to the ingredients and toasting. The key is a bread that won’t get too soggy but will toast up nicely to complement the melt.
Is there a dairy-free option?
Yes! You can easily make this dairy-free by using a good quality vegan mayonnaise and a dairy-free shredded cheese alternative that melts well. The avocado will still provide that creamy richness.
Chicken Avocado Melt Sandwich
A delicious and satisfying sandwich featuring tender chicken, creamy avocado, melted cheese, and fresh vegetables, grilled to perfection.
Ingredients
-
2 boneless (skinless chicken breasts)
-
Salt and pepper to taste
-
1 tablespoon olive oil
-
1 avocado (sliced)
-
4 slices of your favorite cheese (Swiss, cheddar, or provolone work well)
-
4 slices of bread (sourdough, ciabatta, or your choice)
-
2 tablespoons mayonnaise
-
1 tablespoon Dijon mustard
-
1 small red onion (thinly sliced)
-
1 tomato (sliced)
-
Butter or olive oil for grilling the sandwiches
Instructions
-
Step 1
Season the chicken breasts with salt and pepper. Cook the chicken breasts in a skillet with 1 tablespoon of olive oil until cooked through. Let cool slightly and then shred or slice. -
Step 2
In a small bowl, mix together the mayonnaise and Dijon mustard. -
Step 3
Spread the mayonnaise-mustard mixture on one side of each slice of bread. Layer the cheese slices on top of the spread on two of the bread slices. -
Step 4
Divide the cooked chicken evenly over the cheese. Top the chicken with sliced avocado, red onion slices, and tomato slices. -
Step 5
Place the remaining two slices of bread on top, spread-side down, to form two sandwiches. -
Step 6
Butter or brush the outside of each sandwich with olive oil. Grill the sandwiches in a skillet or on a griddle over medium heat until the bread is golden brown and the cheese is melted and gooey, about 4-5 minutes per side.
Important Information
Nutrition Facts (Per Serving)
It is important to consider this information as approximate and not to use it as definitive health advice.
Allergy Information
Please check ingredients for potential allergens and consult a health professional if in doubt.