Lemon Blueberry Truffles – Easy & Delicious Dessert
Lemon Blueberry Truffles are the tiny bursts of sunshine and sweetness your day has been craving. Imagin extracte this: a delicate, melt-in-your-mouth sphere, bursting with the vibrant tang of fresh lemon and the juicy pop of plump blueberries. It’s no wonder these little delights have captured so many hearts! They strike that perfect balance between bright and comforting, making them an irresistible treat for any occasion. What makes these Lemon Blueberry Truffles so utterly special is their sophisticated yet incredibly simple flavor profile. They’re elegant enough for a special gathering but easy enough for a spontaneous afternoon indulgence. Forget complicated baking; these no-bake wonders are pure joy in every bite, a little piece of edible happiness that’s guaranteed to bring a smile to your face and the faces of anyone lucky enough to share them.
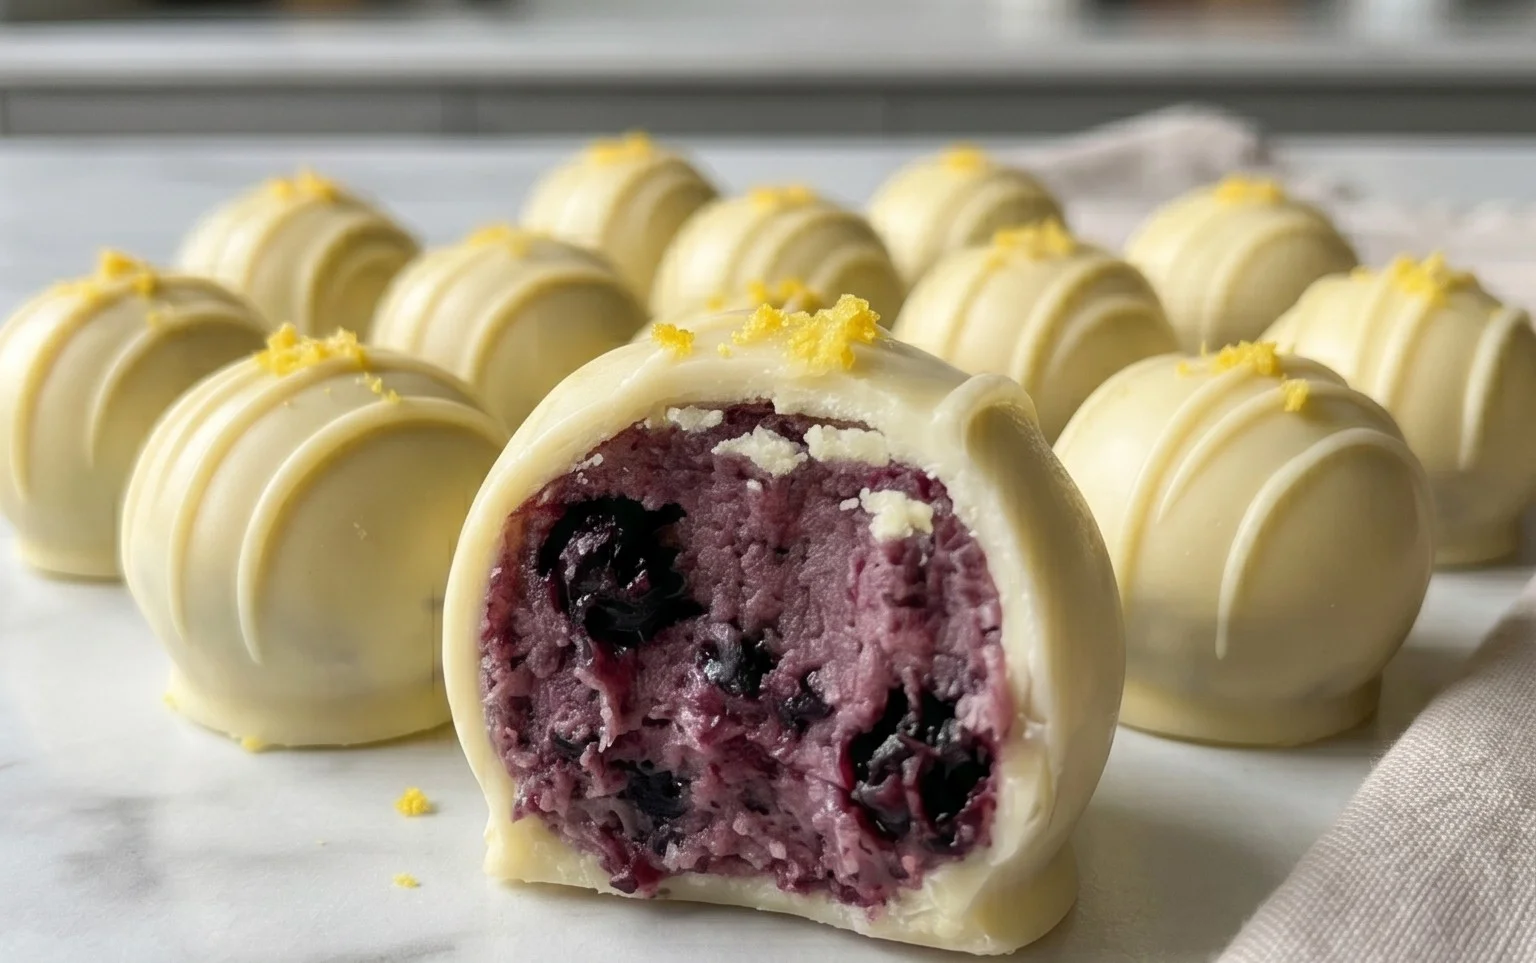
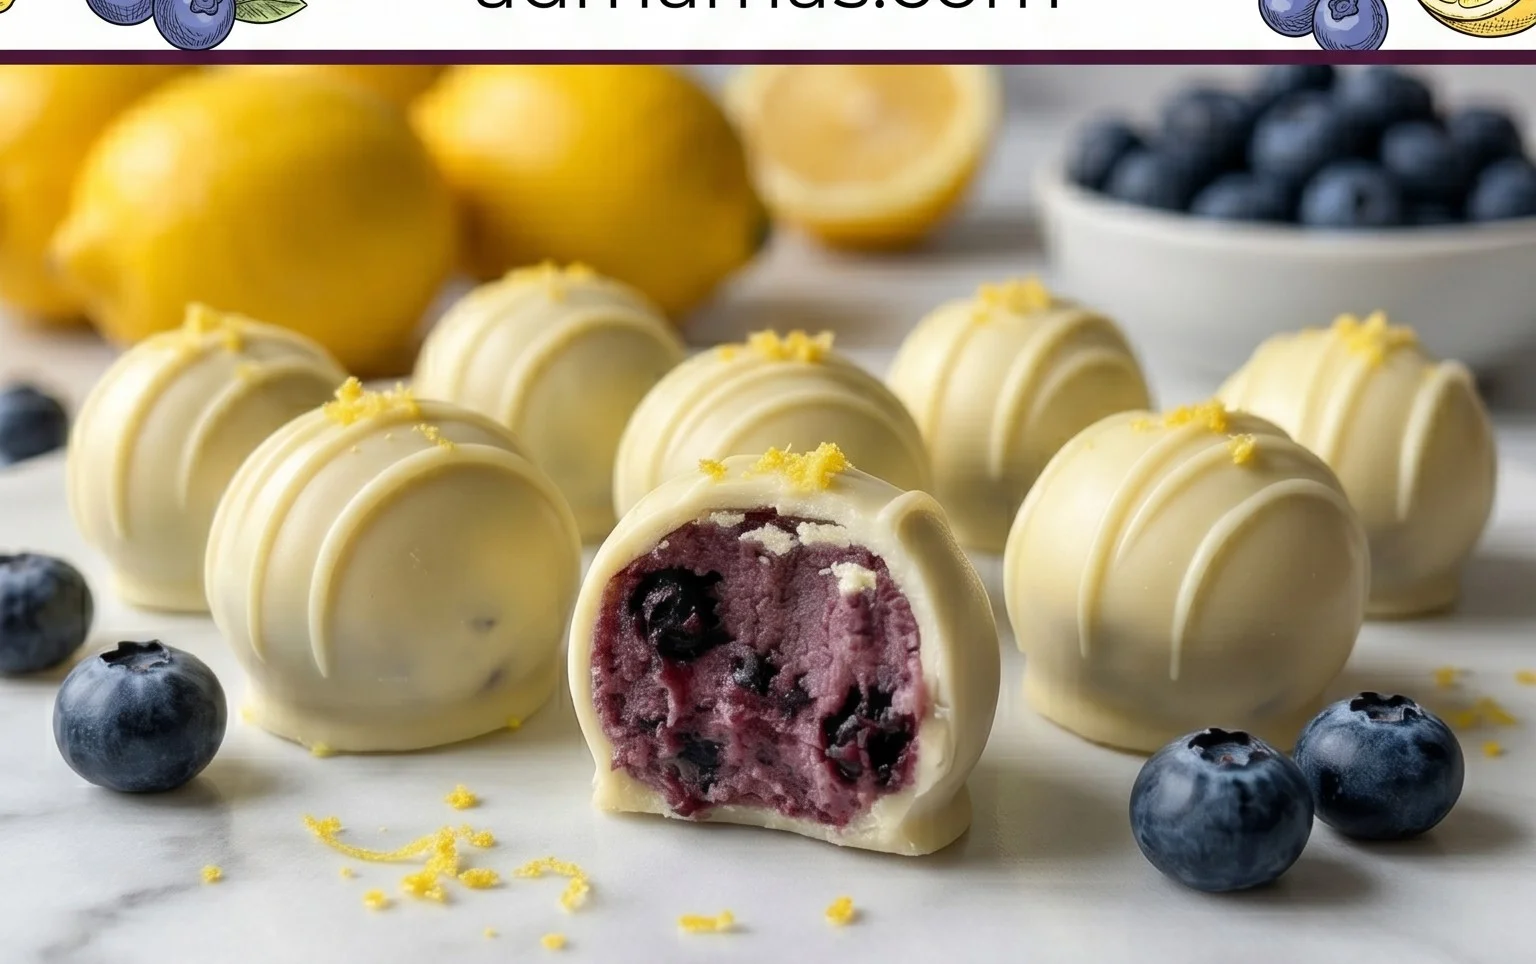
Lemon Blueberry Truffles
Get ready to tantalize your taste buds with these vibrant and utterly delightful Lemon Blueberry Truffles! These little powerhouses are not only a treat for the senses but also packed with wholesome goodness, making them a guilt-free indulgence. Imagin extracte the bright zest of lemon perfectly complementing the sweet bursts of blueberry, all bound together in a creamy, melt-in-your-mouth truffle. They are surprisingly easy to make and require no baking, making them a perfect quick treat for any occasion. Whether you’re looking for a healthy dessert option, a delightful party appetizer, or just a way to brighten your day, these truffles are sure to hit the spot.
Ingredients:
Cooking Instructions:
Let’s dive into creating these beautiful Lemon Blueberry Truffles. We’ll be working in two main phases: creating the delicious truffle base and then whipping up a heavenly frosting to coat them.
Phase 1: Crafting the Truffle Base
This first part is all about bringin extractg together the raw ingredients to form a cohesive and flavorful base.
1. Prepare Your Base Ingredients: Start by ensuring all your base ingredients are ready. If you’re using dried dates, make sure they are soft and pliable. If they are a bit firm, you can soak them in warm water for about 10 minutes and then drain them thoroughly. This will make them easier to process. Measure out your wild blueberries – fresh or frozen will work beautifully here. If using frozen, you might want to let them thaw slightly so they blend more easily without making the mixture too wet too quickly. Have your walnuts, gluten-free rolled oats, shredded coconut, chia seeds, and the juice of one lemon measured and ready to go.
2. Process the Dry Ingredients: In a food processor, combine the walnuts, gluten-free rolled oats, shredded coconut, and chia seeds. Pulse these ingredients a few times until they are roughly chopped and combined. You don’t want a fine powder, but rather a textured mixture that will provide a nice bite in the finished truffles. This step helps to break down the larger components and ensures they are evenly distributed throughout the truffle base.
3. Add the Dates and Blueberries: Now, add the pitted dates to the food processor with the dry ingredients. Process until the dates start to break down and form a sticky mass. Next, add the wild blueberries and the juice from one lemon. Continue to process. The mixture will begin extract to come together. You’re looking for a consistency that is sticky enough to hold its shape when rolled into balls. If the mixture seems too dry and crum extractbly, you can add another teaspoon of lemon juice or a tiny splash of water, but be cautious not to make it too wet. If it’s too wet, you can add a few more rolled oats or a bit more shredded coconut. Process until a dough-like consistency is achieved.
4. Chill and Roll the Truffle Balls: Once you have the right consistency, scrape the mixture into a bowl. Place the bowl in the refrigerator for about 20-30 minutes. This chilling step is crucial as it firms up the mixture, making it much easier to handle and roll into balls without sticking excessively to your hands. After chilling, take small portions of the mixture and roll them between your palms to form bite-sized balls. Aim for a consistent size for even coating later. Place the rolled truffle balls on a parchment-lined plate or tray and put them back into the freezer while you prepare the frosting. This will ensure they are firm and ready for the next step.
Phase 2: Creating the Luscious Frosting
This is where we create the creamy, dreamy coating that takes these truffles to the next level.
5. Prepare and Blend the Frosting Ingredients: Drain the soaked cashews thoroughly. In a high-powered blender or a food processor, combine the drained cashews, melted and cooled coconut oil, raw honey, vanilla extract, and the juice of the second lemon. Begin extract to blend the ingredients. You’ll likely need to scrape down the sides of the blender a few times to ensure everything is incorporated. As you blend, add the warm water, 1 tablespoon at a time, only as needed to achieve a smooth, creamy, and pourable consistency. You want the frosting to be thick enough to coat the truffles but thin enough to drip easily. Taste the frosting and adjust sweetness or lemon flavor if desired. If you want a more intense lemon flavor, you can add a tiny pinch of lemon zest at this stage.
6. Coat and Chill Your Truffles: Remove the chilled truffle balls from the freezer. Dip each truffle into the prepared frosting, ensuring it is fully coated. You can use a fork or a toothpick to gently lower the truffles into the frosting and then lift them out, allowing any excess to drip back into the bowl. Place the coated truffles back onto the parchment-lined plate. Once all the truffles are coated, place the entire tray back into the freezer for at least 30-60 minutes, or until the frosting is completely set and firm. This final chill is essential for the frosting to harden properly, giving your truffles that perfect finish.
Once set, your Lemon Blueberry Truffles are ready to be enjoyed! Store them in an airtight container in the refrigerator or freezer. They are a wonderful make-ahead treat for gatherings or a delightful way to satisfy a sweet craving. Enjoy the vibrant flavors and delightful texture!
Conclusion:
I hope you’ve enjoyed learning how to create these delightful Lemon Blueberry Truffles! This recipe is truly a winner because it strikes a perfect balance between bright, zesty lemon and sweet, juicy blueberries, all enveloped in a decadent, creamy truffle. They’re surprisingly simple to make, making them perfect for both begin extractners and seasoned bakers looking for a quick yet impressive treat. The vibrant colors and irresistible flavor make them ideal for any occasion, from a casual afternoon pick-me-up to a sophisticated dessert at a dinner party. Don’t be afraid to experiment with the finishing touches – a sprinkle of edible glitter or a drizzle of white chocolate can elevate them even further.
For serving, I love presenting these Lemon Blueberry Truffles on a pretty platter alongside a cup of tea or coffee. They also make a fantastic addition to a dessert board or as a sweet surprise in a lunchbox. Get creative and have fun with it! I truly encourage you to give this recipe a try. You’ll be amazed at how quickly these disappear!
Frequently Asked Questions:
Can I make these Lemon Blueberry Truffles ahead of time?
Absolutely! These truffles can be made up to 3-4 days in advance and stored in an airtight container in the refrigerator. They might firm up a bit more, so you may want to let them sit at room temperature for about 15-20 minutes before serving for the best texture.
What are some other variations I could try?
The possibilities are endless! You could swap out the blueberries for raspberries or even finely chopped strawberries. For a citrus twist, try adding a little orange zest along with the lemon. You can also experiment with different coatings, like dark chocolate shavings or a dusting of finely chopped pistachios for a lovely crunch and color contrast.
Lemon Blueberry Truffles
Delicious and healthy no-bake truffles featuring the bright flavors of lemon and sweet blueberries, made with wholesome ingredients.
Ingredients
-
1 cup wild blueberries
-
1 cup walnuts
-
1 cup dates
-
3 tbsp gluten-free rolled oats
-
2 tbsp shredded coconut
-
1 tbsp chia seeds
-
1 lemon, juiced
-
1 cup cashews (soaked for about 30 minutes)
-
½ cup coconut oil, melted and cooled
-
3 tbsp raw honey
-
1 tsp vanilla extract
-
2-3 tbsp warm water (as needed to help blend)
Instructions
-
Step 1
For the truffle base: Combine wild blueberries, walnuts, dates, gluten-free rolled oats, shredded coconut, chia seeds, and lemon juice in a food processor. Process until a sticky dough forms. -
Step 2
Roll the mixture into small balls, about 1 inch in diameter. Place them on a parchment-lined baking sheet. -
Step 3
For the frosting: Drain the soaked cashews and add them to a high-speed blender along with melted and cooled coconut oil, raw honey, vanilla extract, and lemon juice. -
Step 4
Blend the frosting ingredients until smooth and creamy, adding warm water 1-2 tablespoons at a time as needed to reach desired consistency. -
Step 5
Dip each truffle into the cashew frosting, ensuring it is fully coated. You can use a fork or a toothpick for dipping. -
Step 6
Place the coated truffles back onto the parchment-lined baking sheet. You can add a small blueberry or a sprinkle of shredded coconut on top for garnish if desired. -
Step 7
Freeze the truffles for at least 30 minutes to allow the frosting to set. Store in an airtight container in the refrigerator or freezer.
Important Information
Nutrition Facts (Per Serving)
It is important to consider this information as approximate and not to use it as definitive health advice.
Allergy Information
Please check ingredients for potential allergens and consult a health professional if in doubt.