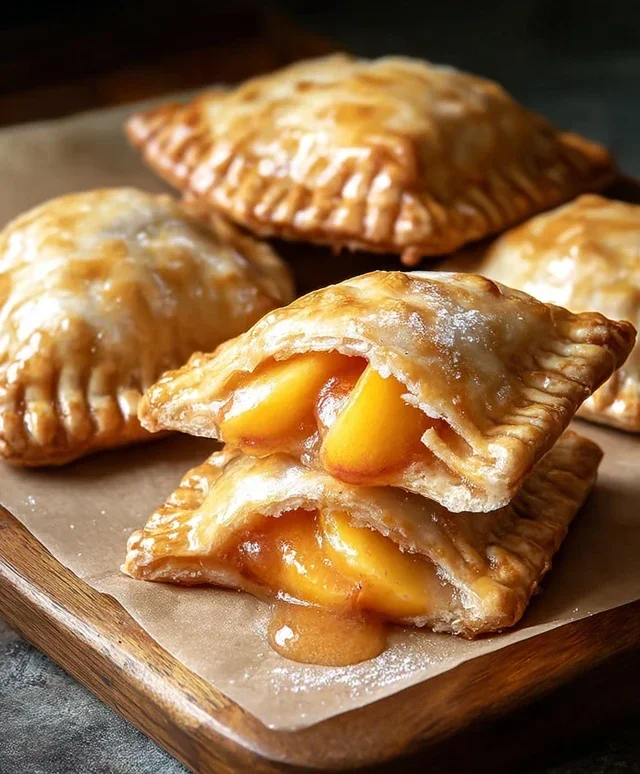
Easy Peach Hand Pies- Deliciously Sweet Summer Treat
Peach hand pies are more than just a dessert; they’re a little pocket of sunshine, a portable slice of pure bliss that instantly transports me back to warm summer afternoons. There’s something undeniably magical about flaky, buttery pastry embracing a sweet, juicy peach filling. It’s that perfect balance of tender fruit and crisp crust, all in a convenient, single-serving package, that makes peach hand pies so universally beloved. Unlike a full-sized pie, these individual delights are wonderfully forgiving and incredibly fun to make, making them an ideal treat for picnics, potlucks, or simply an indulgent afternoon snack. The warm, spiced peach filling bursting from each golden crescent is an experience that truly embodies comfort and simple joy, and I can’t wait to share my favorite recipe for these irresistible peach hand pies with you.
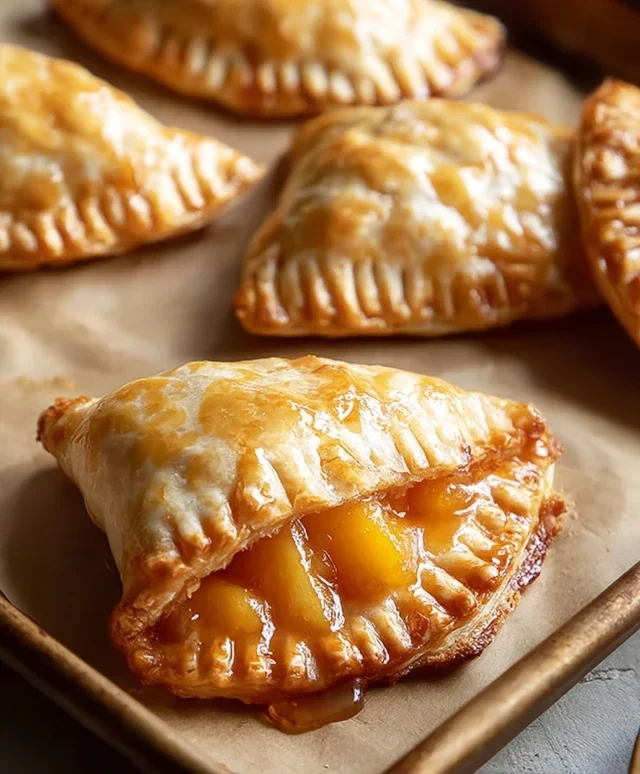
Peach Hand Pies
There’s something undeniably charming about hand pies. They’re perfectly portioned, wonderfully portable, and taste like a little hug in every bite. And when you fill them with sweet, juicy peaches, well, you’ve got pure dessert perfection. These Peach Hand Pies are incredibly easy to make, especially when we leverage a little pantry shortcut. They’re perfect for a weekend treat, a picnic dessert, or even a delightful afternoon pick-me-up. The crispy, golden crust gives way to a warm, sweet peach filling, all finished off with a simple, sweet glaze. Let’s get baking!
Ingredients:
Making the Peach Filling
The beauty of these hand pies lies in their simplicity, and that starts with the filling. We’re going to use a can of pre-made peach pie filling. This saves a tremendous amount of time and effort, and it’s perfectly delicious. While you can certainly make your filling from scratch, this shortcut is a lifesaver for busy bakers. Open the can and give the filling a quick stir to ensure the peaches are evenly distributed in the thick, syrupy goodness. If your peaches seem like they’re in very large chunks, you can give them a gentle mash with a fork to break them down a bit, but it’s not entirely necessary. The baking process will soften them further.
Preparing the Pie Crusts
Now, let’s get our crusts ready. You’ll need two refrigerated pie crusts. These are typically found in the dairy aisle of your grocery store. Carefully unroll both crusts onto a lightly floured surface. You want to work relatively quickly so the dough doesn’t get too warm and sticky. Using a round cutter, or even the rim of a glass or a small bowl (about 4-5 inches in diameter), cut out as many circles as you can from each crust. You should aim to get about 6-8 circles from each crust, depending on the size of your cutter. Don’t worry if you have scraps; you can gently press them together and re-roll them once to get a few more circles.
Assembling the Hand Pies
This is where the magic starts to happen! Take one of your prepared dough circles and place it on your lightly floured surface. Spoon about 2-3 tablespoons of the peach pie filling onto one half of the circle, leaving about a half-inch border around the edges. Be careful not to overfill, as this can cause the filling to leak out during cooking. Now, take another dough circle and place it on top of the filling, aligning the edges. You can also use a single circle, fold it in half like a turnover, and press the edges. The choice is yours! Once the top is in place, press the edges firmly together with your fingers to seal them. For an extra secure seal and a decorative touch, you can use the tines of a fork to crimp the edges all the way around. Make sure the seal is good and tight to prevent any filling from escaping during frying. You can also cut a small vent or two in the top crust with a sharp knife to allow steam to escape.
Frying the Hand Pies to Golden Perfection
This step is crucial for achieving that irresistible golden-brown, crispy exterior. Pour your vegetable oil into a heavy-bottomed skillet or Dutch oven. You’ll want about 1-2 inches of oil. Heat the oil over medium-high heat until it reaches about 350°F (175°C). If you don’t have a thermometer, you can test the oil by dropping a tiny piece of dough into it. If it sizzles immediately and floats to the top, the oil is ready. Carefully place 2-3 hand pies into the hot oil, making sure not to overcrowd the pan. Overcrowding will lower the oil temperature and result in greasy hand pies. Fry for about 2-3 minutes per side, or until they are a beautiful golden brown and puffed up. Use a slotted spoon or spider strainer to carefully remove the fried hand pies from the oil and place them on a wire rack set over a baking sheet. This allows any excess oil to drain off, keeping them wonderfully crisp.
Glazing the Warm Hand Pies
While the hand pies are still warm (but not piping hot, so the glaze doesn’t completely melt away), it’s time for the finishing touch. In a small bowl, whisk together the powdered sugar, corn syrup, and water until you have a smooth, drizzly glaze. The corn syrup helps to make the glaze shiny and slightly chewy. Drizzle this sweet glaze generously over the warm hand pies. You can use a spoon or a piping bag for this. The warmth of the pies will help the glaze set slightly. Let the glaze set for a few minutes before serving. You can also sprinkle them with a little extra powdered sugar if you prefer. These are best enjoyed warm, when the crust is at its crispiest and the peach filling is wonderfully gooey. Enjoy every delightful bite!
Conclusion:
And there you have it! These Peach Hand Pies are an absolute delight, offering a perfect balance of sweet, juicy peaches encased in a flaky, buttery crust. They’re wonderfully portable and delightfully easy to make, making them ideal for picnics, potlucks, or just a special treat any day of the week. I truly believe this recipe is a winner because it delivers maximum flavor with minimal fuss. The simplicity of fresh peaches combined with a straightforward pie crust means you get all the wonderful taste of a classic peach pie in a convenient, single-serving format. They’re fantastic served warm with a dollop of vanilla ice cream or a drizzle of caramel sauce, but honestly, they’re just as delicious at room temperature. Don’t hesitate to get creative with variations – a pinch of cinnamon or nutmeg in the filling can add a lovely warmth, or try adding a few blueberries for a beautiful color contrast.
I encourage you all to give these Peach Hand Pies a try. They are a fantastic way to capture the essence of summer and are sure to become a new favorite in your baking repertoire. Enjoy every single bite!
Frequently Asked Questions:
Can I use frozen peaches for this recipe?
Absolutely! If you’re using frozen peaches, make sure to thaw them completely and drain off any excess liquid before adding them to your filling. You might need to slightly increase the cornstarch or flour to account for the extra moisture.
How should I store leftover Peach Hand Pies?
Store any leftover Peach Hand Pies in an airtight container at room temperature for up to two days, or in the refrigerator for up to four days. They can be gently reheated in a warm oven or toaster oven for that fresh-baked taste.
What if I don’t have peach preserves?
While peach preserves add an extra layer of peachy goodness, they aren’t essential. The fresh peaches provide plenty of flavor. If you omit them, you might want to add a touch more sugar or a splash of peach nectar to the filling.
Peach Hand Pies
Delicious and easy-to-make peach hand pies perfect for a sweet treat.
Ingredients
-
21 oz. can peach pie filling
-
Refrigerated pie crust
-
1/2 cup powdered sugar
-
1 teaspoon corn syrup
-
1 tablespoon water
-
Vegetable oil for frying
Instructions
-
Step 1
Prepare your workstation with all ingredients and utensils. -
Step 2
Roll out the refrigerated pie crust according to package directions. Cut out circles using a cookie cutter or a glass. -
Step 3
Spoon a generous amount of peach pie filling onto one half of each pie crust circle, leaving a small border. -
Step 4
Fold the other half of the pie crust over the filling to create a half-moon shape. Crimp the edges with a fork to seal. -
Step 5
Heat vegetable oil in a skillet over medium heat. Carefully place the hand pies into the hot oil, frying for about 2-3 minutes per side, until golden brown. -
Step 6
Remove hand pies from the oil and place on a wire rack lined with paper towels to drain excess oil. -
Step 7
While the pies are still warm, whisk together powdered sugar, corn syrup, and water in a small bowl to create a glaze. Drizzle over the hand pies.
Important Information
Nutrition Facts (Per Serving)
It is important to consider this information as approximate and not to use it as definitive health advice.
Allergy Information
Please check ingredients for potential allergens and consult a health professional if in doubt.