Easy Chocolate Protein Pudding Recipe-Healthy Treat
Chocolate Protein Pudding Recipe: Craving a rich, decadent dessert that also fuels your body? Look no further! I’ve got you covered with a Chocolate Protein Pudding Recipe that’s so unbelievably delicious, you’ll forget it’s packed with goodness. Forget those chalky, artificial-tasting protein snacks; this pudding is a true game-changer for anyone looking to satisfy their sweet tooth while supporting their fitness goals. What makes this recipe so special? It’s the perfect marriage of deep, satisfying chocolate flavor and creamy, luxurious texture. It’s incredibly simple to whip up, making it an ideal treat for busy weeknights or a pre- or post-workout reward. Get ready to indulge guilt-free with this amazing Chocolate Protein Pudding Recipe!
Chocolate Protein Pudding Recipe
Looking for a delicious and healthy way to satisfy your sweet tooth while boosting your protein intake? This Chocolate Protein Pudding is your answer! It’s incredibly easy to make, requires minimal ingredients, and tastes like a decadent dessert, but it’s packed with nutrients to fuel your body. Perfect for a post-workout treat, a healthy snack, or even a guilt-free dessert, this pudding is a game-changer. Forget those store-bought puddings loaded with sugar and artificial ingredients; we’re going homemade, and it’s going to be amazing. The creamy texture combined with the rich chocolate flavor is simply irresistible. Plus, the protein from the Greek yogurt and protein powder will keep you feeling full and satisfied for longer. Let’s get started on creating this delightful treat!
Ingredients:
Step-by-Step Instructions
This recipe is all about simplicity and speed. You’ll be amazed at how quickly you can whip up a batch of this luscious pudding.
Phase 1: Combining the Base Ingredients
1. Begin extract by gathering a large mixing bowl. You’ll want a bowl that’s big enough to comfortably mix all 5 cups of Greek yogurt without making a mess. Open your container of Greek yogurt. For the best texture and flavor, I highly recommend using full-fat, plain Greek yogurt. The full-fat version will give you a richer, creamier pudding, while the plain variety allows you to control the sweetness and flavor profile more precisely. If you prefer a hint of sweetness and vanilla from the start, you can opt for vanilla Greek yogurt, but be mindful that this might slightly alter the final sweetness of your pudding, and you may need to adjust the maple syrup accordingly. Carefully measure and add all 5 cups of Greek yogurt into your large mixing bowl.
2. Next, it’s time to incorporate the star players: the chocolate protein powder and unsweetened cocoa powder. For this recipe, you’ll need 4 scoops of your favorite chocolate protein powder. The type of protein powder you use will subtly influence the final taste and texture, so feel free to experiment with different brands or types (whey, casein, or plant-based). Most scoops are approximately 2 to 3 tablespoons, so just ensure you’re adding the equivnon-alcoholic alent of 4 scoops. Alongside the protein powder, add 3 to 4 tablespoons of unsweetened cocoa powder. The amount of cocoa powder you use will determine the intensity of the chocolate flavor. If you’re a true chocolate lover, don’t hesitate to lean towards the higher end of 4 tablespoons for a deep, rich chocolate experience. If you prefer a milder chocolate taste, start with 3 tablespoons.
Phase 2: Incorporating Flavor and Sweetness
3. Now, let’s add some aromatic depth and a touch of sweetness. Measure out 1 teaspoon of vanilla extract and pour it into the bowl with the yogurt, protein powder, and cocoa powder. Vanilla extract is a crucial ingredient that enhances the chocolate flavor and adds a subtle warmth that makes the pudding even more irresistible. Following the vanilla extract, it’s time to sweeten things up. Add 2 tablespoons of maple syrup. I prefer maple syrup for its natural sweetness and slightly caramel notes, which complement the chocolate beautifully. If you find you prefer a sweeter pudding, you can always add a little more maple syrup to taste after the pudding has been mixed and chilled. Remember, you can always add more sweetness, but you can’t take it away, so start with 2 tablespoons and adjust as needed.
Phase 3: Mixing and Achieving Pudding Perfection
4. With all the ingredients in the bowl, it’s time to mix them thoroughly. You have a couple of options here. For the smoothest, creamiest pudding, I highly recommend using an electric mixer (handheld or stand mixer). Start on a low speed to incorporate the dry ingredients, then gradually increase the speed to medium-high. Mix until the pudding is completely smooth, lump-free, and has a consistent, thick, pudding-like texture. This process might take a few minutes. If you don’t have an electric mixer, a sturdy whisk and some elbow grease will also do the trick. Whisk vigorously, ensuring you scrape down the sides and bottom of the bowl frequently to incorporate all the ingredients and break up any potential clumps of protein powder or cocoa. The goal is a uniform, velvety consistency. Don’t rush this step; proper mixing is key to achieving that dessert-like texture.
5. Once your pudding is thoroughly mixed and beautifully smooth, the next step is to let it work its magic in the refrigerator. Spoon the mixture into individual serving dishes, small bowls, or even a larger container if you plan to scoop it out later. Cover each serving dish tightly with plastic wrap or a lid. This prevents a skin from forming on top and keeps the pudding fresh. Place the covered pudding into the refrigerator and allow it to chill for at least 2 hours. The chilling process is essential for the flavors to meld together and for the pudding to thicken to its final, desired consistency. The longer it chills, the firmer and more pudding-like it will become. For an even richer, thicker texture, you can leave it to chill overnight.
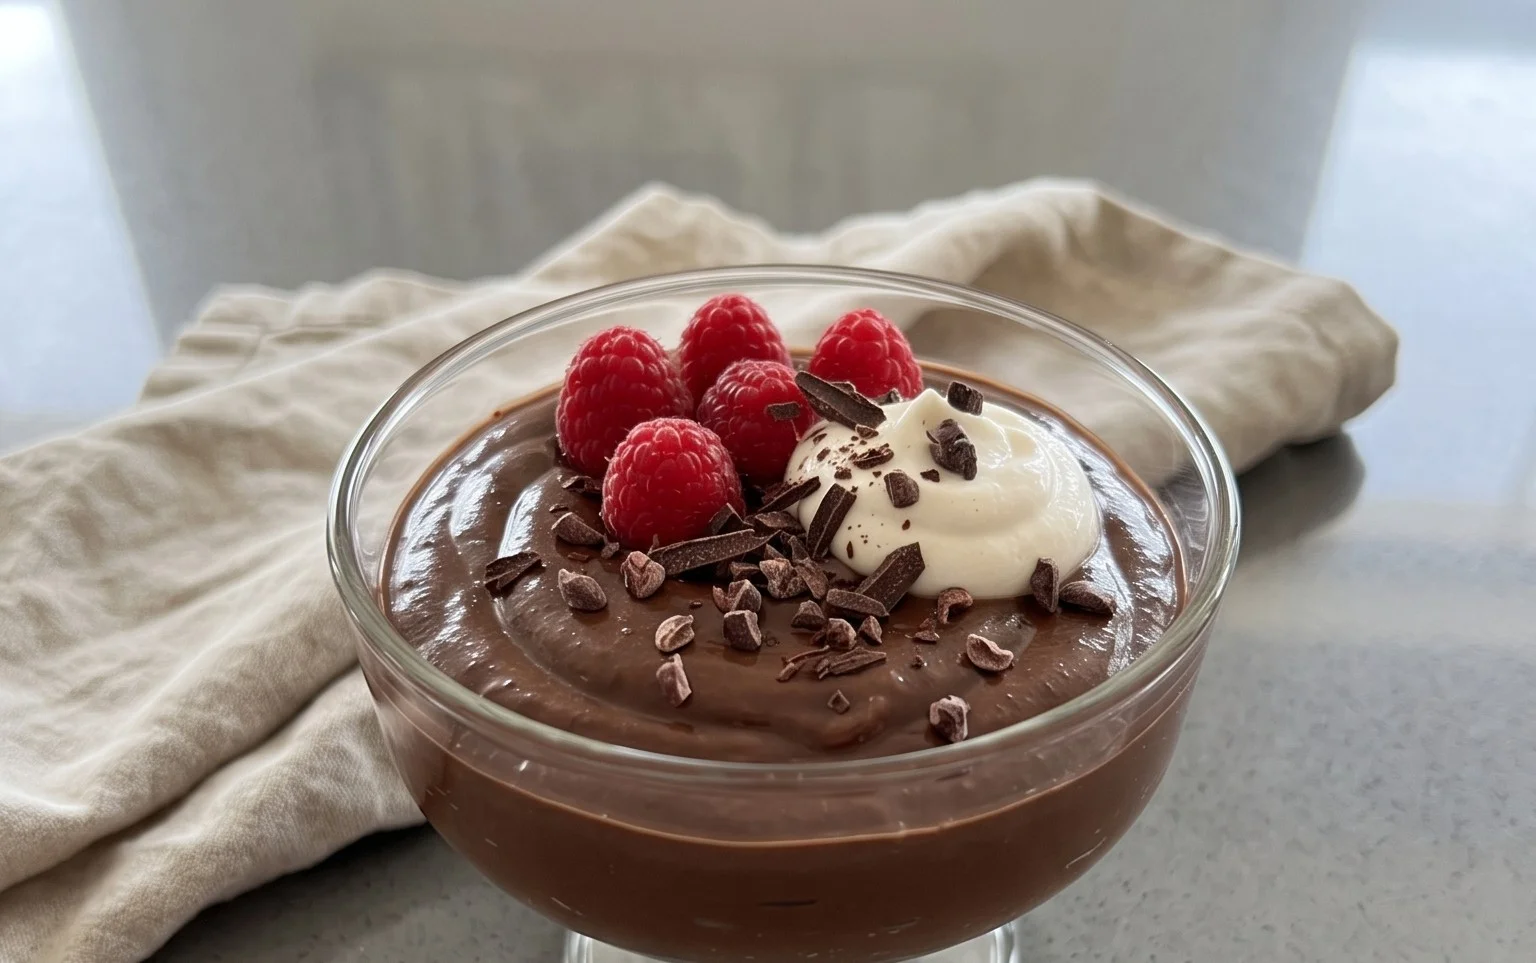
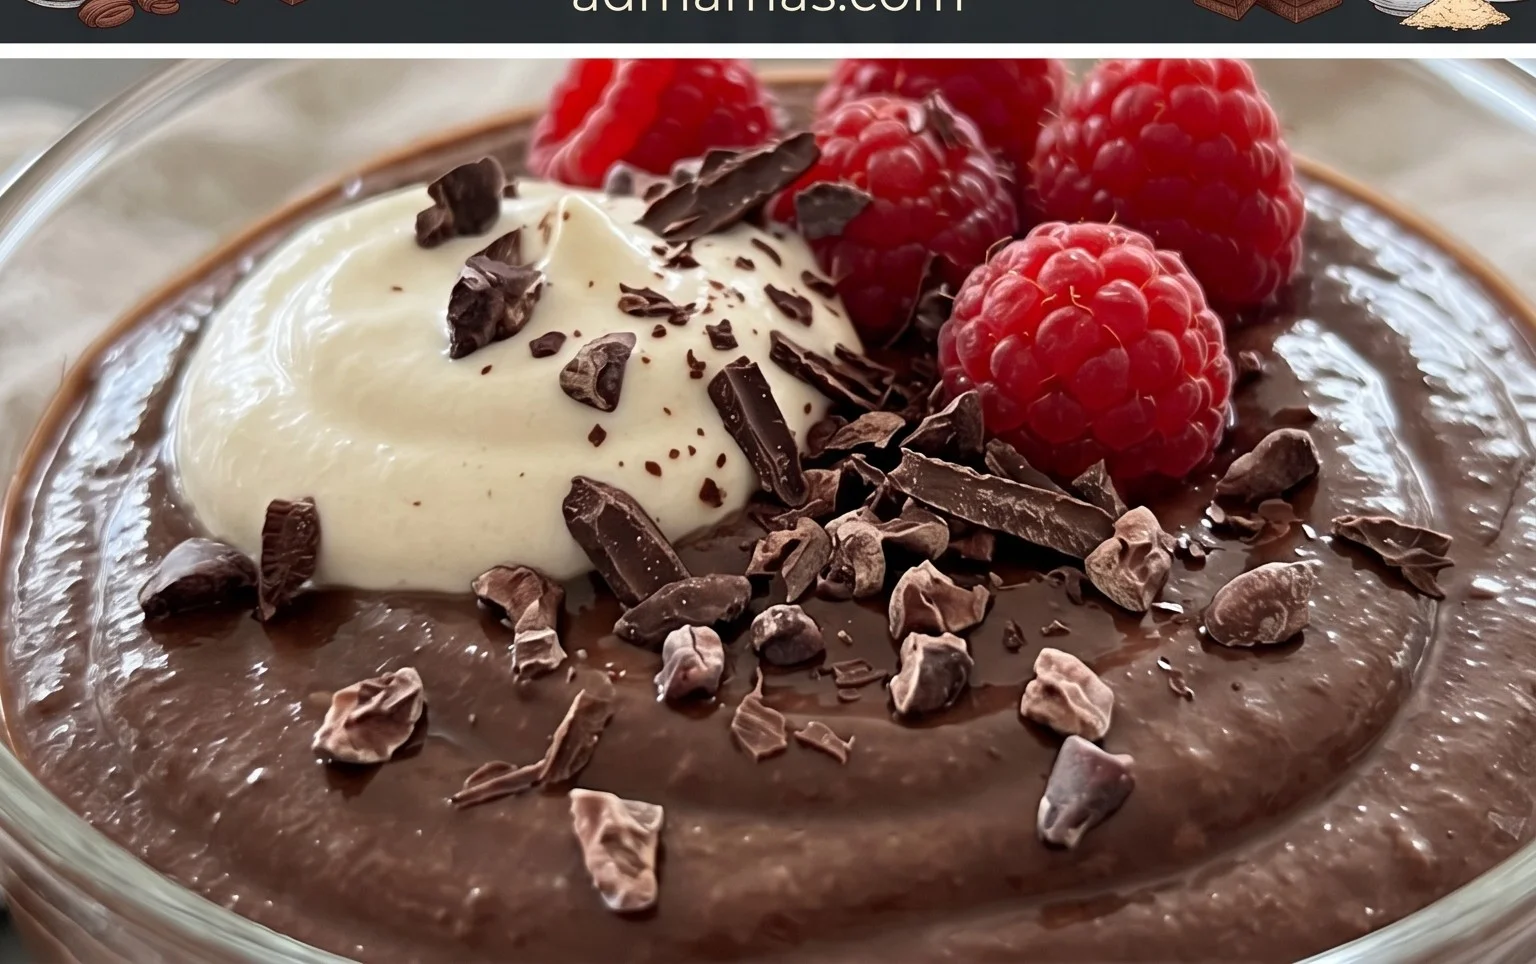
Enjoy your homemade Chocolate Protein Pudding! This recipe is incredibly versatile. You can top it with fresh berries, a sprinkle of chia seeds, a dollop of whipped cream, or even some dark chocolate shavings for an extra touch of indulgence. It’s a fantastic way to sneak in some extra protein without sacrificing flavor or that satisfying dessert experience.
Conclusion:
So there you have it – your ultimate guide to crafting a delicious and guilt-free Chocolate Protein Pudding! This recipe is a game-changer for anyone looking to satisfy their sweet tooth while fueling their body. It’s incredibly simple to make, requiring minimal ingredients and effort, making it perfect for busy weeknights or quick post-workout recovery. The rich, chocolatey flavor combined with the satisfying protein boost makes this a truly versatile treat that won’t derail your healthy eating goals.
I love serving this pudding chilled, perhaps with a sprinkle of cocoa nibs or a few fresh berries for added texture and flavor. For variations, don’t be afraid to experiment! You can add a dash of cinnamon for a warming spice, a touch of instant coffee for a mocha twist, or even blend in some frozen banana for an extra creamy, naturally sweet base. I truly encourage you to give this Chocolate Protein Pudding a try; I’m confident it will become a staple in your healthy dessert repertoire.
Frequently Asked Questions:
Can I make this pudding ahead of time?
Absolutely! This Chocolate Protein Pudding is fantastic for meal prep. You can make a batch at the begin extractning of the week and store it in individual airtight containers in the refrigerator for up to 3-4 days. The flavors meld beautifully over time.
What if I don’t have whey protein powder?
No problem! You can easily substitute with a plant-based protein powder like pea, soy, or brown rice protein. Just be aware that the texture and flavor might vary slightly depending on the brand and type you choose.
Is this recipe suitable for diabetics?
This recipe can be a good option for diabetics, especially when using unsweetened cocoa powder and a sugar-free protein powder. It’s always recommended to check the nutritional information of your specific ingredients and consult with your healthcare provider or a registered dietitian for personalized advice.
Chocolate Protein Pudding Recipe
A rich and creamy chocolate protein pudding, perfect for a healthy dessert or snack. This recipe is quick to make and can be customized with your favorite toppings.
Ingredients
-
5 cups Greek yogurt (full-fat, plain or vanilla)
-
4 scoops chocolate protein powder
-
3 to 4 tablespoons unsweetened cocoa powder
-
1 teaspoon vanilla extract
-
2 tablespoons maple syrup
Instructions
-
Step 1
In a large bowl, combine the Greek yogurt, chocolate protein powder, and unsweetened cocoa powder. -
Step 2
Add the vanilla extract and maple syrup to the bowl. -
Step 3
Mix all ingredients together thoroughly until smooth and well combined. You can use a whisk or an electric mixer for a creamier consistency. -
Step 4
Taste and adjust sweetness if desired by adding a little more maple syrup. -
Step 5
Spoon the pudding into individual serving dishes or a single large bowl. -
Step 6
Chill in the refrigerator for at least 30 minutes to allow the pudding to set and flavors to meld. For a firmer pudding, chill for longer.
Important Information
Nutrition Facts (Per Serving)
It is important to consider this information as approximate and not to use it as definitive health advice.
Allergy Information
Please check ingredients for potential allergens and consult a health professional if in doubt.