Country Fried Chicken – Crispy Deliciousness
Country fried chicken isn’t just a meal; it’s an experience, a comforting embrace on a plate that speaks of simpler times and shared laughter. We all have that memory, don’t we? The sizzle in the cast iron, the golden-brown crust giving way to juicy, tender meat, the unmistakable aroma filling the kitchen. That’s the magic of truly exceptional country fried chicken. It’s that perfect balance of crispy, savory, and utterly satisfying that makes it a perennial favorite, a dish people crave time and time again. What makes this particular country fried chicken so special? It’s the meticulous attention to detail, from the buttermilk brine that tenderizes every succulent piece to the perfectly seasoned flour dredge that creates that legendary crunch. Get ready to create a masterpiece that will have everyone asking for seconds!
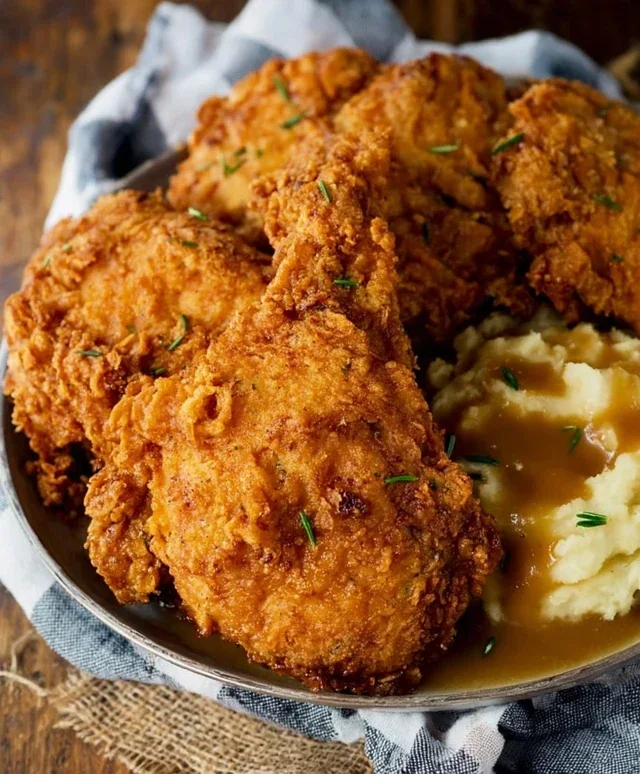
Country Fried Chicken
There’s something undeniably comforting about a plate piled high with golden-brown, crispy country-fried chicken. It’s a dish that evokes warm kitchens, happy gatherings, and the simple joy of good food. This recipe aims to deliver that classic, satisfying crunch with tender, juicy chicken every time. Forget the fancy restaurants; this is the real deal, made right in your own kitchen. We’re going back to basics here, focusing on simple ingredients and proven techniques to achieve that perfect bite.
Ingredients:
Preparing the Chicken
The first step in creating truly delicious country-fried chicken is to properly prepare the chicken itself. Start by trimming any excess fat from your boneless, skinless chicken breasts. Then, you’ll want to pound them to an even thickness. This is crucial for ensuring that the chicken cooks evenly and quickly, preventing dry edges and undercooked centers. You can do this by placing the chicken breasts between two pieces of plastic wrap or inside a sturdy zip-top bag and using a meat mallet or the flat side of a heavy pan to gently pound them to about ½-inch thickness. This step also helps to tenderize the meat, making it even more enjoyable.
The Buttermilk Bath
Next, we move on to the buttermilk marinade. In a shallow dish or a large bowl, pour in your 2 cups of buttermilk. Add 2 of the teaspoons of salt to the buttermilk and stir to dissolve. Place your pounded chicken breasts into the buttermilk mixture, ensuring that each piece is fully submerged. Cover the dish or bowl and refrigerate for at least 30 minutes, or ideally for up to 4 hours. This buttermilk bath is where the magic really begin extracts. The acidity in the buttermilk works to tenderize the chicken, breaking down tough muscle fibers and making it incredibly moist and flavorful. It also creates a surface that the flour coating will adhere to beautifully, leading to that signature crispy crust. If you don’t have buttermilk on hand, a simple substitute can be made by adding 1 tablespoon of white vinegar or lemon juice to regular milk and letting it sit for 5-10 minutes until it thickens slightly.
Creating the Crispy Coating
While the chicken is marinating, it’s time to prepare our dry dredge. In a large, shallow bowl or a pie plate, combine the 1 ½ cups of all-purpose flour, ½ cup of breadcrum extractbs, the remaining 1 teaspoon of salt, 2 ½ teaspoons of seasoned salt, ¾ teaspoon of paprika, ½ teaspoon of cayenne pepper, and 1 ½ teaspoon of black pepper. Whisk these dry ingredients together thoroughly. The breadcrum extractbs will add an extra layer of crunch, and the seasonings will infuse flavor right into the crust. The paprika will contribute to that beautiful golden-brown hue, while the cayenne adds a subtle kick of heat that complements the richness of the chicken. Make sure everything is well combined before you begin extract dredgin extractg.
Dredgin extractg and Frying
Once your chicken has had a good soak in the buttermilk, it’s time to coat it. Remove one piece of chicken at a time from the buttermilk, letting any excess drip off for a moment. Then, place it directly into your seasoned flour mixture. Press the flour mixture onto both sides of the chicken, ensuring it’s completely and evenly coated. Don’t be shy; a good, thick coating is key to that irresistible crunch. After dredgin extractg, you can either let the coated chicken sit on a wire rack for about 5-10 minutes to allow the coating to set slightly (this helps it stick better during frying) or proceed directly to frying if you’re in a hurry.
Now for the frying. In a large, heavy-bottomed skillet, heat 1 ½ cups of vegetable oil over medium-high heat. You want the oil to be hot but not smoking. A good test is to drop a tiny pinch of flour into the oil; if it sizzles immediately, the oil is ready. Carefully place 2 pieces of the coated chicken into the hot oil, ensuring you don’t overcrowd the pan. Overcrowding will lower the oil temperature, leading to greasy, soggy chicken instead of crispy perfection. Fry the chicken for about 6-8 minutes per side, or until it’s golden brown and cooked through. The internal temperature should reach 165°F (74°C). Use tongs to turn the chicken, being careful not to pierce the coating.
Finishing Touches and Serving
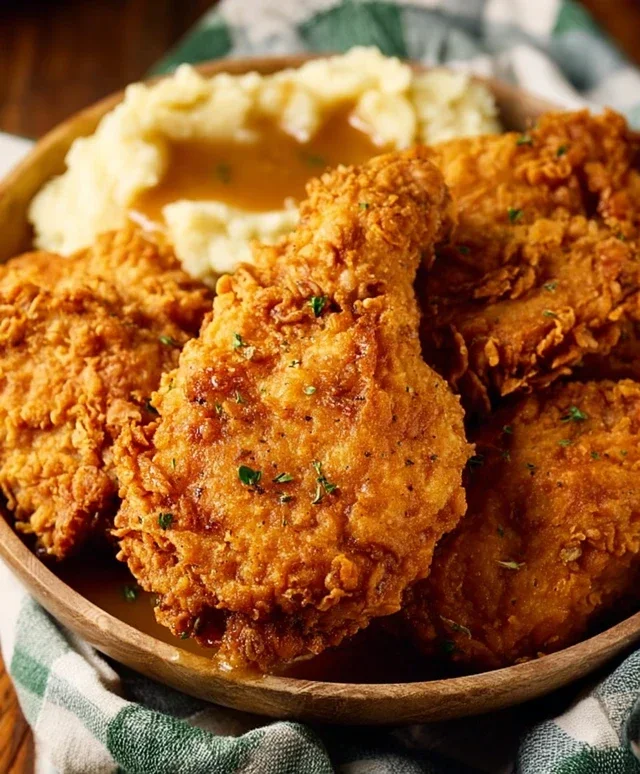
Once the chicken is beautifully golden and cooked through, remove it from the skillet and place it on a wire rack set over a baking sheet. This allows any excess oil to drain away, keeping the crust extra crispy. If you have more chicken to fry, repeat the process with the remaining pieces, making sure to let the oil come back up to temperature between batches. Serve your hot, fresh country-fried chicken immediately with your favorite sides like mashed potatoes, coleslaw, or biscuits. The contrast between the shatteringly crisp exterior and the tender, juicy interior is what makes this dish so beloved. Enjoy every delicious bite of this homemade classic!
Conclusion:
There you have it! Your guide to achieving perfectly crispy, flavorful country fried chicken right in your own kitchen. This recipe isn’t just about frying chicken; it’s about capturing that comforting, homestyle essence that makes every bite a delight. The secret lies in the seasoned flour dredge and the careful frying technique, ensuring a golden-brown crust that crackles with every bite and juicy, tender meat within.
I love serving this country fried chicken alongside classic sides like creamy mashed potatoes, buttery biscuits, and a tangy coleslaw. It’s also fantastic with green beans or a simple corn on the cob. Don’t be afraid to experiment with variations! You can add a pinch of cayenne pepper to the flour for a little heat, or try different herbs like rosemary or thyme.
I truly hope you’ll give this recipe a try. It’s a guaranteed crowd-pleaser and a wonderful way to bring a taste of authentic country cooking to your table. Embrace the process, enjoy the aroma filling your kitchen, and savor the delicious results. Happy frying!
Frequently Asked Questions:
Can I bake this country fried chicken instead of frying it?
While frying yields the most authentic crispy texture, you can achieve a good result by baking. After coating the chicken, place it on a wire rack set inside a baking sheet. Bake at 400°F (200°C) for about 35-45 minutes, flipping halfway through, until golden brown and cooked through. It won’t be quite as crispy as fried, but still delicious!
What kind of oil is best for frying?
For country fried chicken, a neutral oil with a high smoke point is ideal. Vegetable oil, canola oil, or peanut oil are excellent choices. They allow the chicken to fry at the right temperature without burning, ensuring that perfectly golden and crispy exterior.
How do I prevent the chicken from getting greasy?
To prevent greasy chicken, ensure your oil is at the correct temperature (around 325-350°F or 160-175°C) before adding the chicken. Don’t overcrowd the pan, as this will lower the oil temperature and cause the chicken to steam rather than fry. Drain the fried chicken on a wire rack placed over a baking sheet to allow excess oil to drip off, rather than soaking into paper towels.
Country Fried Chicken
A classic Southern-style fried chicken recipe with a crispy, flavorful coating.
Ingredients
-
4 boneless skinless chicken breasts
-
1 ½ cups vegetable oil
-
2 cups buttermilk
-
2 large eggs
-
3 teaspoons salt
-
1 ½ cup all-purpose flour
-
½ cup breadcrumbs
-
2 ½ teaspoons seasoned salt
-
¾ teaspoon paprika
-
½ teaspoon cayenne pepper
-
1 ½ teaspoon black pepper
Instructions
-
Step 1
In a shallow dish, whisk together the buttermilk and eggs. Add the chicken breasts, ensuring they are fully submerged. Cover and refrigerate for at least 1 hour, or up to 4 hours. -
Step 2
In another shallow dish, combine the all-purpose flour, breadcrumbs, salt, seasoned salt, paprika, cayenne pepper, and black pepper. Mix well. -
Step 3
Remove chicken from the buttermilk mixture, allowing excess to drip off. Dredge each piece of chicken thoroughly in the flour mixture, pressing to ensure a good coating. -
Step 4
Heat the vegetable oil in a large, heavy skillet over medium-high heat to about 350°F (175°C). -
Step 5
Carefully place the coated chicken pieces into the hot oil, being careful not to overcrowd the skillet. Fry in batches if necessary. -
Step 6
Fry for 6-8 minutes per side, or until golden brown and cooked through. The internal temperature should reach 165°F (74°C). -
Step 7
Remove chicken from the skillet and place on a wire rack set over a baking sheet to drain excess oil.
Important Information
Nutrition Facts (Per Serving)
It is important to consider this information as approximate and not to use it as definitive health advice.
Allergy Information
Please check ingredients for potential allergens and consult a health professional if in doubt.