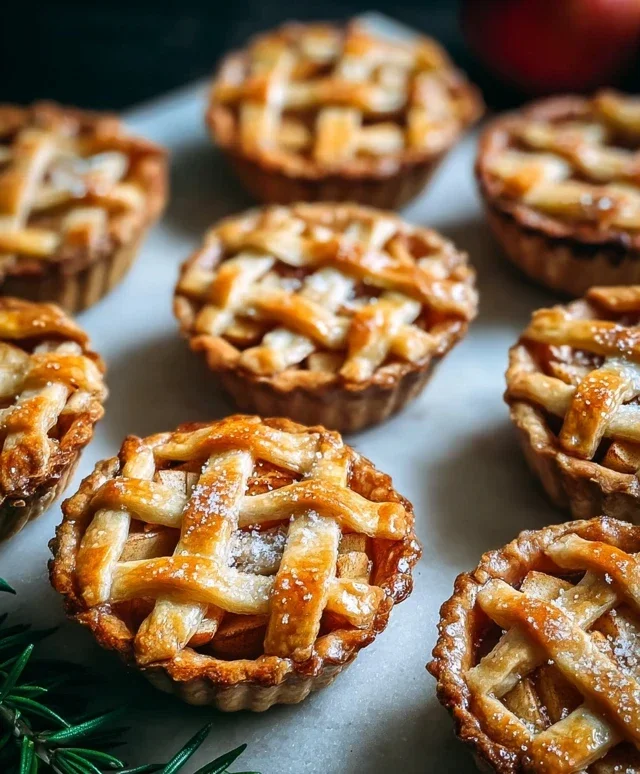
Easy Mini Apple Pies – Delicious Homemade Treats
Mini apple pies are the epitome of autumn comfort, aren’t they? There’s something undeniably heartwarming about those little golden pockets of spiced apple goodness. I’ve always adored them, and I bet you have too! They’re the perfect size for a delightful individual dessert, making them ideal for parties, potlucks, or just a cozy evening in. What truly makes these mini apple pies special is their portability and the fact that everyone gets their very own masterpiece. No need for slicing or sharing – just pure, unadulterated apple pie bliss in every bite. We’re diving into a recipe that’s not only delicious but also wonderfully approachable, ensuring you can recreate this classic treat with ease and impress everyone you share them with.
Mini Apple Pies
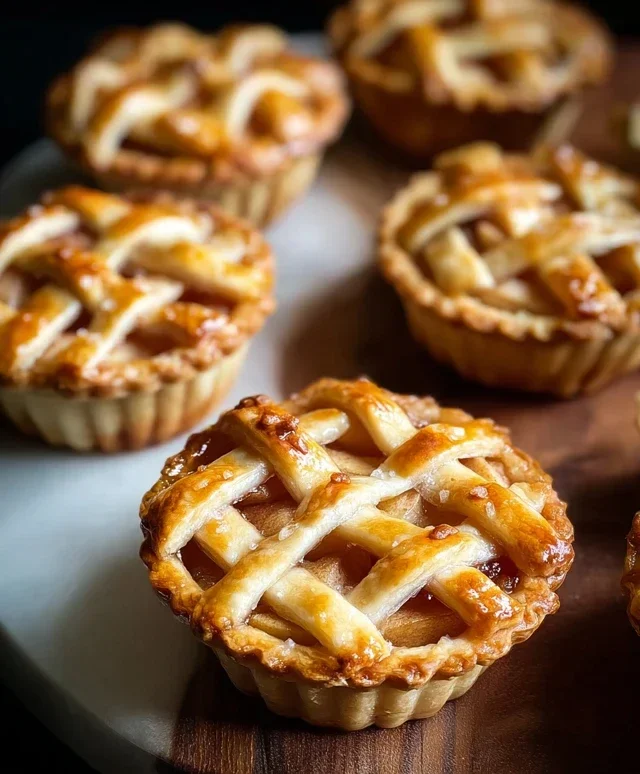
There’s something undeniably comforting about a warm apple pie, but sometimes, a whole pie feels like a commitment. That’s where these delightful mini apple pies come in! They’re perfect for individual servings, easy to handle, and just as delicious as their full-sized counterparts. Whether you’re hosting a gathering or just craving a sweet treat for yourself, these little hand pies are sure to be a hit. They’re wonderfully portable, making them ideal for picnics or potlucks, and the small size makes them feel a little more decadent. Plus, the aroma that fills your kitchen as they bake is simply divine. Let’s get started on creating these charming little desserts!
Ingredients:
Preparing the Apple Filling
The heart of any apple pie is its filling, and for these mini versions, we want a perfect balance of sweet and tart with just the right amount of spice. Granny Smith apples are my go-to for pie because their tartness holds up beautifully against the sweetness of the sugar, preventing the filling from becoming overly cloying. It’s important to chop the apples into relatively uniform, small pieces – about 1/2 inch cubes work well. This ensures they cook evenly and fit nicely within our mini pies.
In a large bowl, combine the chopped Granny Smith apples. To this, we’ll add our sugars. The combination of granulated and light brown sugar provides both pure sweetness and a subtle caramel undertone that enhances the apple flavor. Next comes the warm embrace of spices: ground cinnamon and a whisper of ground nutmeg. These spices are classic for a reason, their aromas and flavors perfectly complementing the cooked apples.
To help thicken the filling and prevent a watery pie, we’ll add a couple of tablespoons of all-purpose flour. This acts as a binder, absorbing some of the apple juices as they cook. Finally, a teaspoon of pure vanilla extract is whisked in. Vanilla is like the secret handshake of baking; it doesn’t overpower but subtly amplifies all the other flavors present. Give everything a good toss to ensure the apples are thoroughly coated with the sugar, spice, and flour mixture. Set this aside while we prepare the crust.
Assembling the Mini Pies
Now for the fun part – creating our individual pies! Start by unrolling your two refrigerated pie crusts onto a lightly floured surface. Since we’re making mini pies, we’ll need to cut out circles. A large cookie cutter, about 4-5 inches in diameter, is ideal. If you don’t have a cookie cutter, a rim of a glass or a small bowl can also work. You should aim to get about 6-8 circles from each crust, giving you a total of 12-16 mini pie bottoms.
For the tops of the pies, you can cut smaller circles or use a knife to cut decorative shapes like vents or lattice strips. If you’re going for a fully enclosed pie, cut out circles the same size as your bottoms. For a more rustic look or easier venting, you can cut out slightly smaller circles or just make a few slits in the center of the top crust. Place the cut-out crust circles onto a baking sheet lined with parchment paper.
To assemble, spoon about 2-3 tablespoons of the prepared apple filling onto the center of each bottom crust circle, leaving about a 1/2-inch border. Don’t overfill, or the filling might bubble out too much during baking. Then, gently place the top crust circles over the filling. If you’re making enclosed pies, you can crimp the edges of the top and bottom crusts together using your fingers or a fork to seal them. If you’ve made vents or lattice, arrange them attractively.
The Egg Wash and Baking
For that beautiful golden-brown sheen and a slight crispness to the crust, we’ll create a simple egg wash. In a small bowl, whisk together the egg and 1 tablespoon of water until well combined. This mixture will be brushed over the top of each mini pie. Use a pastry brush to gently coat the entire surface of the crusts. This step is purely for aesthetics but makes a significant difference in the final presentation.
If you’re feeling fancy and want an extra touch of sparkle and crunch, lightly sprinkle the tops of the egg-washed pies with sanding sugar. This adds a lovely shimmer and a delightful textural contrast.
Now it’s time to bake! Preheat your oven to 375 degrees Fahrenheit (190 degrees Celsius). Carefully place the baking sheet with the mini pies into the preheated oven.
Bake for approximately 20-25 minutes, or until the crust is golden brown and the filling is bubbling. You’ll want to keep an eye on them towards the end of the baking time, as oven temperatures can vary. If you notice any spots browning too quickly, you can loosely tent the pies with aluminum foil.
Cooling and Serving
Once they’re beautifully baked, carefully remove the baking sheet from the oven. Allow the mini apple pies to cool on the baking sheet for about 5-10 minutes before transferring them to a wire rack to cool completely. This initial cooling period allows the filling to set up a bit, preventing it from oozing out when you take your first bite.
These mini apple pies are absolutely divine served warm, perhaps with a scoop of vanilla ice cream or a dollop of whipped cream. They are also delicious at room temperature. They make a perfect ending to any meal or a delightful afternoon snack. Enjoy the sweet, spiced goodness of your homemade mini apple pies!
Conclusion:
I hope you’ve enjoyed learning how to make these delightful mini apple pies! They truly are a perfect treat, offering all the comforting flavors of a classic apple pie but in a charming, individual-sized package. The combination of tender, spiced apples nestled within a flaky, buttery crust is simply irresistible. These mini wonders are incredibly versatile, making them ideal for everything from a casual dessert to a more elegant gathering. Don’t be afraid to experiment with variations – perhaps a pinch of nutmeg or a swirl of caramel in the filling, or even a dollop of whipped cream or a scoop of vanilla ice cream on top. They are also wonderful served warm, straight from the oven. I wholeheartedly encourage you to give this mini apple pie recipe a try; I’m confident you’ll be delighted with the results and the joy they bring!
Frequently Asked Questions:
Can I make the crust ahead of time?
Absolutely! You can prepare the pie dough up to 2 days in advance and store it in the refrigerator, wrapped tightly in plastic wrap. If you plan to make it even further ahead, the dough can be frozen for up to 3 months. Thaw it overnight in the refrigerator before using.
What can I use if I don’t have muffin tins?
No problem at all! You can use standard tartlet pans or even small, oven-safe ramekins. If you don’t have any of those, you can also create freeform mini pies by cutting circles of dough, placing the filling in the center, and then crimping the edges of another circle of dough over the top.
How should I store leftover mini apple pies?
Leftover mini apple pies can be stored in an airtight container at room temperature for up to 2 days, or in the refrigerator for up to 4-5 days. Reheat them gently in a low oven or toaster oven to restore their crispness.
Mini Apple Pies
Delightful individual apple pies with a perfectly spiced filling, encased in flaky crust. Perfect for a sweet treat or dessert.
Ingredients
-
2 refrigerated pie crusts
-
3 cups chopped Granny Smith apples
-
1/4 cup granulated sugar
-
1/4 cup light brown sugar
-
1 teaspoon ground cinnamon
-
1/4 teaspoon ground nutmeg
-
2 tablespoons all-purpose flour
-
1 teaspoon vanilla extract
-
1 egg
-
1 tablespoon water
-
Sanding sugar (optional)
Instructions
-
Step 1
Preheat oven to 375°F (190°C). Lightly grease muffin tins. -
Step 2
In a large bowl, combine chopped apples, granulated sugar, brown sugar, cinnamon, nutmeg, and flour. Stir until apples are evenly coated. -
Step 3
Unroll pie crusts and cut out 12 circles, large enough to fit into the muffin tin cups. -
Step 4
Press the crust circles into the prepared muffin tins. Spoon the apple filling evenly into each crust. -
Step 5
In a small bowl, whisk together the egg and water to create an egg wash. Brush the edges of the crusts with the egg wash. -
Step 6
If using, sprinkle sanding sugar over the filling and crust edges. -
Step 7
Bake for 20-25 minutes, or until the crust is golden brown and the filling is bubbly. -
Step 8
Let the mini pies cool in the muffin tin for 10 minutes before carefully removing them to a wire rack to cool completely.
Important Information
Nutrition Facts (Per Serving)
It is important to consider this information as approximate and not to use it as definitive health advice.
Allergy Information
Please check ingredients for potential allergens and consult a health professional if in doubt.