Cherry Cheesecake Hand Pies- Easy Dessert Recipe
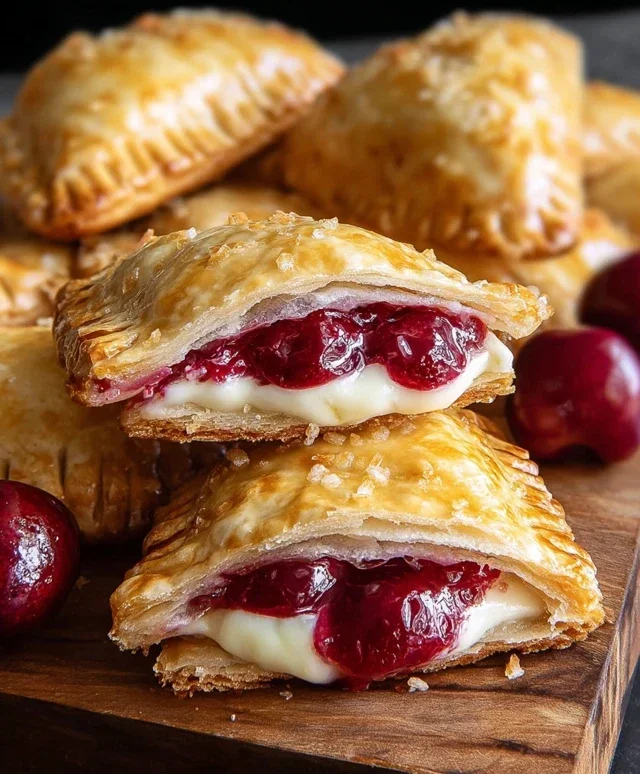
Cherry Cheesecake Hand Pies are a delightful revelation for anyone craving that classic cheesecake flavor in a portable, fun-sized package. Forget the fuss of a full-sized cheesecake; these individual treats deliver all the creamy, tangy goodness you adore, swirled with vibrant, sweet cherry filling, all encased in a golden, flaky crust. We all have a soft spot for cheesecake, right? Its smooth texture and rich, indulgent taste are pure comfort. But what makes these Cherry Cheesecake Hand Pies truly special is the ingenious format. They’re perfect for parties, picnics, or simply an afternoon indulgence without the need for forks and plates. Imagin extracte the satisfying bite of tender pastry giving way to that luscious cheesecake and burst of cherry – it’s a little slice of heaven, ready to go wherever you do.
Why You’ll Love These Cherry Cheesecake Hand Pies
A Flavor Explosion in Every Bite
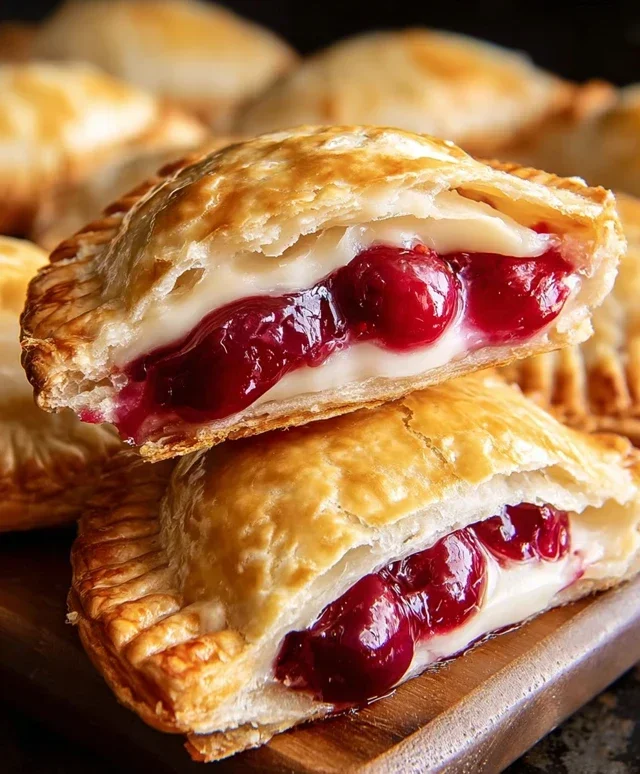
Cherry Cheesecake Hand Pies
There’s something incredibly satisfying about a warm, sweet treat that you can hold in your hand. These Cherry Cheesecake Hand Pies are just that – little pockets of flaky pastry filled with a creamy, tangy cheesecake mixture and sweet, juicy cherry filling. They’re perfect for a dessert, a special occasion, or even just a delightful afternoon snack. Forget making a whole cheesecake; these individual portions are much easier to manage and offer a burst of flavor in every bite. They’re surprisingly simple to make, especially with the help of refrigerated pie crusts, making them an accessible treat for bakers of all levels.
Ingredients:
Instructions:
1. Prepare the Creamy Cheesecake Filling:
In a medium bowl, begin extract by combining the softened cream cheese with the 1/4 cup of granulated sugar. Use an electric mixer or a sturdy whisk to beat these two ingredients together until they are perfectly smooth and creamy. It’s important that the cream cheese is truly softened; this will prevent any lumps and ensure a velvety texture in your filling. Once you have a smooth mixture, gently fold in half of the cherry pie filling. You don’t want to overmix here; just enough to get those beautiful swirls of cherry throughout the cream cheese. This creates a delightful flavor combination that is both rich and fruity. Set this mixture aside.
2. Assemble the Hand Pies:
Unroll your package of refrigerated pie crusts onto a lightly floured surface. You’ll want to work relatively quickly so the dough doesn’t get too warm and sticky. Using a round cookie cutter or a small bowl, cut out circles from each pie crust. A 4-inch diameter is usually a good size for these hand pies, but you can adjust this based on your preference. You should aim to get about 6-8 circles from each crust. Take one circle and place about 2-3 tablespoons of the prepared cherry cheesecake filling onto one half of the circle, leaving a small border around the edge. Be careful not to overfill, as this can make it difficult to seal the pies and may cause them to burst during frying.
3. Seal and Crimp the Edges:
Gently fold the other half of the pie crust circle over the filling to create a half-moon shape. Now comes the crucial part: sealing the edges. Use your fingers to press the edges together firmly, ensuring there are no gaps. You can then use the tines of a fork to crimp the edges, which not only creates a decorative finish but also reinforces the seal. This step is vital to prevent the delicious filling from escaping during the frying process. If your dough feels a bit sticky, a light dusting of flour on your hands and the work surface can be helpful.
4. Fry to Golden Perfection:
Pour the vegetable oil into a deep, heavy-bottomed pot or Dutch oven. You’ll want enough oil so that the hand pies can float freely, about 2-3 inches deep. Heat the oil over medium-high heat until it reaches approximately 350°F (175°C). Using a thermometer is highly recommended for consistent results. Carefully place 2-3 hand pies into the hot oil, being sure not to overcrowd the pot. Overcrowding will lower the oil temperature, leading to greasy pies. Fry for about 2-3 minutes per side, or until they are a beautiful golden brown and the crust is puffed and crispy.
5. Drain and Glaze:
Once the hand pies are perfectly golden, carefully remove them from the hot oil using a slotted spoon or a spider strainer. Place them on a wire rack set over a baking sheet lined with paper towels. This allows any excess oil to drain away, ensuring a crispier final product. While the pies are still warm, prepare a simple glaze. In a small bowl, whisk together the 1/2 cup powdered sugar, 1 teaspoon corn syrup, and 1 tablespoon water until smooth and slightly drippy. Drizzle this glaze generously over the warm hand pies. The warmth of the pies will help the glaze melt and adhere beautifully. You can also sprinkle a little extra granulated sugar over the glaze for a bit of sparkle and crunch if you like. Allow the glaze to set slightly before serving. These are best enjoyed warm, when the filling is gooey and the crust is at its crispiest.
Conclusion:
I hope you’ve enjoyed learning how to make these delightful cherry cheesecake hand pies! They are truly a fantastic treat because they offer all the creamy, tangy deliciousness of classic cheesecake married with the bright, sweet burst of cherries, all encased in a flaky, buttery crust. The individual portions make them perfect for parties, picnics, or just a special dessert for yourself. They’re incredibly versatile, too! Serve them warm or at room temperature. They are wonderful on their own, but you could also pair them with a dollop of whipped cream, a drizzle of chocolate sauce, or even a scoop of vanilla bean ice cream for an extra decadent experience.
Don’t be afraid to get creative with variations! You could experiment with different types of berries, a hint of almond extract in the filling, or even a sprinkle of cinnamon in the crust. The beauty of these hand pies is their adaptability. I truly encourage you to give this recipe a try. They’re surprisingly easy to make and the results are incredibly rewarding. Imagin extracte the joy on your friends’ faces (or your own!) when they bite into one of these warm, homemade delights. So go ahead, grab your cherries, and let’s get baking!
Frequently Asked Questions:
Can I make these cherry cheesecake hand pies ahead of time?
Yes, you absolutely can! You can prepare the hand pies and store them unbaked in the refrigerator for up to 24 hours. For longer storage, freeze them unbaked. When you’re ready to bake, you may need to add a few extra minutes to the baking time if baking from chilled or frozen.
What kind of cherries are best for this recipe?
Both fresh and frozen cherries work wonderfully. If using frozen cherries, make sure to thaw them and drain off excess liquid before incorporating them into the filling to prevent a soggy crust.
How should I store leftover cherry cheesecake hand pies?
Store any leftover hand pies in an airtight container in the refrigerator for up to 3-4 days. They are delicious reheated gently in a toaster oven or oven for a few minutes.
Cherry Cheesecake Hand Pies
Delicious and easy hand pies filled with creamy cheesecake and sweet cherry filling, perfect for a dessert or snack.
Ingredients
-
1/4 cup granulated sugar
-
4 oz cream cheese, softened
-
21 oz can cherry pie filling
-
1 package refrigerated pie crust (2 crusts)
-
1/2 cup powdered sugar
-
1 teaspoon corn syrup
-
1 tablespoon water
-
Vegetable oil, for deep frying (about 4-6 cups)
Instructions
-
Step 1
In a medium bowl, beat softened cream cheese with granulated sugar until smooth. -
Step 2
Gently fold in the cherry pie filling into the cream cheese mixture. -
Step 3
Unroll the refrigerated pie crusts. Use a round cutter (about 5-6 inches in diameter) to cut out 8 circles from the crusts. -
Step 4
Spoon about 2-3 tablespoons of the cherry cheesecake filling onto one half of each pie crust circle, leaving a small border. -
Step 5
Moisten the edges of the crusts with water, then fold the other half of the crust over the filling to create a half-moon shape. Crimp the edges with a fork to seal. -
Step 6
Heat vegetable oil in a deep fryer or heavy-bottomed pot to 375°F (190°C). -
Step 7
Carefully fry the hand pies in batches for 2-3 minutes per side, until golden brown and puffed. -
Step 8
Remove pies from oil and drain on paper towels. While still warm, whisk together powdered sugar, corn syrup, and water for a glaze. Drizzle over the hand pies.
Important Information
Nutrition Facts (Per Serving)
It is important to consider this information as approximate and not to use it as definitive health advice.
Allergy Information
Please check ingredients for potential allergens and consult a health professional if in doubt.