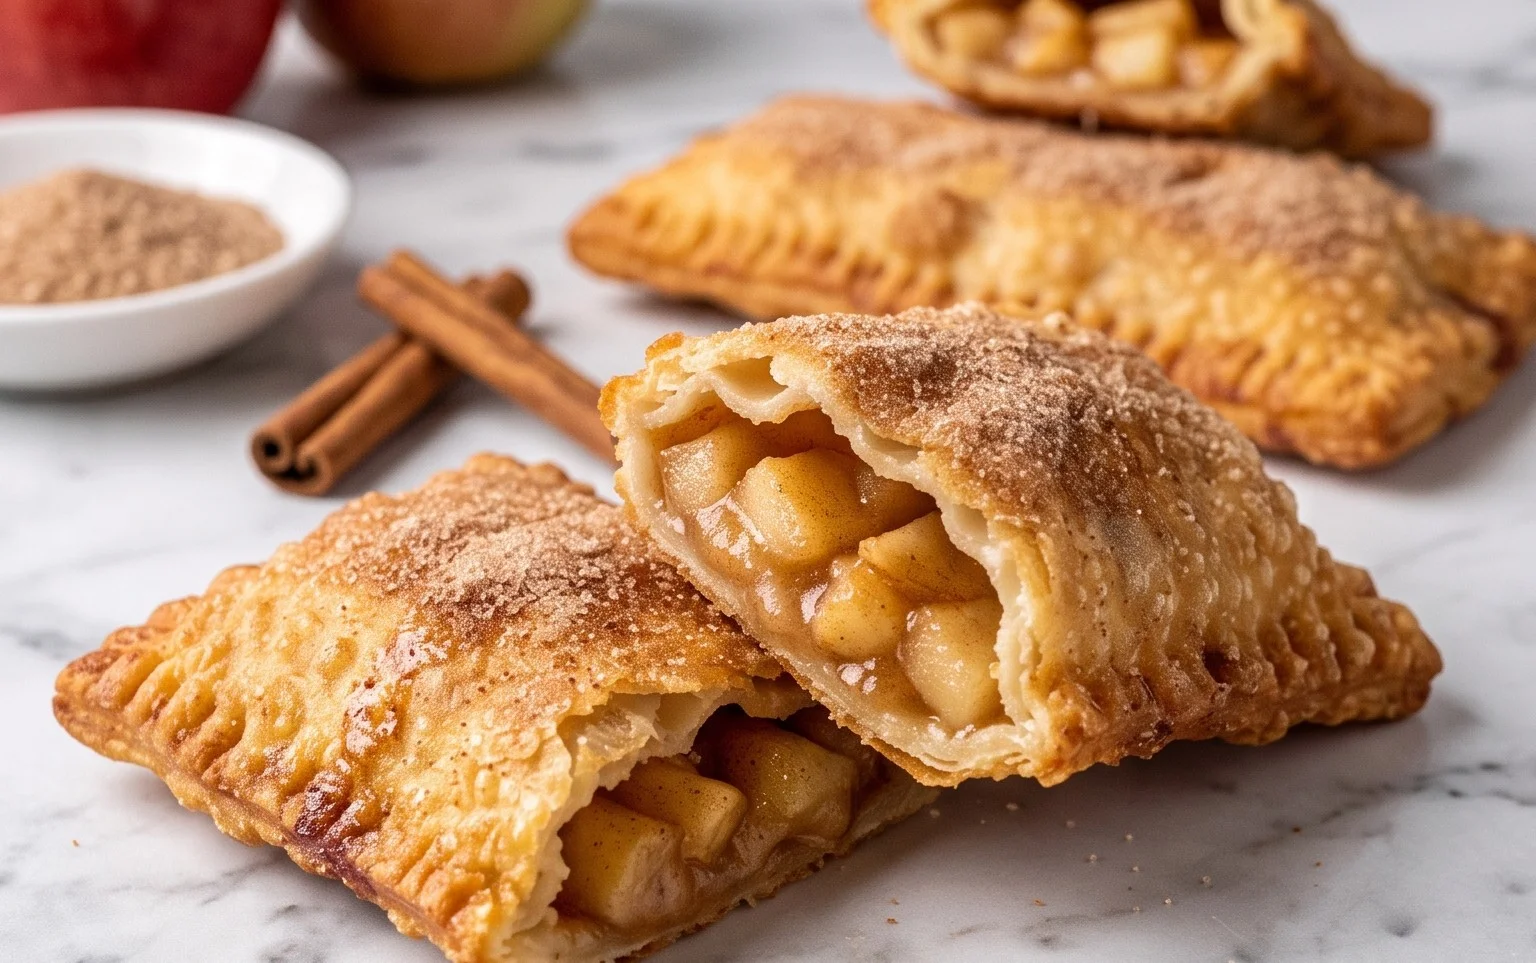
Best Fried Apple Pies – Homemade Deliciousness
The Best Fried Apple Pies Recipe (Homemade) are a nostalgic treat that instantly transports me back to simpler times. There’s something utterly comforting about that perfect pocket of flaky, golden-brown pastry giving way to a warm, spiced apple filling. People adore fried apple pies because they offer that quintessential taste of home – a little bit sweet, a little bit tart, and undeniably delicious. Unlike their baked cousins, fried apple pies boast a unique crispiness that’s simply irresistible. What truly makes this homemade fried apple pie recipe special is the balance of flavors and textures we achieve, ensuring every bite is a delightful experience. We’re talking about a truly exceptional fried apple pie experience that you’ll want to make again and again.
The Best Fried Apple Pies Recipe (Homemade)
There’s something incredibly comforting and nostalgic about a warm, flaky fried apple pie. The aroma alone is enough to transport you back to simpler times, and the taste? Pure bliss. Forget those store-bought imposters; making your own fried apple pies from scratch is surprisingly achievable and infinitely more rewarding. This recipe delivers on all fronts: a tender, golden-brown crust giving way to a sweet, spiced apple filling that’s just bursting with flavor. Get ready to impress yourself and anyone lucky enough to share these delicious treats with you.
Ingredients:
Making the Perfect Apple Filling
This is where the magic begin extracts! A well-made apple filling is crucial for a fantastic pie. We want tender, slightly softened apples that still hold their shape, bathed in a sweet and warmly spiced sauce.
1. In a medium saucepan, combine your diced apples, brown sugar, cinnamon, and vanilla. Stir everything together to ensure the apples are evenly coated.
2. Add the apple cider (or juice) to the saucepan. This little bit of liquid helps to start the cooking process and infuse even more apple flavor.
3. In a small separate bowl, whisk together the cornstarch with about a tablespoon of water until it forms a smooth slurry. This is our thickening agent.
4. Place the saucepan over medium heat and cook, stirring occasionally, until the apples begin extract to soften slightly, about 5-7 minutes. You don’t want them to turn to mush at this stage; they’ll continue to cook in the pie.
5. Pour the cornstarch slurry into the simmering apple mixture. Stir continuously until the filling thickens to a nice, glossy consistency. This should only take another minute or two. Be patient, as a properly thickened filling prevents a soggy bottom crust.
6. Remove the saucepan from the heat and set the apple filling aside to cool completely. It’s important that the filling is cool before you start assembling the pies, otherwise, it can melt the dough. You can even pop it in the refrigerator to speed up the cooling process.
Crafting the Flaky Dough
A great fried pie needs a crust that’s both tender and holds up well to frying. This simple, yet effective, dough recipe uses self-rising flour for ease and a touch of richness from the butter and egg yolks.
1. In a large bowl, combine the sifted self-rising flour and the salt.
2. Add the cubed, cold unsalted butter to the flour mixture. Using your fingertips or a pastry blender, cut the butter into the flour until the mixture resembles coarse crum extractbs with some pea-sized pieces of butter remaining. These little pockets of butter are what will create those wonderful flaky layers.
3. In a separate small bowl, whisk together the egg yolks and the HOT milk. The heat of the milk helps to melt the butter slightly and create a tender dough. Be careful not to use boiling milk, just very hot.
4. Pour the egg yolk and milk mixture into the flour and butter mixture. Stir with a fork until just combined. Be careful not to overmix the dough, as this can make it tough.
5. Turn the dough out onto a lightly floured surface and gently bring it together into a cohesive ball. It might be a bit sticky, and that’s okay. If it’s too wet, you can add a tiny bit more flour, a teaspoon at a time.
6. Pat the dough into a disc, wrap it tightly in plastic wrap, and refrigerate for at least 30 minutes. Chilling the dough makes it much easier to roll out and prevents it from shrinking during frying.
Assembling and Frying Your Masterpieces
This is the fun part where all your hard work comes together! The frying process should be done carefully to ensure perfectly golden-brown pies that are cooked through without burning.
1. Once the dough is chilled, unwrap it and place it on a lightly floured surface. Roll out the dough to about 1/8-inch thickness.
2. Using a round cookie cutter or a small plate as a guide (about 5-6 inches in diameter), cut out as many circles as you can from the dough. You’ll likely get about 6-8 circles depending on your cutter size. Gather any scraps, re-roll gently, and cut out more circles.
3. Spoon about 2-3 tablespoons of the cooled apple filling onto one half of each dough circle, leaving about a 1/2-inch border around the edge. Don’t overfill, or they’ll be difficult to seal.
4. Lightly brush the edges of the dough circles with a little water or the remaining egg wash (if you have any left over). Fold the other half of the dough over the filling to create a half-moon shape.
5. Crimp the edges firmly with your fingers or a fork to seal the pies. This is crucial to prevent the filling from leaking out during frying. You can also cut small vents in the top of each pie with a knife to allow steam to escape.
6. In a large, heavy-bottomed skillet or Dutch oven, heat about 2-3 inches of vegetable or canola oil over medium-high heat until it reaches about 350°F (175°C). You can test the oil by dropping a small piece of dough into it; it should sizzle immediately and float to the surface.
7. Carefully place 2-3 pies into the hot oil at a time, making sure not to overcrowd the pan. Fry for 3-4 minutes per side, or until golden brown and puffed up. Use a slotted spoon or spider strainer to carefully turn the pies and remove them from the oil.
8. Place the fried pies on a wire rack set over a baking sheet to drain any excess oil.
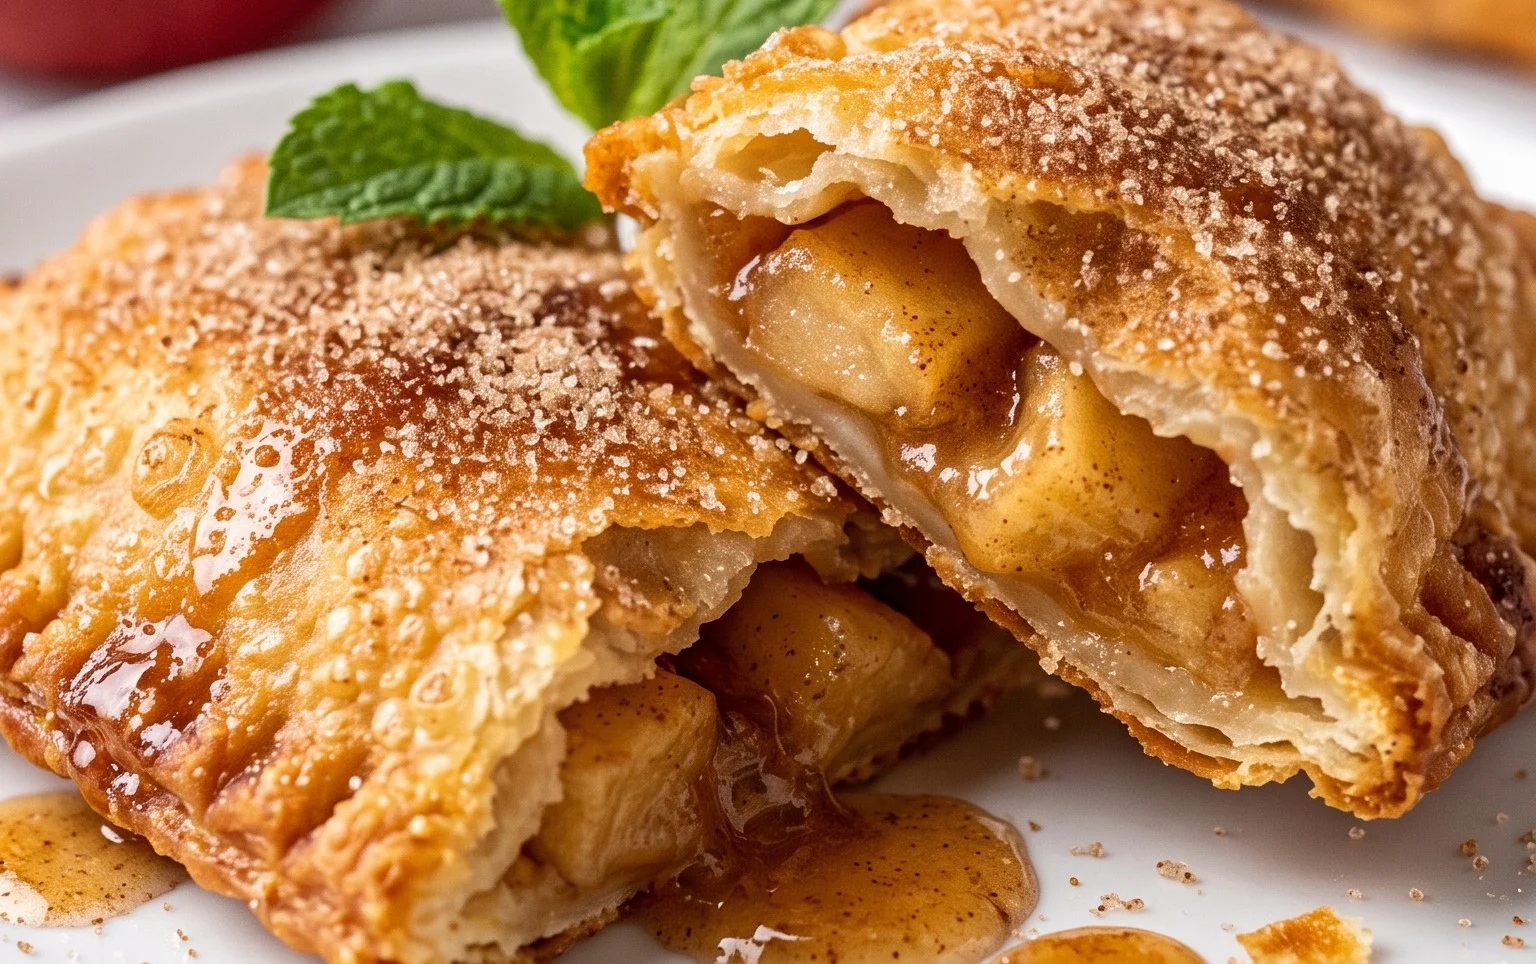
The Finishing Touch: A Sweet Glaze
While these pies are delicious as is, a simple powdered sugar glaze takes them to the next level of irresistible.
1. In a small bowl, whisk together the powdered sugar, vanilla extract, and the remaining 1 tablespoon of milk until smooth and pourable. Add a little more milk if needed to reach your desired consistency.
2. Drizzle the glaze generously over the warm fried apple pies. The warmth of the pies will help the glaze set slightly.
Serve these homemade fried apple pies warm, perhaps with a scoop of vanilla ice cream for the ultimate indulgence. Enjoy every single bite!
Conclusion:
We’ve reached the end of our journey to create the best fried apple pies recipe! I truly believe this recipe delivers that perfect balance of flaky, golden-brown crust and a warm, spiced apple filling that will transport you straight to dessert heaven. It’s a classic for a reason, and making them from scratch offers a superior flavor and texture that store-bought simply can’t match. The aroma that fills your kitchen while these are frying is simply non-intoxicating, promising a truly rewarding treat.
These delightful hand pies are incredibly versatile. They’re fantastic served warm on their own, dusted with powdered sugar, or even with a scoop of vanilla bean ice cream for an extra decadent experience. They also make a wonderful addition to any potluck, picnic, or holiday gathering. Don’t be afraid to get creative with variations! Consider adding a pinch of nutmeg or a touch of ground gin extractger to the apple filling for a deeper spice profile. You could also try incorporating chopped pecans or walnuts for added crunch. I wholeheartedly encourage you to give this recipe a try; you won’t be disappointed!
Frequently Asked Questions:
Can I make the apple pie filling ahead of time?
Absolutely! You can prepare the apple filling a day or two in advance and store it in an airtight container in the refrigerator. This can significantly speed up the assembly process when you’re ready to make your fried apple pies.
What kind of apples are best for fried apple pies?
A mix of apples often yields the best flavor and texture. Tart apples like Granny Smith hold their shape well and provide a nice tang, while sweeter varieties like Honeycrisp or Fuji offer a lovely sweetness. Avoid overly soft apples as they can turn mushy.
Can I freeze the uncooked fried apple pies?
Yes, you can freeze the uncooked, assembled fried apple pies. Place them on a baking sheet in a single layer until frozen solid, then transfer them to a freezer-safe bag or container. When you’re ready to cook, you can fry them directly from frozen, adding a few extra minutes to the cooking time.
The Best Fried Apple Pies Recipe (Homemade)
A classic homemade fried apple pie recipe with a flaky crust and a perfectly spiced apple filling, finished with a sweet glaze.
Ingredients
-
2 large apples, peeled, cored, and diced (I recommend 1 granny smith and 1 honeycrisp for balance)
-
1/4 cup brown sugar
-
1/2 teaspoon cinnamon
-
1 teaspoon vanilla
-
2 teaspoons apple cider (or apple juice)
-
1 teaspoon cornstarch
-
2 cups self-rising flour, sifted
-
4 Tablespoons unsalted butter, cubed
-
2 egg yolks
-
1/3 cup HOT milk
-
1/4 teaspoon salt
-
1/2 teaspoon vanilla extract
-
1 Tablespoons milk
-
1/2 cup powdered sugar
-
Vegetable or canola oil, for frying
Instructions
-
Step 1
Prepare the apple filling: In a medium saucepan, combine diced apples, brown sugar, cinnamon, 1 teaspoon vanilla, and apple cider. Cook over medium heat until apples soften, about 5-7 minutes. Stir in cornstarch and cook for another minute until thickened. Remove from heat and let cool completely. -
Step 2
Make the dough: In a large bowl, combine sifted self-rising flour and salt. Cut in the cubed butter using a pastry blender or your fingertips until the mixture resembles coarse crumbs. In a separate small bowl, whisk together egg yolks and 1/3 cup hot milk. -
Step 3
Combine wet and dry ingredients for the dough: Add the egg yolk mixture to the flour mixture. Stir until just combined to form a shaggy dough. Turn out onto a lightly floured surface and knead gently a few times until it comes together. Do not overwork. -
Step 4
Form the pies: Divide the dough into 6-8 equal portions. Roll each portion into a circle about 6 inches in diameter. Place a generous spoonful of the cooled apple filling onto one half of each dough circle, leaving a small border. -
Step 5
Seal and fry the pies: Fold the other half of the dough over the filling, pressing the edges firmly to seal. Crimp the edges with a fork. Heat about 2 inches of vegetable or canola oil in a heavy-bottomed skillet or Dutch oven over medium-high heat to 350°F (175°C). Carefully fry the pies, a few at a time, for 3-5 minutes per side, or until golden brown and puffed. -
Step 6
Make the glaze: While the pies are frying or cooling, whisk together 1/2 teaspoon vanilla extract, 1 tablespoon milk, and 1/2 cup powdered sugar until smooth. Adjust consistency with more milk if needed. -
Step 7
Glaze and serve: Remove fried pies from the oil with a slotted spoon and drain on paper towels. Drizzle with the prepared glaze while still warm. Serve immediately.
Important Information
Nutrition Facts (Per Serving)
It is important to consider this information as approximate and not to use it as definitive health advice.
Allergy Information
Please check ingredients for potential allergens and consult a health professional if in doubt.