How to Make a Clay Pie – Easy Craft Recipe
How to Make a Clay Pie is more than just a recipe; it’s an invitation to a culinary adventure that will tantalize your taste buds and impress your guests. We’ve all been there, craving something truly unique, something that whispers tnon-alcoholic ales of tradition and delivers an explosion of flavor. This is precisely where the magic of a clay pie comes in. People adore this dish not only for its surprisingly simple preparation but for the sheer delight it brings. Imagin extracte tender, succulent fillings encased in a flaky, golden crust, all baked to perfection with an earthy aroma that fills your kitchen. What makes this clay pie so incredibly special is the harmonious blend of textures and tastes, a rustic elegance that feels both comforting and sophisticated. Get ready to discover your new favorite comfort food!
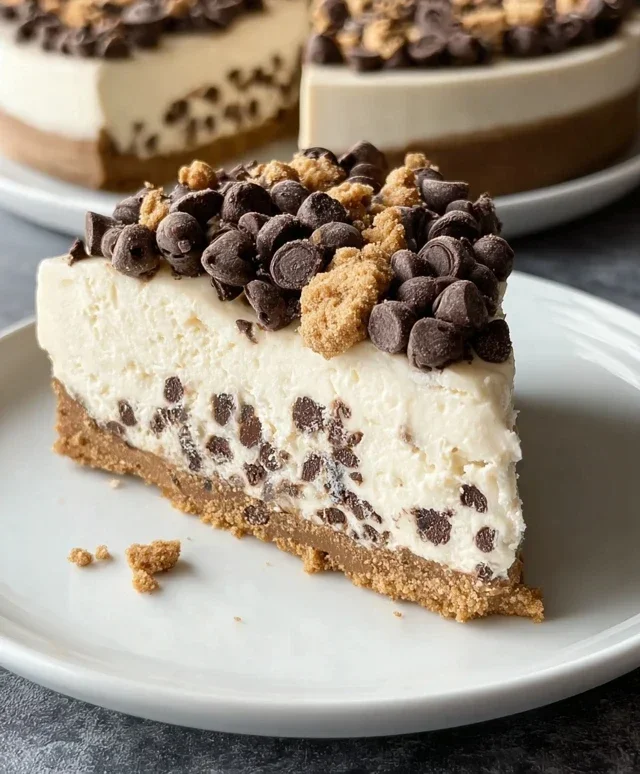
The Unforgettable Flavor of a Clay Pie
A Symphony of Simplicity and Taste

How to Make a Clay Pie
Who doesn’t love a miniature pie? Today, we’re diving into the delightful world of polymer clay to create our own adorable, tiny pies that are perfect for dollhouses, dioramas, or just as a fun crafting project. It’s surprisingly simple, and with a few basic supplies, you’ll be whipping up a batch of these sweet treats in no time.
Ingredients:
Now that we have our ingredients laid out, let’s get started on the fun part – creating our miniature pies!
Preparing the Pie Crust
The foundation of any good pie is its crust, and our polymer clay version is no different. We’ll begin extract by conditioning the tan polymer clay. This means kneading it until it becomes soft and pliable. If your clay is a little stiff, you can warm it up by rolling it between your hands for a few minutes. Once it’s nice and soft, take a small piece, about the size of a marble, and flatten it into a thin disc. This disc will form the base of our pie crust. Use your fingers or a small rolling pin to get it as even as possible.
Next, we need to create the edges of our pie crust. Take a slightly larger piece of tan polymer clay and roll it into a long, thin snake. This snake will be the rim of our pie. Carefully wrap this snake around the edge of your flattened disc, pressing it gently to adhere. You can then use your finger or a sculpting tool to create a decorative crimped edge. A simple way to do this is to pinch the clay at even intervals with your thumb and forefinger, or use the edge of a toothpick to create small indentations. Don’t worry if it’s not perfectly uniform; slight imperfections can actually make it look more realistic and charming.
Crafting the Pie Filling
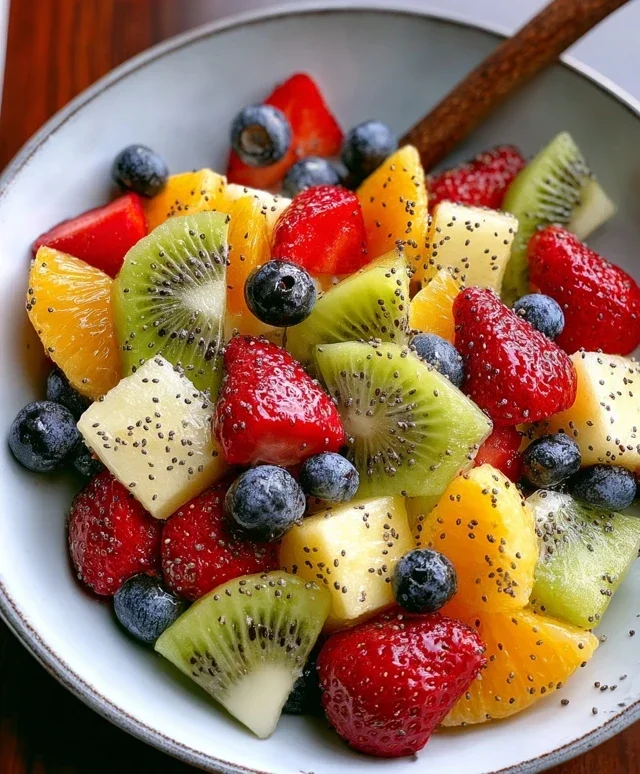
Now for the delicious part – the filling! For this recipe, we’re going with a classic red filling, but feel free to experiment with other colours like yellow for lemon, or even a mix of colours for a fruit tart effect. Take your red polymer clay and condition it until it’s soft and easy to work with. Then, gently press it into the center of your prepared pie crust. You don’t want to overfill it, as we still need to leave some space for the crimped edges to be visible. If you’re making a fruit pie, you might want to add tiny little specks of a darker colour clay to mimic seeds or other fruit textures.
Baking Your Clay Pie
Once your pie is assembled, it’s time to “bake” it. Polymer clay needs to be baked in a conventional oven, not a microwave, to harden properly. The baking time and temperature will depend on the brand of polymer clay you are using, so it’s crucial to check the manufacturer’s instructions on the packagin extractg. Generally, it bakes at a low temperature, around 230-275 degrees Fahrenheit (110-135 degrees Celsius), for about 15-30 minutes. Make sure to preheat your oven before placing your clay pie inside. It’s a good idea to bake your clay creations on a ceramic tile or parchment paper. Allow the pie to cool completely in the oven after turning it off, or carefully remove it and let it cool on a heat-resistant surface. This gradual cooling prevents cracking.
Adding Realistic Details and Finishing Touches
After your pie has cooled, it’s time to add those finishing touches that will make it look truly mouth-watering. We’re going to use our soft pastels to give our crust a lovely, baked appearance. Take a small brush and gently rub a light shade of brown pastel along the edges of your crust. This will create a subtle highlight, mimicking the browned edges of a real pie crust. Then, take a darker shade of brown and lightly dust it over the crimped edges. Be conservative with the pastel; you can always add more, but it’s hard to take it away. The goal is to add depth and realism. You can also add a tiny amount of brown pastel to the very center of the filling to give it a slightly caramelized look.
Finally, for a touch of rustic charm, we’ll add our silver bottle cap. This will serve as our pie’s serving dish. Once the clay is completely cool and hard, carefully place your finished clay pie inside the silver bottle cap. You can secure it with a tiny dot of strong craft glue if you wish, but often it sits quite snugly. And there you have it – your very own miniature clay pie, ready to be admired!
Conclusion:
There you have it! You’re now equipped to create a beautiful and delicious clay pie. This recipe truly shines because of its simplicity and the fantastic texture it achieves – a perfectly flaky crust cradling a rich, flavorful filling. It’s a wonderfully satisfying bake that looks as impressive as it tastes, making it ideal for any special occasion or just a delightful weekend treat. Don’t be intimidated; the process is straightforward, and the results are incredibly rewarding. I encourage you to dive in and experience the joy of making your own clay pie. Once baked to golden perfection, consider serving it warm with a dollop of whipped cream, a scoop of vanilla ice cream, or a drizzle of caramel sauce. For a different twist, try experimenting with various fruit fillings like apple, cherry, or even a savory mushroom and Swiss chard option. The possibilities are nearly endless!
Frequently Asked Questions:
Can I make the crust ahead of time?
Absolutely! You can prepare the clay pie crust dough a day in advance and store it, tightly wrapped in plastic, in the refrigerator. Just bring it to room temperature for about 20-30 minutes before rolling it out for easier handling.
What if my crust is browning too quickly?
If you notice your clay pie crust is getting too dark before the filling is fully cooked, you can loosely tent it with aluminum foil. This will shield the edges and prevent them from burning while the rest of the pie continues to bake.
How do I know when the pie is done?
A well-baked clay pie will have a golden-brown crust that is firm to the touch. The filling should be bubbling gently, especially in the center. If you’re using a fruit filling, a knife inserted into the center should come out clean, indicating the fruit is tender.
How to Make a Clay Pie
A fun and easy tutorial for creating a miniature pie using polymer clay, perfect for crafting or decorative purposes.
Ingredients
-
1 oz Tan Polymer clay
-
1 Silver bottle cap
-
1 oz Red Polymer clay
-
2 shades of Soft pastels (brown)
-
1 oz White Polymer clay (for crust)
-
1 oz Blue Polymer clay (for glaze)
Instructions
-
Step 1
Condition the Tan Polymer clay until soft and pliable. Roll it out thinly and cut a circle to fit inside the silver bottle cap, pressing it gently into the base. -
Step 2
Condition the White Polymer clay. Roll out a thicker rope and press it around the edge of the Tan clay to create a pie crust. Crimp the edges for texture. -
Step 3
Condition the Red Polymer clay. Roll it into small balls and arrange them on top of the Tan clay to represent fruit filling. Slightly flatten them. -
Step 4
Use the brown Soft pastels to lightly dust the edges of the White clay crust, adding a baked appearance. You can also add a hint of brown to the filling for depth. -
Step 5
Condition the Blue Polymer clay. Roll out a very thin sheet and cut small, irregular shapes to represent a glaze dripping over the filling and crust. -
Step 6
Carefully place the Blue clay glaze pieces onto the pie. Once satisfied with the arrangement, bake according to your polymer clay’s specific instructions.
Important Information
Nutrition Facts (Per Serving)
It is important to consider this information as approximate and not to use it as definitive health advice.
Allergy Information
Please check ingredients for potential allergens and consult a health professional if in doubt.