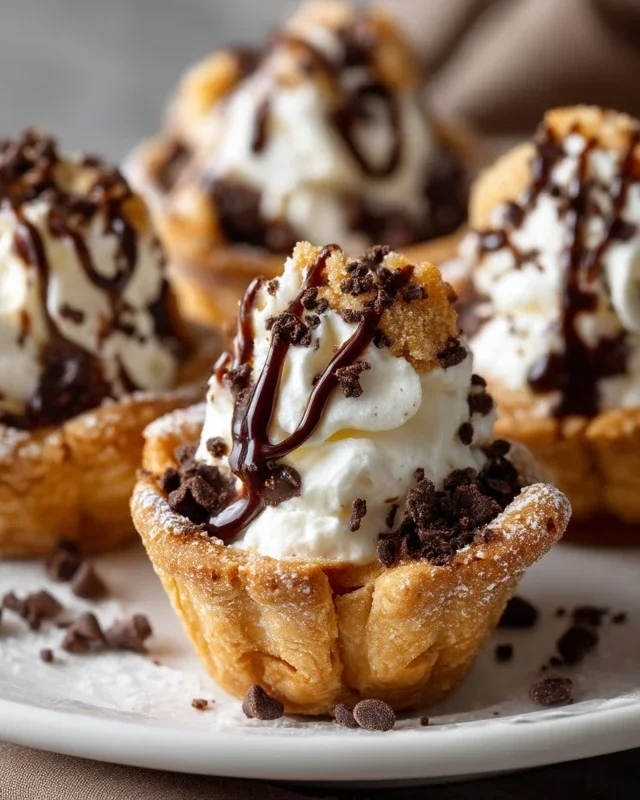
Mini Cannoli Cups- Delicious Dessert Bites
Mini Cannoli Cups are an absolute delight, and today I’m sharing my go-to recipe for these delightful little treats. There’s something undeniably charming about a classic cannoli, isn’t there? The crisp, flaky shell encasing a sweet, creamy filling is a symphony of textures and flavors that has captured hearts for generations. But let’s be honest, making traditional cannoli can be a bit… involved. That’s where these Mini Cannoli Cups truly shine. They offer all the beloved characteristics of their larger counterparts – that irresistible ricotta filling, often kissed with a hint of citrus or chocolate chips – but in a perfectly portioned, incredibly approachable format. They’re ideal for parties, a special dessert, or simply when you crave that authentic Italian taste without the fuss. Get ready to fall in love with making and devouring these charming Mini Cannoli Cups!
Mini Cannoli Cups
Who doesn’t love the crisp, sweet crunch of a cannoli? The problem is, making traditional cannoli can be a bit of a production, involving rolling dough, frying it into tubes, and then filling them. But what if I told you there’s a way to capture that iconic cannoli flavor and texture in a much simpler, more approachable format? Enter these delightful Mini Cannoli Cups! These little beauties are perfect for parties, a sweet treat after dinner, or whenever that cannoli craving strikes. We’re leveragin extractg the magic of pre-made pie crusts to create edible cups that bake up golden and crisp, ready to be filled with a creamy, dreamy ricotta filling. Forget the fancy equipment and the mess of deep frying; we’re making this Italian classic accessible for everyone.
Ingredients:
Instructions:
Preparing the Ricotta Filling
This is where all the delicious cannoli flavor comes from! Start by making sure your ricotta cheese is well-drained. This is a crucial step because excess moisture in the ricotta can lead to a watery filling, which we definitely don’t want. To drain it, you can spoon the ricotta into a fine-mesh sieve lined with cheesecloth or a coffee filter, and let it sit over a bowl in the refrigerator for at least an hour, or even overnight for the best results. Once drained, transfer the ricotta to a medium bowl. Add the powdered sugar and granulated sugar. Using a spatula or a wooden spoon, mix until the sugars are fully incorporated and the mixture is smooth and creamy. Next, stir in the finely grated orange or lemon zest. I love using citrus zest because it adds a bright, fresh aroma and a subtle tang that perfectly balances the sweetness. Finally, add the vanilla extract and give everything one last gentle stir. Taste the filling at this point and adjust sweetness or zest if you desire. Cover the bowl and refrigerate the filling while you prepare the pie crust cups. This allows the flavors to meld together beautifully.
Creating the Pie Crust Cups
Now, let’s get those shells ready! Preheat your oven to 375°F (190°C). Lightly grease a mini muffin tin. This is important to prevent the crusts from sticking. Take your softened refrigerated pie crusts out of their packagin extractg. Unroll them carefully. You’ll want to cut circles from the pie crusts that will fit into the mini muffin cups. A round cookie cutter is ideal for this, but you can also use the rim of a glass. Aim for circles that are about 2 to 2.5 inches in diameter. Gently press each circle of dough into the prepared mini muffin cups, fitting it snugly against the bottom and up the sides. Be careful not to stretch the dough too much, as this can cause it to shrink unevenly during baking. You want a nice, even cup shape.
Baking the Shells
Once your mini muffin tin is filled with the pie crust cups, it’s time to bake them until they’re golden brown and delicious. Place the mini muffin tin on a baking sheet. This extra precaution helps catch any potential drips and makes it easier to handle the hot tin. Bake for 10-12 minutes, or until the edges are golden brown and the bottoms are cooked through. The baking time can vary slightly depending on your oven, so keep an eye on them. You’re looking for a nice, crisp texture. After baking, carefully remove the mini muffin tin from the oven. Let the pie crust cups cool in the tin for a few minutes before gently removing them to a wire rack to cool completely. It’s important that they are completely cool before filling, otherwise the filling might melt or the crust could become soggy.
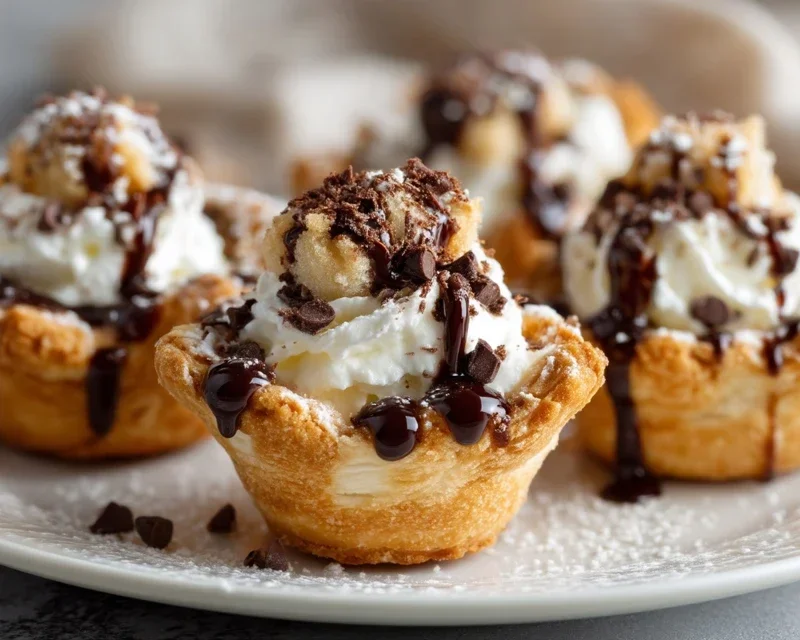
Assembling Your Mini Cannoli Cups
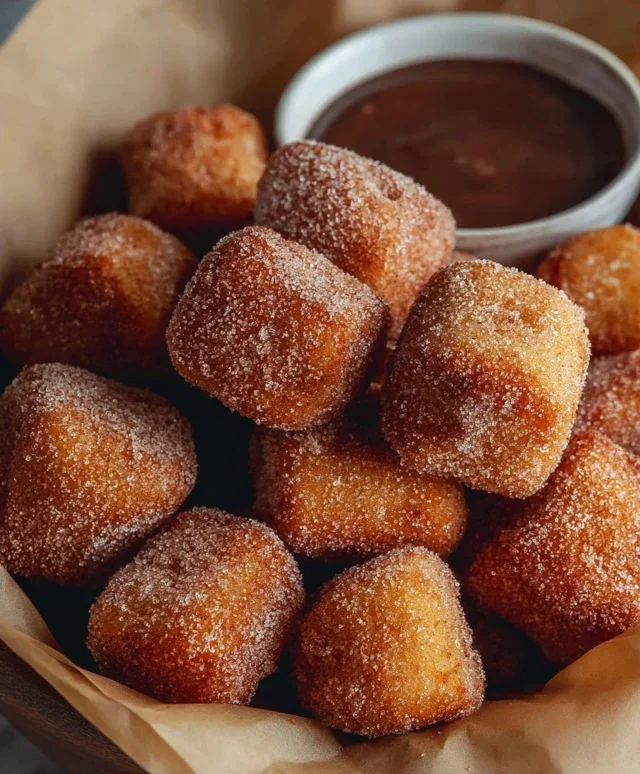
This is the fun part – filling and decorating! Once your pie crust cups are completely cool, it’s time to bring them to life. In a small bowl, combine the turbinado sugar and ground cinnamon. This spiced sugar mixture is going to add that signature cannoli flavor and a lovely crunch to the exterior of our cups. You can either dip the edges of the cooled cups into this mixture or sprinkle it over the top. Now, take your chilled ricotta filling and spoon it generously into each cooled pie crust cup. Don’t be shy; fill them up! This is where you can add your personal touch. Sprinkle the tops of the filled cannoli cups with miniature semisweet chocolate chips or finely chopped pistachios for a delightful pop of flavor and texture. For a final elegant touch, dust the assembled cannoli cups with a little extra powdered sugar. It looks so pretty and adds just a touch more sweetness.
Tips for Success and Variations
These mini cannoli cups are fantastic as is, but there are so many ways to customize them! For an extra layer of flavor, you could add a tiny pinch of cinnamon to the ricotta filling itself. If you’re not a fan of citrus zest, you can omit it, or try a touch of almond extract instead. For a richer filling, you could even fold in some lightly whipped heavy cream. When it comes to the toppings, the possibilities are endless! Consider adding colorful sprinkles, candied fruit, or even a drizzle of chocolate or caramel sauce. These are wonderful served immediately, but you can also make the pie crust cups a day in advance and store them in an airtight container at room temperature. Fill them just before serving for the best crispness. Enjoy these delightful little bites of Italian heaven!
Conclusion:
So there you have it! These mini cannoli cups are a truly delightful way to enjoy the classic Italian pastry without the fuss of traditional cannoli tubes. They’re incredibly easy to whip up, making them perfect for both impromptu dessert cravings and planned gatherings. The satisfying crunch of the baked phyllo shells paired with the creamy, sweet ricotta filling is simply divine. They’re not just delicious; they’re also incredibly versatile and beautifully presented, sure to impress your guests or simply bring a smile to your own face. Don’t be intimidated – this recipe is forgiving and so rewarding!
I highly encourage you to give these mini cannoli cups a try. Experiment with different toppings, serve them as a sweet ending to a hearty Italian meal, or present them on a dessert buffet. They’re fantastic on their own, but a drizzle of chocolate sauce or a sprinkle of chopped pistachios takes them to another level. Get creative and enjoy every delicious bite!
Frequently Asked Questions:
Can I make the phyllo shells ahead of time?
Absolutely! You can bake the phyllo shells a day or two in advance and store them in an airtight container at room temperature. Just be sure they are completely cooled before storing to prevent them from becoming soggy. Fill them just before serving to maintain their crispness.
What other filling flavors can I use besides ricotta?
While ricotta is traditional and delicious, feel free to get creative! A mascarpone cheese filling, perhaps flavored with a touch of espresso powder or lemon zest, would be wonderful. You could also make a chocolate-infused filling by adding cocoa powder and a little extra sugar.
How should I store leftover filled mini cannoli cups?
It’s best to store any leftover filled mini cannoli cups in an airtight container in the refrigerator. They will soften over time, so they are definitely best enjoyed the same day they are filled. If you have unfilled shells, store those separately as described above.
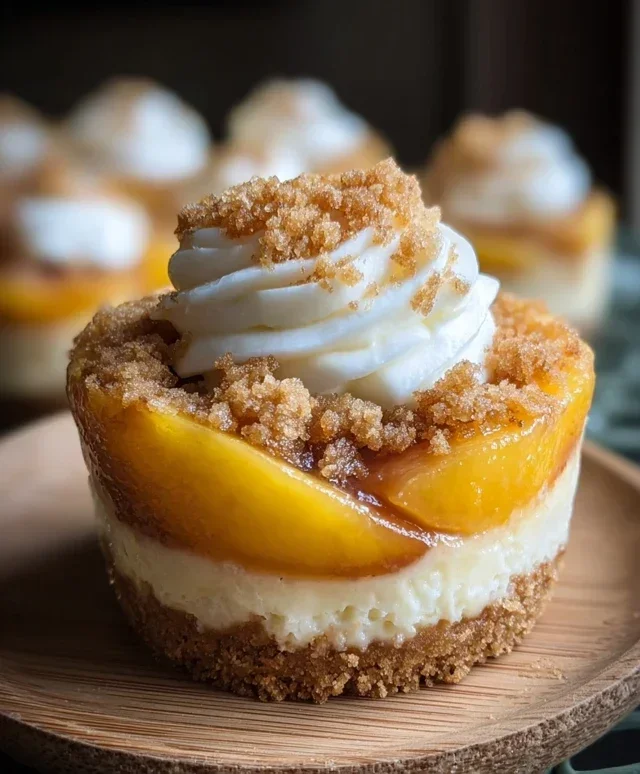
Mini Cannoli Cups
These mini cannoli cups offer a delightful dessert experience with a creamy ricotta filling and a crisp, sweet shell, perfect for parties or a special treat.
Ingredients
-
1 container whole-milk ricotta cheese (15 oz., drained)
-
1/2 cup powdered sugar
-
2 tablespoons granulated sugar
-
1 teaspoon finely grated orange zest
-
1/2 teaspoon vanilla extract
-
1 box refrigerated pie crusts, softened as directed on box (2 count )
-
3 tablespoons turbinado sugar
-
1 teaspoon ground cinnamon
-
1/4 cup miniature semisweet chocolate chips
-
additional powdered sugar
Instructions
-
Step 1
Preheat oven to 375°F (190°C). Lightly grease a 12-cup muffin tin. -
Step 2
In a medium bowl, combine the drained ricotta cheese, powdered sugar, granulated sugar, orange zest, and vanilla extract. Stir until well combined and smooth. Stir in the chocolate chips. -
Step 3
Unroll the refrigerated pie crusts. Use a 3-inch round cutter to cut out 12 circles from the pie crusts. -
Step 4
Gently press each pie crust circle into the cups of the prepared muffin tin, forming a small cup. -
Step 5
Bake for 12-15 minutes, or until the crusts are golden brown and lightly puffed. Let them cool in the muffin tin for a few minutes before carefully transferring them to a wire rack to cool completely. -
Step 6
In a small bowl, combine the turbinado sugar and ground cinnamon. Once the cannoli cups are completely cool, fill each with the ricotta mixture. Sprinkle with additional powdered sugar and the cinnamon-sugar mixture just before serving.
Important Information
Nutrition Facts (Per Serving)
It is important to consider this information as approximate and not to use it as definitive health advice.
Allergy Information
Please check ingredients for potential allergens and consult a health professional if in doubt.