Stunning Spring Desserts- Awe Your Guests Easily
Stunning Spring Desserts to Awe Your Guests! As the world awakens from its winter slumber, there’s an undeniable urge to embrace the vibrant flavors and lighter, fresher pnon-alcoholic alettes that spring offers. We’re talking about the kind of desserts that don’t just satisfy a sweet tooth but truly capture the essence of the season – think delicate floral notes, bright citrus zests, and the first blush of ripe berries. Imagin extracte your guests’ faces lighting up as they behold a dessert that’s as beautiful to look at as it is delicious to eat. These aren’t just desserts; they’re edible works of art, designed to impress and delight. People adore these dishes because they bring a sense of renewal and joy to any gathering, transforming a simple meal into a memorable occasion. What makes these stunning spring desserts so special is their ability to harness the season’s bounty, offering a taste of sunshine and new begin extractnings in every bite. Get ready to elevate your hosting game!
Stunning Spring Desserts to Awe Your Guests!
Spring is in the air, and with it comes a yearning for fresh, vibrant flavors and lighter, more elegant desserts. Gone are the heavy, comforting bakes of winter; it’s time to embrace the season’s bounty with treats that sing of sunshine and new begin extractnings. This collection of spring desserts is designed to do just that – to impress your guests, delight your taste buds, and bring a burst of springtime cheer to any occasion. Whether you’re hosting a brunch, a dinner party, or simply want to treat yourself, these recipes are sure to become new favorites. Let’s dive into a recipe that captures the essence of spring perfectly.
Lemon Raspberry Mascarpone Tartlets
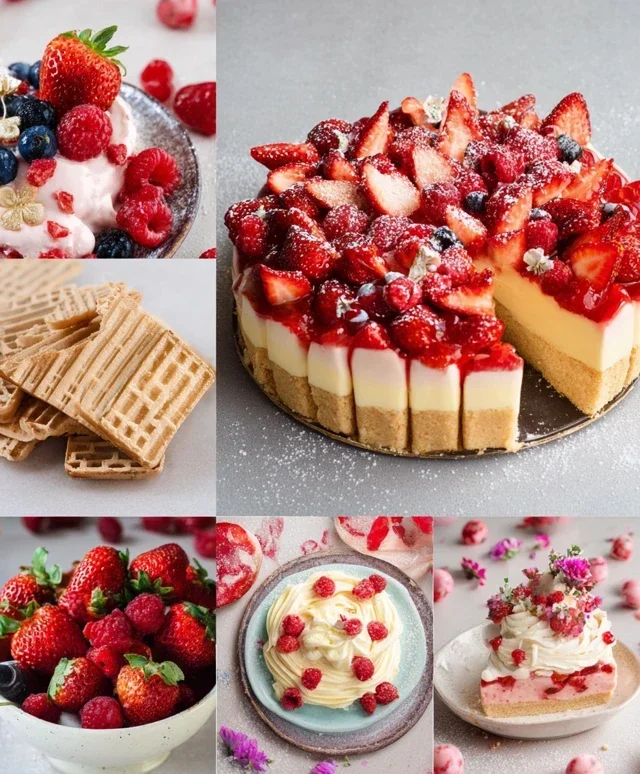
These delicate tartlets are a symphony of flavors and textures. The bright tang of lemon, the sweet burst of fresh raspberries, and the creamy richness of mascarpone cheese come together in a flaky, buttery crust. They are as beautiful to look at as they are delicious to eat, making them the perfect showstopper for your spring gatherings.
Ingredients:
Instructions:
1. Crafting the Perfect Tartlet Crust
To begin extract, we’ll create our buttery, flaky tartlet crust. In a large bowl, combine the all-purpose flour and granulated sugar. Add the cold, cubed unsalted butter. Using a pastry blender or your fingertips, cut the butter into the flour mixture until it resembles coarse crum extractbs with some pea-sized pieces of butter remaining. This is crucial for achieving a tender and flaky crust, as those pockets of butter will create steam during baking, separating the layers. In a small bowl, whisk together the egg yolk and 2 tablespoons of ice water. Gradually add this mixture to the flour and butter, stirring with a fork until the dough just begin extracts to come together. Be careful not to overmix, as this can lead to a tough crust. If the dough seems too dry, add the remaining tablespoon of ice water, a teaspoon at a time, until it forms a cohesive ball. Flatten the dough into a disk, wrap it tightly in plastic wrap, and refrigerate for at least 30 minutes. This chilling period allows the gluten to relax and the butter to firm up, making the dough easier to roll and preventing shrinkage during baking.
2. Shaping and Pre-baking the Tartlet Shells
Once your dough has chilled, it’s time to shape your tartlets. Lightly flour a clean surface and your rolling pin. Roll out the chilled dough to about ⅛-inch thickness. Using a round cookie cutter or the rim of a glass that is slightly larger than your tartlet tins (or muffin tin cups), cut out circles of dough. Gently press each circle of dough into your prepared tartlet tins, ensuring it’s snug against the bottom and sides. Trim any excess dough. If you are using a muffin tin, you can simply press the dough into the cups, making sure it comes up the sides. Prick the bottom of each tartlet shell several times with a fork. This step, known as docking, prevents the dough from puffing up excessively during baking. Line each tartlet shell with a small piece of parchment paper or foil and fill with pie weights, dried beans, or rice. This is called blind baking and helps to ensure a crisp bottom crust. Bake in a preheated oven at 375°F (190°C) for 15-18 minutes, or until the edges are lightly golden. Carefully remove the parchment paper and weights, and then bake for another 5-7 minutes, or until the bottoms are also golden and cooked through. Let the tartlet shells cool completely in their tins before removing them.
3. Whipping Up the Luscious Mascarpone Filling
While our tartlet shells are cooling, let’s prepare the luxurious mascarpone filling. In a medium bowl, combine the softened mascarpone cheese, powdered sugar, and vanilla extract. Beat with an electric mixer on medium speed until smooth and creamy. This is where the magic happens – the mascarpone provides a wonderfully rich and creamy texture, while the powdered sugar adds just the right amount of sweetness without being overpowering. Next, add the lemon zest and fresh lemon juice. Continue to mix until everything is well combined and the filling has a bright, fresh citrus aroma. Taste and adjust the lemon juice or powdered sugar as needed, depending on your preference for tartness. The lemon zest provides a wonderful fragrant punch that complements the tartness of the juice beautifully. Set this delicious filling aside.
4. Assembling the Beautiful Tartlets
Now for the fun part – assembling our stunning tartlets! Once the tartlet shells have completely cooled, carefully spoon or pipe the mascarpone filling into each shell, filling them generously. You can use a piping bag with a decorative tip for an extra elegant touch, or simply a spoon for a more rustic charm. The key is to fill them just before serving to maintain the crispness of the crust. Arrange a few fresh raspberries on top of the mascarpone filling in each tartlet. Don’t be afraid to get creative with your arrangement; a small cluster or a scattered scattering both look lovely. The vibrant red of the raspberries against the creamy white filling is incredibly appealing.
5. The Finishing Touches and Presentation
To elevate these already beautiful tartlets, we’ll add a final flourish. If you have fresh mint leaves, a small sprig tucked in amongst the raspberries adds a touch of green and a subtle, refreshing aroma that perfectly complements the lemon and berries. You could also dust them with a whisper of powdered sugar or even add a tiny drizzle of raspberry coulis if you’re feeling extra fancy. Serve these Lemon Raspberry Mascarpone Tartlets immediately to your eager guests. The combination of the crisp, buttery crust, the luscious lemon mascarpone, and the burst of fresh raspberries is a truly delightful spring treat that is guaranteed to impress. Enjoy the oohs and aahs!
Conclusion:
These stunning spring desserts are truly the perfect way to welcome the season and impress your guests. With their vibrant flavors and beautiful presentation, they offer a delightful balance of freshness and indulgence. Whether you’re looking for a light and airy mousse or a more decadent tart, these recipes provide something for every palate. They are fantastic for Easter brunches, garden parties, or simply a special weekend treat. I truly encourage you to try them out – you’ll find they are surprisingly achievable and incredibly rewarding to make!
For serving suggestions, consider pairing the delicate lemon and elderflower panna cotta with fresh berries or a scattering of edible flowers. The rhubarb and strawberry crum extractble is wonderful served warm with a scoop of vanilla bean ice cream or a drizzle of crème anglaise. Don’t be afraid to get creative with your garnishes to enhance the visual appeal of these delightful spring desserts.
Frequently Asked Questions:
Can I make these desserts ahead of time?
Absolutely! Many of these stunning spring desserts are designed to be made ahead. Panna cotta, mousses, and crum extractbles can usually be prepared a day in advance and refrigerated. Tarts may also be assembled ahead, with fillings added closer to serving time to maintain freshness and crispness of the crust.
What if I don’t have a specific spring fruit available?
Don’t worry! Most recipes can be adapted. For example, if you can’t find rhubarb, you could substitute with other tart fruits like cranberries or even a mix of berries. The key is to maintain a good balance of sweetness and acidity. Freshness is always a great theme for spring!
Are these recipes suitable for begin extractner bakers?
Yes, I’ve aimed to make these recipes accessible to bakers of all skill levels. While some may require a bit more finesse, the instructions are clear, and the results are well worth the effort. With a little patience, you’ll be creating these stunning spring desserts with confidence.
Stunning Spring Desserts to Awe Your Guests!
A collection of vibrant and delightful spring dessert recipes perfect for impressing any guest. These recipes utilize fresh, seasonal flavors and beautiful presentations.
Ingredients
-
1 cup fresh strawberries, sliced
-
1/2 cup fresh raspberries
-
1/4 cup granulated sugar
-
1 tablespoon lemon juice
-
1/2 teaspoon vanilla extract
-
1 cup heavy cream
-
2 tablespoons powdered sugar
Instructions
-
Step 1
In a medium bowl, gently combine the sliced strawberries and raspberries. -
Step 2
Sprinkle the granulated sugar and lemon juice over the berries. Let them macerate for 10 minutes. -
Step 3
While the berries macerate, whip the heavy cream in a separate bowl with the powdered sugar and vanilla extract until stiff peaks form. -
Step 4
Spoon the whipped cream into individual serving glasses or bowls. -
Step 5
Top each serving generously with the macerated berry mixture. -
Step 6
Chill for at least 15 minutes before serving to allow the flavors to meld.
Important Information
Nutrition Facts (Per Serving)
It is important to consider this information as approximate and not to use it as definitive health advice.
Allergy Information
Please check ingredients for potential allergens and consult a health professional if in doubt.