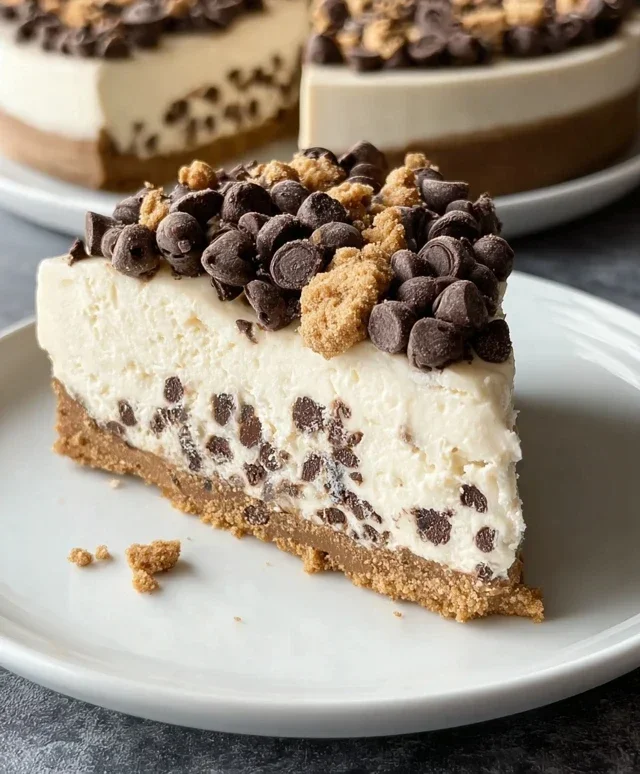
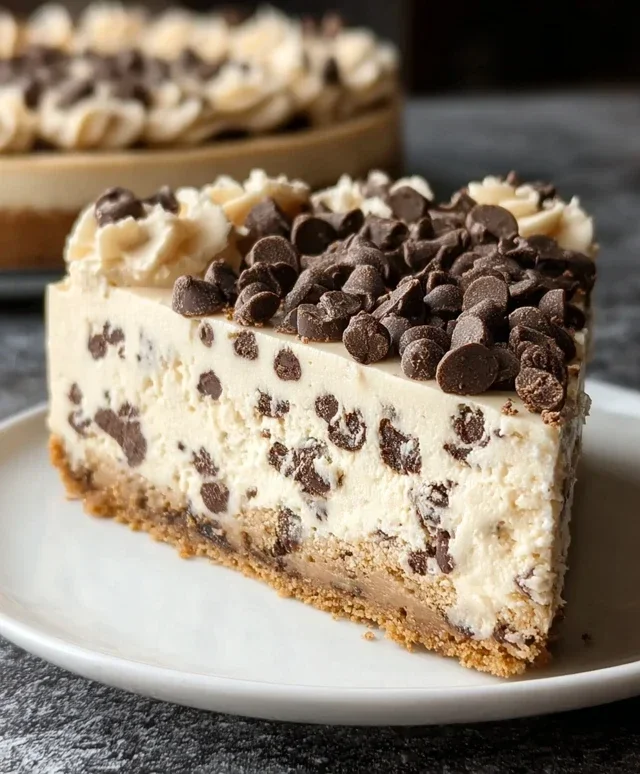
No-Bake Cookie Dough Cheesecake Recipe
No Bake Cookie Dough Cheesecake is more than just a dessert; it’s a dream come true for anyone who has ever swooned over the irresistible allure of raw cookie dough and the creamy indulgence of cheesecake. Imagin extracte this: a perfectly smooth, luscious cheesecake filling, infused with all the sweet, buttery, and chocolate-chippy goodness of your favorite cookie dough, all nestled within a buttery grabeef ham cracker crust. This isn’t just a dessert; it’s an experience.
Why do we all adore this No Bake Cookie Dough Cheesecake?
It’s the ultimate mashup, combining two beloved treats into one spectacular creation without the fuss of turning on the oven.
The magic lies in its simplicity and its unadulterated flavor. We get that satisfying cookie dough taste, completely safe and utterly delicious, blended seamlessly into a rich, decadent cheesecake. It’s the kind of dessert that elicits gasps of delight with every bite, a guaranteed crowd-pleaser that feels both nostalgic and incredibly sophisticated. Get ready to fall head over heels for this no-bake masterpiece!
No Bake Cookie Dough Cheesecake
There’s something truly magical about the combination of creamy cheesecake and edible cookie dough. It’s a dessert that hits all the right notes: decadent, satisfying, and utterly delicious. But what if I told you that you can have this dream dessert without even turning on your oven? That’s right, this No Bake Cookie Dough Cheesecake is your ticket to a show-stopping treat that’s surprisingly simple to make. Perfect for potlucks, holidays, or just because you deserve a little something special, this cheesecake is guaranteed to disappear in a flash. The beauty of a no-bake cheesecake is its ease; it relies on chilling to set, meaning less fuss and more time to enjoy your creation. We’ll be layering a classic no-bake cheesecake base with chunks of edible cookie dough and a fluffy whipped topping, creating a symphony of textures and flavors in every bite. Get ready to impress yourself and everyone lucky enough to snag a slice!
Ingredients:
Instructions:
Prepare the Edible Cookie Dough:
First things first, we need our star ingredient: the edible cookie dough! In a medium bowl, combine the 1 ¾ cups all-purpose flour, ¼ teaspoon salt, and 1 cup (two sticks) of unsalted butter, making sure it’s softened to room temperature. Using a hand mixer or a sturdy spoon, cream these ingredients together until they resemble coarse crum extractbs. Next, add ¾ cup of packed light brown sugar and ½ cup of granulated sugar. Continue mixing until well combined and the mixture starts to come together. Stir in 2 tablespoons of cold heavy cream and 1 ½ teaspoons of vanilla extract. Mix until just combined; you don’t want to overmix. Finally, gently fold in 1 ¼ cups of mini semi-sweet chocolate chips. This dough is meant to be eaten raw, so no egg is needed! Once mixed, roll small portions of the dough into 10 bite-sized balls. Set these aside on a parchment-lined plate and refrigerate them while you prepare the cheesecake filling. This chilling step helps them hold their shape.
Create the No-Bake Cheesecake Filling:
Now, let’s get to the creamy part. In a large bowl, beat the 24 ounces of softened cream cheese (that’s three 8-ounce blocks) with an electric mixer until it’s completely smooth and free of lumps. This is crucial for a silky-smooth cheesecake. Gradually add 1 cup of the sifted powdered sugar to the cream cheese, beating until it’s well incorporated and the mixture is light and fluffy. Add 1 ½ teaspoons of vanilla extract and beat again to combine. In a separate, very clean bowl, whip the 1 ¼ cups of very cold heavy cream on medium-high speed until stiff peaks form. Be careful not to over-whip, or you’ll end up with butter! Once the heavy cream is whipped to perfection, gently fold in the remaining ½ cup of sifted powdered sugar. This makes our whipped cream layer even more stable and delicious.
Combine and Assemble the Cheesecake:
This is where everything comes together. Take about half of the whipped cream mixture and gently fold it into the cream cheese mixture. We’re using a folding technique here (lifting from the bottom and folding over) to maintain as much air as possible, which will give our cheesecake that light and airy texture. Once the cream cheese and whipped cream are just combined, gently fold in the remaining whipped cream mixture until no streaks remain. Be patient with this step; you want a uniform, fluffy filling. This is the base of our no-bake masterpiece.
Layering and Chilling:
Now it’s time to build our beautiful cheesecake. Grab your favorite 9-inch pie plate or springform pan. You can lightly grease it or line it with parchment paper for easy removal. Spoon about half of the cheesecake filling into the prepared pan and spread it evenly. Scatter 5 of your chilled edible cookie dough balls over this layer of filling, gently pressing them down slightly. Spoon the remaining cheesecake filling over the cookie dough balls, smoothing the top with an offset spatula or the back of a spoon. Cover the cheesecake tightly with plastic wrap. Refrigerate for at least 6 hours, or preferably overnight, until the cheesecake is firm and set. The longer it chills, the better it will hold its shape when sliced.
Decorate and Serve:
The grand finnon-alcoholic ale! Once your cheesecake has chilled and set beautifully, it’s time for the finishing touches. Gently remove the cheesecake from the pan. In a small bowl, combine the 8 ounces of whipped topping with 2 tablespoons of mini semi-sweet chocolate chips. You can also use a stabilized whipped cream recipe for a sturdier topping if you prefer. Spread this whipped topping evenly over the top of the chilled cheesecake. Arrange the remaining 5 edible cookie dough balls artfully on top of the whipped topping. You can sprinkle a few extra mini chocolate chips if you like. For the best flavor and texture, allow the cheesecake to sit at room temperature for about 10-15 minutes before slicing and serving. This allows the cheesecake to soften just slightly, making it easier to cut and more enjoyable to eat. Enjoy your incredible homemade No Bake Cookie Dough Cheesecake!
Conclusion:
And there you have it – your guide to creating an absolutely divine No Bake Cookie Dough Cheesecake! This recipe truly shines because it delivers all the decadent flavors of classic cheesecake and safe-to-eat cookie dough without the hassle of baking. It’s the perfect dessert for those hot summer days when you want something incredibly satisfying but don’t want to turn on the oven, or frankly, any day you crave a special treat that’s surprisingly simple to assemble. The creamy cheesecake filling, studded with delightful chunks of edible cookie dough, makes for a truly unforgettable experience.
For serving suggestions, this No Bake Cookie Dough Cheesecake is fantastic on its own, but you can elevate it further with a drizzle of chocolate ganache, a scattering of extra chocolate chips, or even a dollop of whipped cream. Consider adding fresh berries for a touch of tartness to balance the richness.
Thinking about variations? You can easily swap out the chocolate chips for white chocolate, butterscotch, or even M&Ms. For a fun twist, try adding a layer of crushed Oreos to the base or folding in some caramel sauce into the cheesecake filling. The possibilities are truly endless! I highly encourage you to give this recipe a try; I promise you won’t be disappointed. It’s a guaranteed crowd-pleaser and a personal favorite of mine.
Frequently Asked Questions:
Can I really eat the cookie dough raw?
Absolutely! The key to this recipe’s success and safety is using an edible cookie dough recipe that omits raw eggs and uses heat-treated flour. This ensures you can safely enjoy those delicious cookie dough bites without any worries.
How long does this No Bake Cookie Dough Cheesecake need to chill?
For the best texture and flavor, I recommend chilling your cheesecake for at least 6-8 hours, or preferably overnight. This allows the cheesecake to set up properly and the flavors to meld beautifully.
What if I don’t have cream cheese? Can I substitute it?
While cream cheese is essential for that classic cheesecake tang and texture, you could experiment with using a blend of mascarpone cheese and a little sour cream for a slightly different but still delicious creamy result. However, pure cream cheese is highly recommended for this specific recipe.
No Bake Cookie Dough Cheesecake
A decadent no-bake cheesecake featuring a cookie dough base and layers of creamy cheesecake and cookie dough.
Ingredients
-
1 ¾ cups all-purpose flour
-
1 cup unsalted butter, softened
-
¾ cup light brown sugar, packed
-
½ cup granulated sugar
-
2 tablespoons heavy cream, cold
-
1 ½ teaspoons vanilla extract
-
¼ teaspoon salt
-
1 ¼ cups mini semi-sweet chocolate chips
-
24 ounces cream cheese, softened
-
1 ½ cups powdered sugar, sifted, divided
-
1 ¼ cups heavy cream, very cold
-
8 ounces whipped topping
-
2 tablespoons mini semi-sweet chocolate chips
-
10 edible cookie dough balls
Instructions
-
Step 1
For the crust: In a bowl, combine flour, softened butter, brown sugar, granulated sugar, 1 ½ teaspoons vanilla extract, and salt. Mix until well combined. Stir in 1 ¼ cups mini semi-sweet chocolate chips. Press mixture evenly into the bottom of a 9-inch springform pan. -
Step 2
For the cheesecake filling: In a large bowl, beat softened cream cheese until smooth. Gradually add 1 cup of the sifted powdered sugar and beat until combined. Stir in 1 ½ teaspoons vanilla extract and ¼ teaspoon salt. -
Step 3
In a separate bowl, beat 1 ¼ cups very cold heavy cream until stiff peaks form. Gently fold whipped cream into the cream cheese mixture. -
Step 4
Spread the cream cheese filling evenly over the cookie dough crust. -
Step 5
Gently fold the 8 ounces of whipped topping and the remaining ½ cup sifted powdered sugar with 2 tablespoons of cold heavy cream until combined. Spoon dollops of this mixture over the cheesecake filling. Swirl gently with a knife. -
Step 6
Arrange 10 edible cookie dough balls on top of the cheesecake. Sprinkle with 2 tablespoons of mini semi-sweet chocolate chips. -
Step 7
Chill in the refrigerator for at least 4 hours, or until firm. Release from springform pan before serving.
Important Information
Nutrition Facts (Per Serving)
It is important to consider this information as approximate and not to use it as definitive health advice.
Allergy Information
Please check ingredients for potential allergens and consult a health professional if in doubt.