Flourless Chickpea Brownies – Vegan Gluten Free Delight
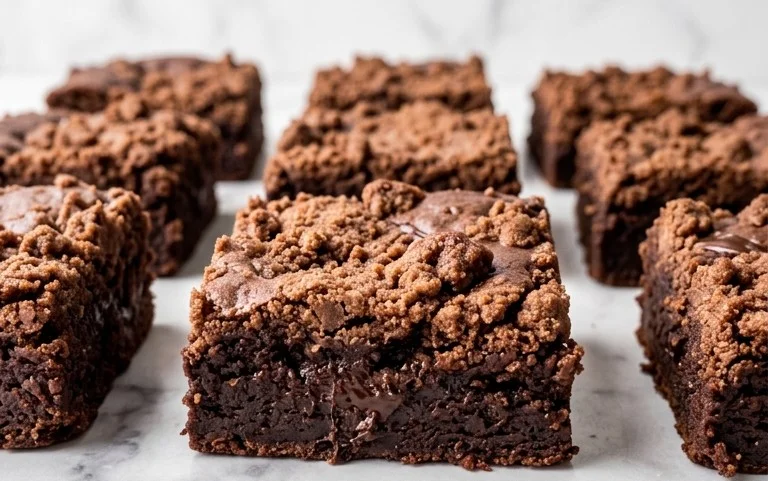
Flourless Chickpea Brownies (Vegan & Gluten Free) are about to become your new obsession. Forget everything you thought you knew about brownies! These fudgy, decadent delights completely redefine dessert, proving that you don’t need traditional flour or dairy to achieve pure chocolatey bliss. I’ve been on a mission to create the ultimate healthier treat, and let me tell you, these flourless chickpea brownies deliver on every single promise. People adore them because they’re surprisingly simple to whip up, packed with hidden plant-based protein thanks to the humble chickpea, and boast an incredibly moist and chewy texture that rivals any classic brownie. What truly sets these flourless chickpea brownies apart is their magical ability to be both incredibly indulgent and remarkably good for you. They’re the perfect guilt-free indulgence for any occasion, whether you’re a vegan, gluten-free enthusiast, or simply someone who craves a seriously delicious brownie.
Flourless Chickpea Brownies (Vegan & Gluten Free)
Are you craving a rich, decadent brownie experience but also trying to keep things healthy, vegan, and gluten-free? Look no further! These Flourless Chickpea Brownies are an absolute game-changer. I know what you’re thinking – chickpeas in brownies? Trust me on this one! The chickpeas lend an incredible fudgy texture and moisture to the brownies, and you absolutely cannot taste them. They’re also packed with protein and fiber, making them a guilt-free indulgence. This recipe is surprisingly simple and requires no fancy equipment, just a food processor and a whisk. Get ready to discover your new favorite healthy dessert!
Ingredients:
Getting Started: Preparing Your Ingredients
Before we dive into mixing, it’s crucial to prep your ingredients properly. This ensures a smooth process and delicious outcome. First, open your can of chickpeas. You’ll want to rinse them very thoroughly under cold running water. After rinsing, drain them as well as you possibly can. I like to press them against the sieve with a spoon to remove as much excess water as possible. This step is important because any residual water can affect the texture of the brownies, potentially making them a bit too mushy. Next, measure out all your other ingredients. Having everything prepped and ready to go makes the mixing process much faster and more enjoyable. If you’re using almond butter, make sure it’s well-stirred if it has separated.
Mixing the Magic: Creating the Brownie Batter
Now for the fun part – transforming these simple ingredients into rich brownie batter!
Baking to Perfection
The baking time for these brownies is relatively short, but it’s important not to overbake them, as this can lead to a dry texture.
Bake for 20-25 minutes, or until a toothpick inserted into the center comes out with moist crum extractbs attached, but no wet batter. Keep in mind that because these are flourless, they won’t behave exactly like traditional brownies. The edges should look set, but the center may still appear slightly underbaked – this is good for that fudgy texture!
Cooling for Ultimate Fudgin extractess
This is arguably the most important step for achieving that perfect, fudgy brownie texture.
Once baked, remove the pan from the oven and let the brownies cool completely in the pan on a wire rack. This is essential! Resist the urge to cut into them while they are still warm. As they cool, they will firm up beautifully and develop that rich, dense, and fudgy consistency. For the best results, I like to let them cool for at least an hour, or even better, pop them into the refrigerator for about 30 minutes after they’ve reached room temperature. This chilling step really helps them set up perfectly.
Serving and Enjoying
Once fully cooled and set, use the parchment paper overhang to carefully lift the entire slab of brownies out of the pan. Place it on a cutting board and slice into squares. These brownies are incredibly rich, so you might find that a smaller piece is perfectly satisfying. They are delicious on their own, but you can also serve them with a scoop of vegan ice cream, fresh berries, or a sprinkle of sea salt for an extra flavor boost. Enjoy your incredibly healthy and surprisingly delicious homemade brownies!
Conclusion:
And there you have it! These flourless chickpea brownies are truly a revelation. They’re a testament to how delicious and satisfying vegan and gluten-free baking can be, proving you don’t need traditional flour or dairy to achieve that rich, fudgy texture we all crave. The humble chickpea, often overlooked in sweet recipes, provides an incredible moistness and a subtle, almost nutty undertone that perfectly complements the deep chocolate flavor. They’re incredibly easy to whip up, making them perfect for busy weeknights or last-minute dessert emergencies. I’m so excited for you to try this recipe and discover your new go-to treat!
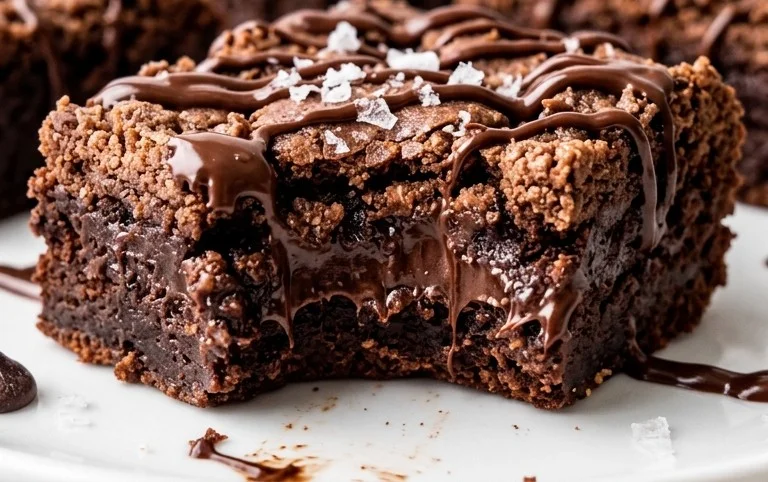
These brownies are wonderfully versatile. Enjoy them warm, straight from the oven, for an extra gooey experience. They’re also fantastic cooled, perhaps with a dollop of vegan whipped cream or a sprinkle of flaky sea salt. For a more decadent serving, consider drizzling them with melted vegan chocolate or topping with fresh berries. Feel free to experiment with additions like chopped nuts (walnuts or pecans work beautifully), a swirl of vegan peanut butter, or even a dash of cinnamon for a subtle warmth. Don’t be afraid to get creative!
Frequently Asked Questions:
Can I taste the chickpeas?
No, the flavor of the chickpeas is remarkably well-hidden by the rich cocoa powder and sweetness. They primarily contribute to the brownies’ fantastic moist and fudgy texture, rather than adding a distinct flavor.
How long do these flourless chickpea brownies last?
Stored in an airtight container at room temperature, they’re best enjoyed within 2-3 days. For longer storage, you can keep them in the refrigerator for up to a week, or freeze them for up to 2-3 months. They thaw beautifully!
Can I use a different type of bean?
While chickpeas are ideal, you could experiment with other neutral-flavored, cooked white beans like cannellini or great northern beans. However, the texture and outcome might vary slightly.
Flourless Chickpea Brownies (Vegan & Gluten Free)
Decadent, fudgy brownies made with chickpeas, almond butter, and cocoa powder. Naturally vegan and gluten-free.
Ingredients
-
15.5 ounces chickpeas (1 can), rinsed and drained
-
½ cup almond butter
-
½ cup pure maple syrup
-
1 tablespoon vanilla extract
-
½ teaspoon baking powder
-
½ teaspoon baking soda
-
½ teaspoon sea salt
-
⅓ cup unsweetened cocoa powder
-
¾ cup mini chocolate chips
Instructions
-
Step 1
Preheat your oven to 350°F (175°C). Line an 8×8 inch baking pan with parchment paper, leaving some overhang for easy removal. -
Step 2
In a food processor, combine the rinsed and drained chickpeas, almond butter, maple syrup, and vanilla extract. Process until completely smooth, scraping down the sides as needed. -
Step 3
Add the baking powder, baking soda, sea salt, and cocoa powder to the food processor. Pulse until just combined. -
Step 4
Fold in ¾ cup of mini chocolate chips, reserving a few for topping if desired. -
Step 5
Pour the batter into the prepared baking pan and spread evenly. Top with any reserved chocolate chips. -
Step 6
Bake for 20-25 minutes, or until a toothpick inserted into the center comes out with moist crumbs attached (not wet batter). -
Step 7
Let the brownies cool completely in the pan on a wire rack before slicing and serving.
Important Information
Nutrition Facts (Per Serving)
It is important to consider this information as approximate and not to use it as definitive health advice.
Allergy Information
Please check ingredients for potential allergens and consult a health professional if in doubt.