Easy Buster Bar Ice Cream Dessert Recipe
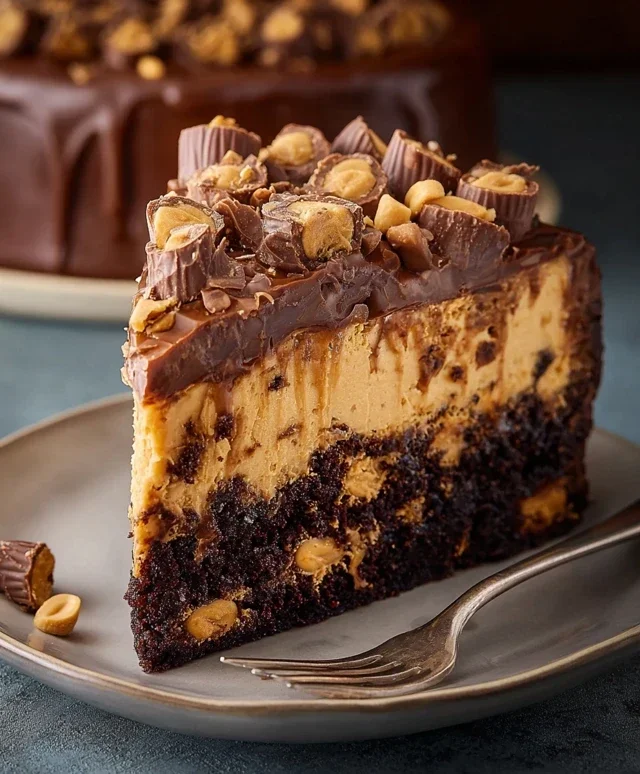
Get ready to rediscover pure childhood joy because today, we’re diving headfirst into crafting the legendary Buster Bar Ice Cream Dessert. This isn’t just any frozen treat; it’s a nostalgic journey back to those carefree summer days, a symphony of textures and flavors that has captured hearts for generations. What makes this particular Buster Bar Ice Cream Dessert so universally adored? It’s that perfect balance – the creamy vanilla ice cream, the satisfying crunch of peanuts, and that irresistible chocolatey shell that snaps with every bite.
We’ve all had those moments craving that specific, iconic taste. This recipe aims to recreate that magic in your own kitchen, delivering all the beloved elements of a store-bought Buster Bar, but with the added satisfaction of making it yourself. Prepare to impress your family and friends, or simply treat yourself to a truly spectacular dessert that’s as fun to make as it is to devour. Let’s get started on creating your very own Buster Bar Ice Cream Dessert masterpiece!
The Ultimate Buster Bar Ice Cream Dessert Recipe
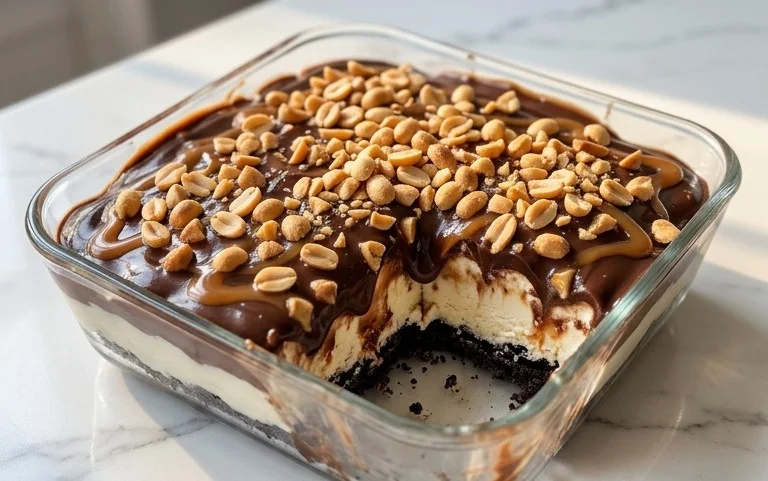
Get ready to impress your friends and family with this incredible Buster Bar Ice Cream Dessert! This recipe takes the classic flavors of the beloved Buster Bar and elevates them into a decadent, homemade treat that’s surprisingly easy to make. Imagin extracte a crisp, chocolatey cookie crust, layers of creamy vanilla ice cream and crunchy peanuts, all smothered in a rich, fudgy chocolate shell. It’s pure bliss in every bite! Forget store-bought – this homemade version is in a league of its own. We’ll walk you through each step, ensuring you achieve a perfect Buster Bar every time.
Ingredients:
Crafting the Cookie Crust
The foundation of our Buster Bar is a delicious, no-bake crust made from crushed Oreos and butter. This creates a delightful chocolatey base that complements the creamy ice cream perfectly.
1. Prepare the Oreo Crust: Take your entire package of Oreo cookies and process them into fine crum extractbs. You can do this in a food processor for the quickest and most consistent results, or place them in a sturdy zip-top bag and crush them with a rolling pin. Aim for a texture that resembles coarse sand. In a medium bowl, combine the crushed Oreo crum extractbs with the 1/2 cup of melted butter. Stir until all the crum extractbs are thoroughly moistened. This mixture should hold together when you press it.
2. Form the Crust: Now, press this crum extractb mixture evenly into the bottom of a 9×13 inch baking dish. Use the back of a spoon or the bottom of a measuring cup to firmly pack the crum extractbs. This is crucial for a sturdy crust that won’t crum extractble when you slice the dessert. Make sure to get it as even as possible, especially around the edges. You want a solid, cohesive layer. You can even bring the crust slightly up the sides of the dish if you like, creating a little barrier for the ice cream.
Layering the Ice Cream and Peanuts
This is where the Buster Bar really starts to take shape. We’ll be layering the softened ice cream and those satisfyingly crunchy Spanish peanuts.
3. Add the Ice Cream Layer: Take your 1/2 gallon of vanilla ice cream and let it soften at room temperature for about 15-20 minutes. You want it pliable enough to spread easily but not so soft that it becomes liquid. Spread the softened ice cream evenly over the prepared Oreo crust, making sure to cover it completely. Use an offset spatula or the back of a spoon to smooth the top. This layer should be generous, creating a thick, creamy bed for our peanuts.
4. Incorporate the Peanuts: Now for the delightful crunch! Generously scatter the 1 lb. of Spanish peanuts over the vanilla ice cream layer. Try to distribute them as evenly as possible, so you get that signature Buster Bar peanut texture in every bite. You can press them slightly into the ice cream to help them stay in place. Don’t be shy with the peanuts; they are a key component of the classic Buster Bar experience!
Freezing and Preparing the Chocolate Topping
Once our layers are in place, it’s time for some chilling and then the magic of the chocolate coating.
5. Freeze Solid: Cover the baking dish tightly with plastic wrap, and then with aluminum foil. Place it in the freezer and freeze for at least 4-6 hours, or preferably overnight, until the ice cream is completely firm. This is a critical step; you want the dessert to be rock-solid before you attempt to cover it with the warm chocolate. This will prevent the ice cream from melting into the chocolate.
Crafting the Fudgy Chocolate Shell
This luscious chocolate coating is what truly elevates this dessert to legendary status. It hardens into a satisfyingly crisp shell, just like the origin extractal.
Making the Chocolate Fudge Topping:
This fudgy topping is the final, show-stopping element of our Buster Bar dessert. It’s simple to make and creates that irresistible, crackly chocolate shell.
1. Melt Chocolate and Butter: In a medium saucepan over low heat, combine the 12 oz of semi-sweet chocolate chips and the 1/2 cup of butter. Stir constantly until the chocolate and butter are completely melted and smooth. Be careful not to overheat the chocolate, as it can seize. If it seems too thick, you can add a tiny splash of milk, but be sparing.
2. Incorporate Evaporated Milk and Confectioners’ Sugar: Once the chocolate and butter are melted, gradually whisk in the 12 oz of evaporated milk. Continue to whisk until the mixture is smooth and well combined. Next, slowly add the 2 cups of powdered confectioner’s sugar, whisking continuously. This will thicken the mixture into a luscious, fudgy consistency. It should be pourable but thick enough to coat the back of a spoon. Continue to cook and stir for another minute or two, just to ensure everything is well incorporated and the sugar is dissolved.
3. Pour the Topping: Retrieve your frozen dessert from the freezer. Carefully and quickly pour the warm chocolate fudge topping over the entire surface of the frozen ice cream and peanut layer. Work fast to ensure an even spread before the topping begin extracts to set. Use an offset spatula to gently spread it out, aiming for a smooth, even coating that covers the entire top surface and potentially drips slightly down the sides.
4. Final Freeze: Once the chocolate topping is applied, immediately return the dessert to the freezer. Freeze for at least another 2-3 hours, or until the chocolate topping is completely hardened. This allows the chocolate to form that signature crisp shell.
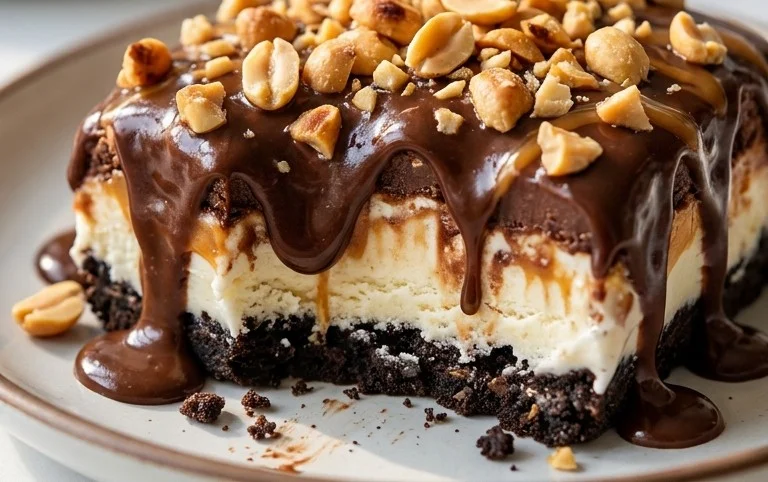
5. Serving Your Buster Bar Masterpiece: When you’re ready to serve, let the Buster Bar dessert sit at room temperature for about 5-10 minutes to slightly soften the chocolate and ice cream, making it easier to slice. Use a sharp knife, dipped in hot water and wiped dry between cuts, to slice the dessert into bars. Enjoy the incredible layers of crunchy crust, creamy ice cream, peanuts, and that amazing chocolate shell! It’s a truly unforgettable dessert experience.
Conclusion:
There you have it! This Buster Bar Ice Cream Dessert is truly a showstopper, offering that irresistible combination of crunchy chocolate, creamy ice cream, and a delightful peanut-y surprise. It’s surprisingly easy to whip up, making it perfect for both weeknight treats and impressive gatherings. The joy of this dessert lies in its customizable nature and the pure satisfaction of creating something so delicious from scratch. I’m confident you’ll find this recipe a huge hit!
For serving, I love to present this Buster Bar Ice Cream Dessert in individual bowls, perhaps with a drizzle of extra hot fudge or a scattering of chopped peanuts for added texture. It’s also fantastic served directly from the pan for a more rustic, family-style approach. Feel free to get creative with your toppings! Think whipped cream, caramel sauce, or even a sprinkle of sea salt to enhance the flavors.
When it comes to variations, the possibilities are endless! You can swap out the chocolate coating for white chocolate, add a layer of crushed Oreos in the middle, or even incorporate a swirl of fruit puree. Experiment with different nut butters for a unique twist. Don’t be afraid to make this Buster Bar Ice Cream Dessert your own!
So, what are you waiting for? Gather your ingredients and give this delightful recipe a try. I promise it’s worth every delicious bite!
Frequently Asked Questions about Buster Bar Ice Cream Dessert:
Can I make this Buster Bar Ice Cream Dessert ahead of time?
Absolutely! This dessert is perfect for making ahead. Once it’s fully set in the freezer, you can cover it tightly and keep it frozen for up to a week. Let it sit at room temperature for about 10-15 minutes before slicing to ensure it’s easy to cut and still delightfully cold.
What kind of ice cream works best for this recipe?
A good quality vanilla ice cream is the classic choice and provides a perfect canvas for the other flavors. However, feel free to experiment! A chocolate ice cream would make it extra decadent, or even a strawberry would add a fruity dimension. Just make sure it’s a firm ice cream that freezes well.
My chocolate coating is too thick. What can I do?
If your chocolate coating is too thick, you can try adding a tablespoon or two of a neutral oil, like vegetable or canola oil, to the melted chocolate. This will help thin it out and make it easier to pour and spread. Stir it in gradually until you reach your desired consistency.
Buster Bar Ice Cream Dessert
A no-bake ice cream dessert featuring a cookie crust, creamy ice cream, crunchy peanuts, and a chocolate coating.
Ingredients
-
1 14.3 oz pkg. of Oreo cookies, crushed
-
1/2 C butter, melted
-
1/2 gal. vanilla ice cream, softened
-
1 lb. Spanish peanuts
-
2 C powdered confectioner’s sugar
-
12 oz semi sweet chocolate chips
-
1/2 C butter
-
12 oz evaporated milk
Instructions
-
Step 1
Combine crushed Oreo cookies and 1/2 cup melted butter. Press into the bottom of a 9×13 inch pan. -
Step 2
Spread softened vanilla ice cream evenly over the cookie crust. -
Step 3
Sprinkle Spanish peanuts over the ice cream layer. -
Step 4
In a saucepan, melt 1/2 cup butter. Stir in semi-sweet chocolate chips until melted and smooth. Gradually whisk in evaporated milk and powdered sugar until well combined and smooth. -
Step 5
Pour the chocolate mixture over the peanut and ice cream layers, spreading evenly. -
Step 6
Freeze for at least 4 hours, or until firm. Cut into squares and serve.
Important Information
Nutrition Facts (Per Serving)
It is important to consider this information as approximate and not to use it as definitive health advice.
Allergy Information
Please check ingredients for potential allergens and consult a health professional if in doubt.